In this article, we’ll look at how to install Pi-hole on Portainer by looking at a complete guide on exactly what Pi-hole is, why you might want to run it on Portainer, and how to set it up.
What is Pi-hole?
Pi-hole is a DNS sinkhole and installing it on Portainer is a very straightforward process thanks to how easy Portainer is to use. There are many different systems that you can run Pi-hole on, and it’s always a good idea to have more than one DNS server (for redundancy purposes), so check out our other Pi-hole tutorials if you’re interested in running it on another device!
Before we get started, it is incredibly important to note that having redundant DNS servers is very important. I highly suggest that you purchase a cheap Raspberry Pi Zero and configure Pi-hole on it (or run it on one of many other devices) so that you have two Pi-hole DNS servers. This will ensure that when your Docker and Portainer instance is rebooted, your clients do not lose DNS resolution services.
Pi-hole on Portainer Prerequisite Checks
Before you can install Pi-hole on Portainer, there are a few important things to check for and/or understand.
1. You must have Portainer installed. Portainer can be installed on various devices, and as long as you’re running a device that supports Docker and Portainer, you should be able to get Pi-hole working without a hitch.
2. We’re going to look at how to install Pi-hole on Portainer below, but I’ve had major problems with installing Pi-hole on Portainer without using a macvlan network interface. A macvlan network interface will assign an individual IP address and separate port configuration to the Pi-hole container.
The device running Portainer must support this, but I haven’t had luck getting Pi-hole to run with a bridge/host network interface on Portainer.
Macvlan Network Interface Configuration
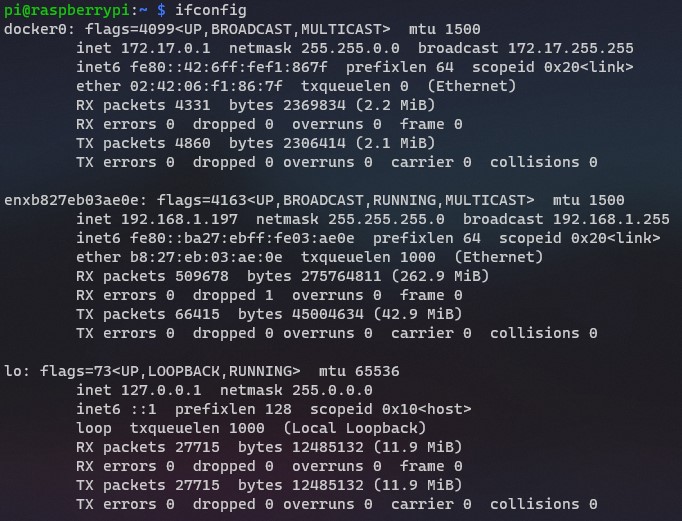
1. SSH into the device where Portainer is installed. We need to determine what network interfaces currently exist and note down the adapter name.
To do this, run the command below and note down the network interface name that has your Portainer instances IP address (in this example, mine is enxb827eb03ae0e).
ifconfig

2. Next, you need to run the command below while substituting the correct subnet (most are 192.168.1.0/24 by default) and network interface ID (mine is enxb827eb03ae0e).
You also need to pick an IP address that you’d like to use that’s not currently in use. I will be using 192.168.1.195.
NOTE: ph_network will be the name of the network (you can substitute this as you’d like). The items listed below in pink might need to be updated when you run this command.
sudo docker network create -d macvlan -o parent=enxb827eb03ae0e --subnet=192.168.1.0/24 --gateway=192.168.1.1 --ip-range=192.168.1.195/32 ph_network
3. The network interface is now set up. Move on to the next step to configure Pi-hole on Portainer!
Installing Pi-hole on Portainer
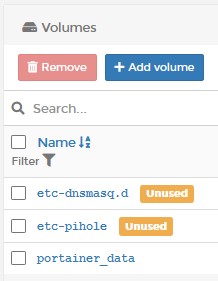
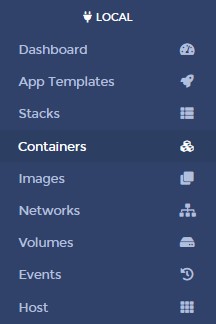
1. Ensure that Portainer is installed, then access the management interface. Open Portainer and select Volumes.

2. Select Add Volume and add two total volumes. One with the name etc-pihole and one with the name etc-dnsmasq.d.
These volumes will contain all of the important configuration data for Pi-hole. Therefore, if you’d ever like to move this container to a separate device, copy the contents of these folders to the new device and your entire configuration will exist there! This is also the data that should be backed up.

3. Select Containers and then Add Container.


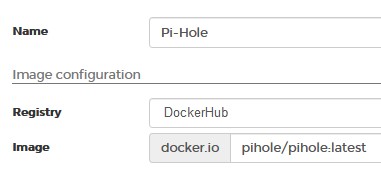
4. Give the container a Name and then in the Image section, enter pihole/pihole:latest.

5. Select Publish a new network port five total times and match the ports as the screenshot below shows. Ensure that you have the two top ports (53, 67) set as UDP ports.

6. Select Volumes and select map additional volume twice. Enter the first container as /etc/pihole and select the /etc/pihole volume. Enter the second container as /etc/dnsmasq.d and select the /etc/dnsmasq.d volume.

7. In the Network tab, select the macvlan network interface that we created earlier.

8. In the Env section, enter the two variables in the screenshot below. Ensure that you replace WEBPASSWORD value with the password that you’d like to use to access Pi-Hole. Also, change the ServerIP value to match the IP address of the macvlan network interface.

9. In the Restart Policy, change this to Always. This will force Pi-Hole to always start when Docker/Portainer starts.

10. Select Deploy the container. The container will take a few minutes to fully download and install, but when it’s done and reporting running, you will be able to access the Pi-Hole web management interface using the ServerIP address you assigned!
http://[serverIP]
DNS Configuration
Now that the setup of Pi-hole is complete, we need to determine a way to point our clients to our DNS server. There are two main ways to do this:
- Point your router’s DNS server to your Pi-hole server IP address. This will ensure that any device connected will use Pi-hole as its DNS server.
- Point each client to your DNS server. This is beneficial if you only want certain clients to use Pi-hole as a DNS server.
I point my router’s DNS servers to my Pi-hole server as I want to ensure every device connects to it.
NOTE: The IP addresses below are different as this is an older screenshot, but the DNS server you’ll use will be the IP address of the macvlan network interface.

Conclusion: How to Install Pi-hole on Portainer
This tutorial explained how to install Pi-hole on Portainer. If you’re using Portainer and Docker, running Pi-hole is a great option as it’s incredibly minimal and works well. Please keep in mind that there are various other types of devices that can install Pi-hole and you should have a secondary DNS server for backup and reliability purposes.
Thank you for checking out the tutorial on how to install Pi-hole on Portainer. If you have any questions on how to install Pi-hole on Portainer, feel free to leave them in the comments!


