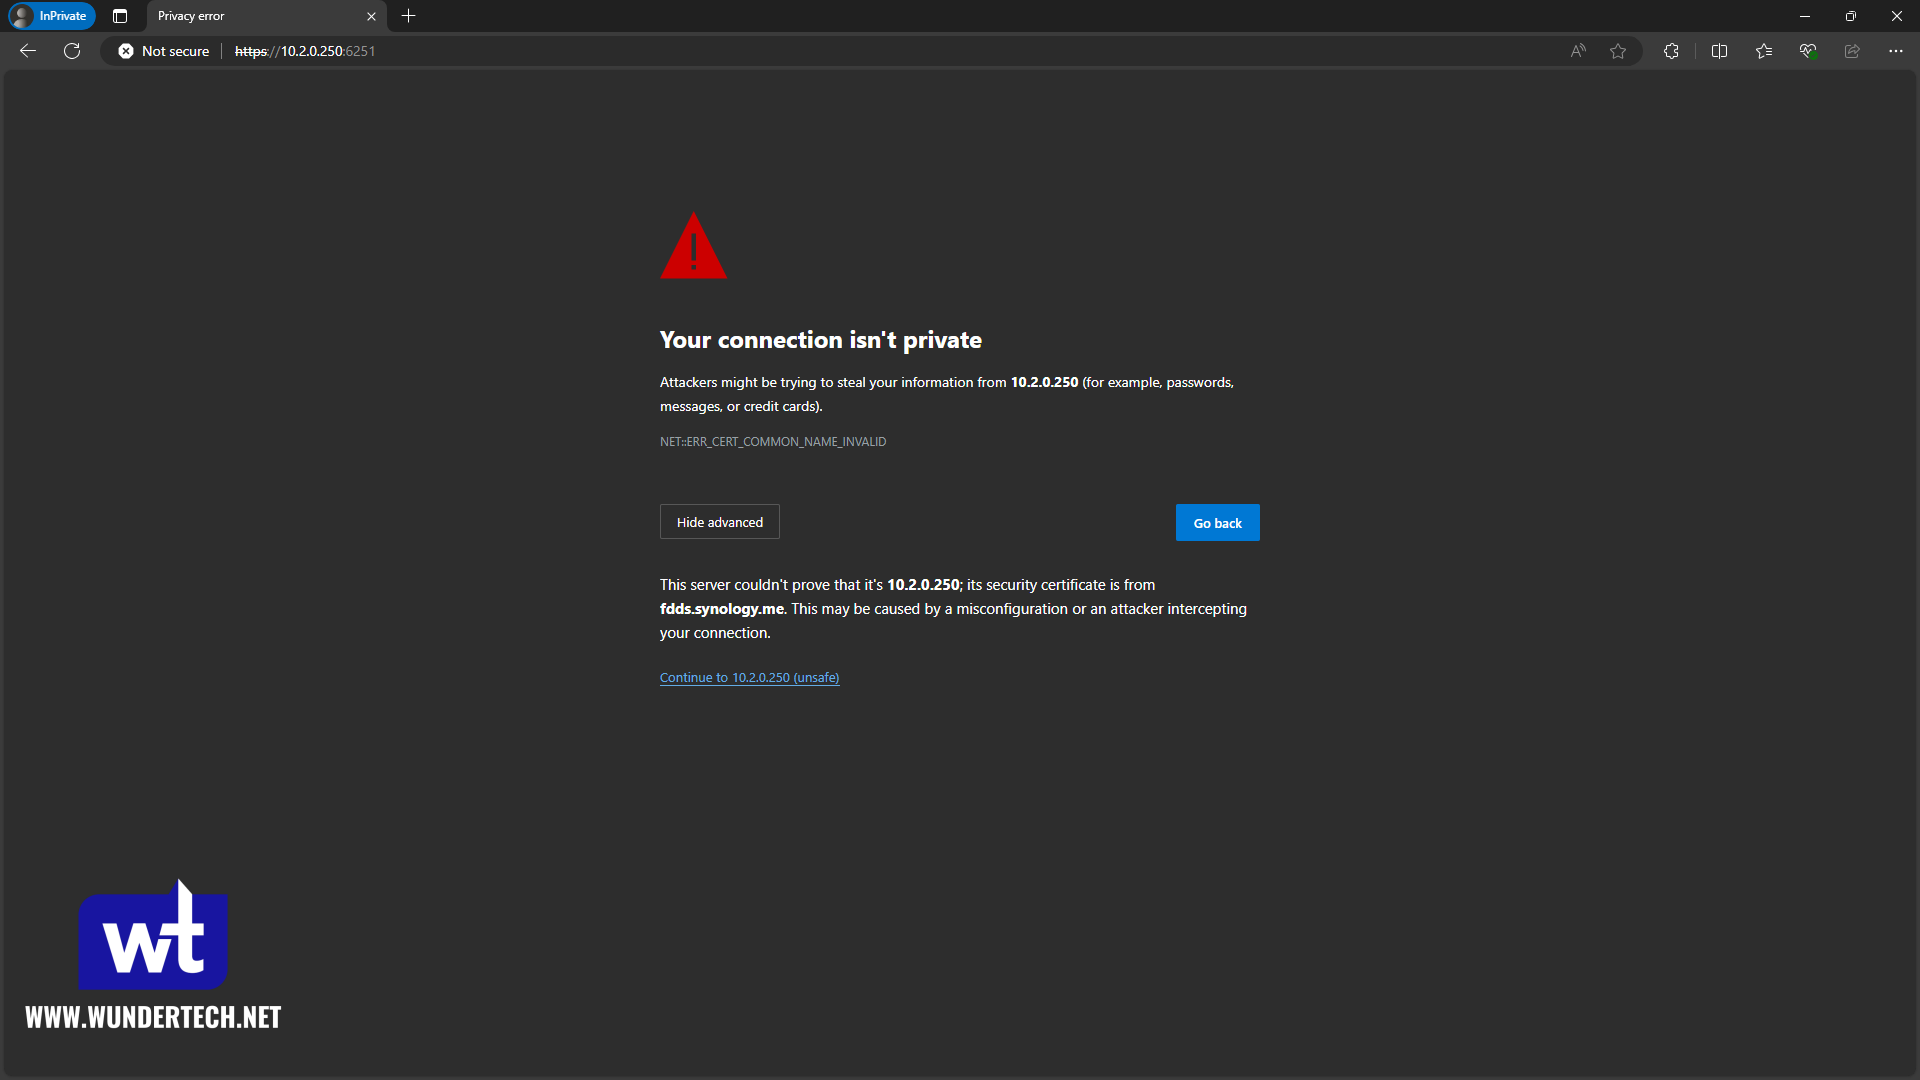
If you start adding more services to your home lab, the inevitable scenario you’ll find yourself in is forgetting IP addresses and ports. If you happen to remember the IP and port, you’ll find yourself constantly clicking through “Not Secure” errors since the service(s) use self-signed certificates that aren’t trusted.
Generally, this will be annoying from the start, something you’ll start to deal with, and eventually get to the point where you need to fix it just so you’re aware of where your services are. We’ll be fixing all of this today with Nginx Proxy Manager, a wildcard certificate, and a local DNS server, so you’ll never have to type in a local IP address or port again.
This is a full video on the process and how it works!
Summary of How the Local SSL Certificates Work
The process of how this all works is actually fairly simple, but more difficult in practice since there are a lot of moving pieces. We have three total steps for this that have to be followed:
- Resolve a subdomain name to the IP address of a reverse proxy server, using a local DNS server.
- Point the reverse proxy server to a local service using the subdomain from step one.
- Assign a wildcard certificate that is obtained and renewed through a DNS challenge to the reverse proxy (so we don’t have to open any ports).
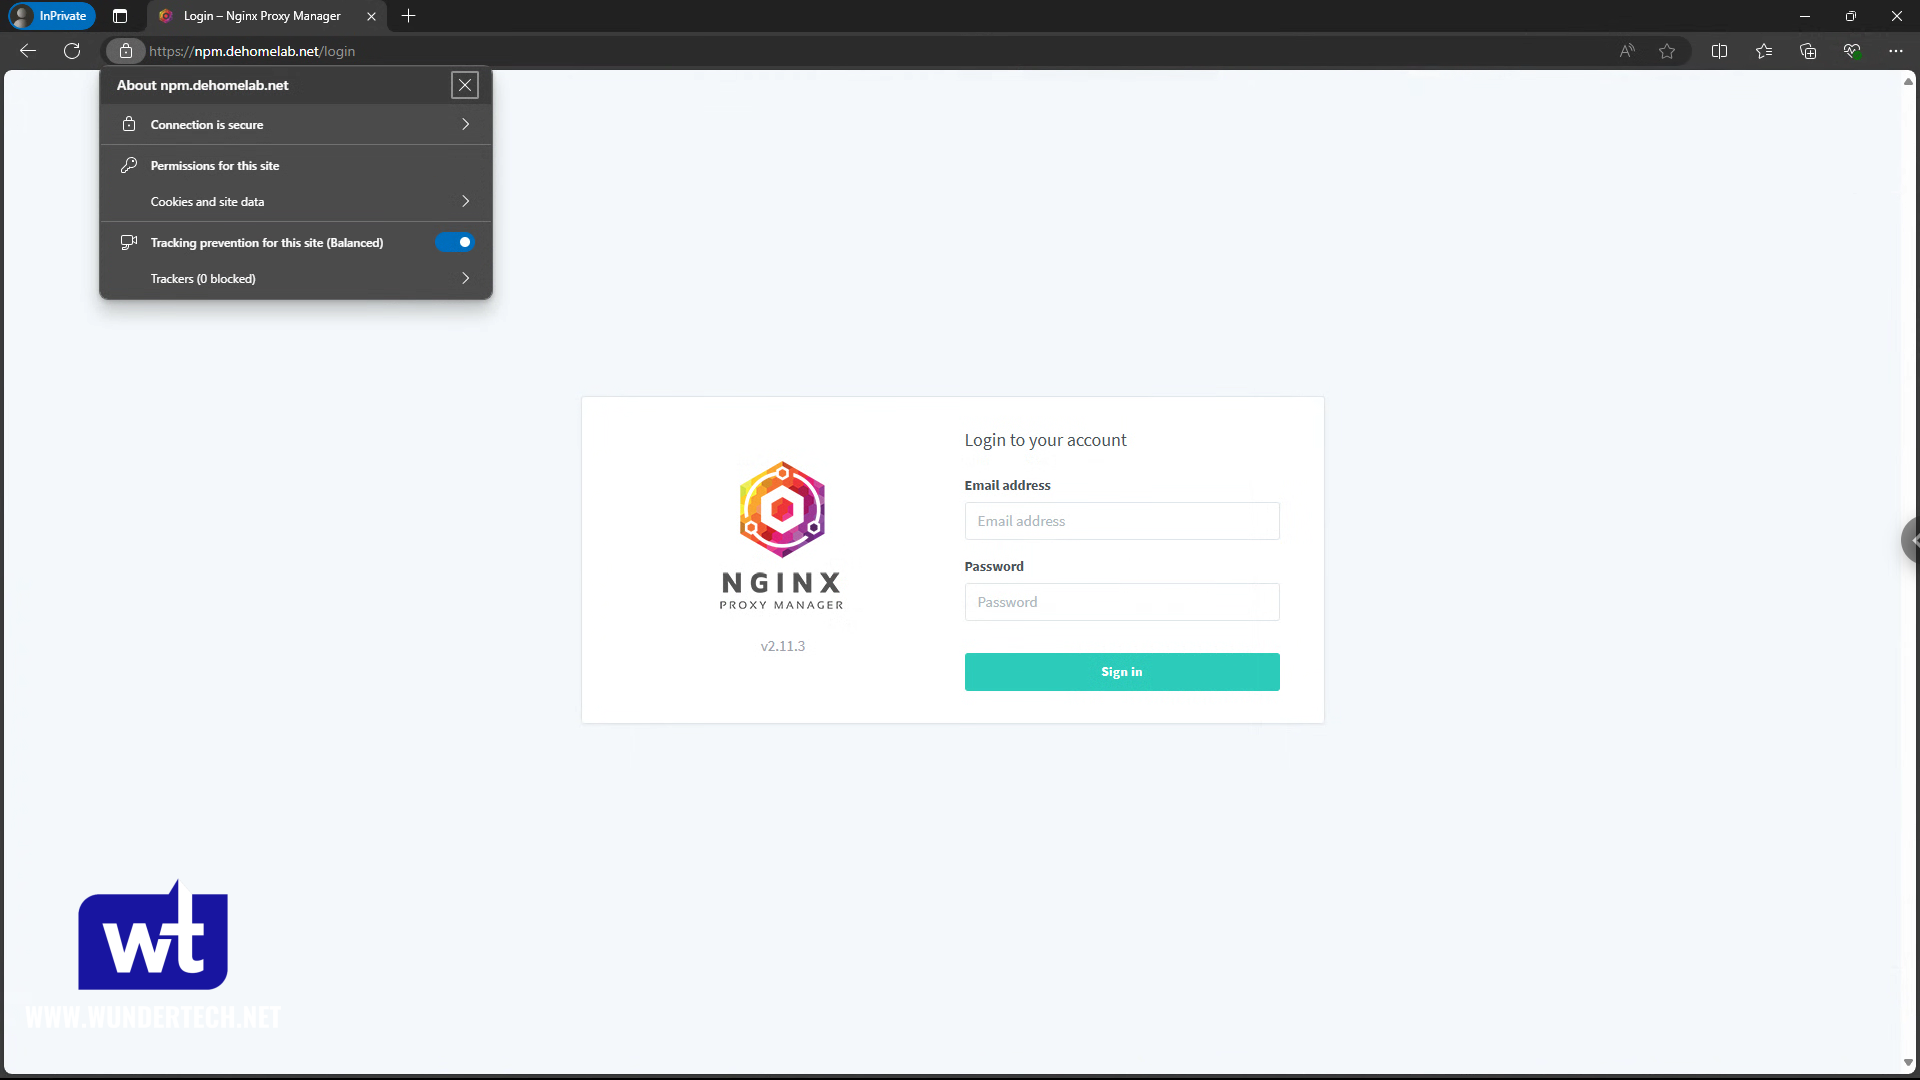
The process above will allow you to avoid using any IP addresses or ports, and since the certificate is valid, you can say goodbye to these SSL warnings:
Configuring Nginx Proxy Manager on Docker
We’ll be configuring Nginx Proxy Manager on Docker. You’ll also need a local DNS server, so if you don’t have one, you’ll have to configure one (Pi-hole is a great option).
Depending on the location of your Docker instance, the Docker Compose file will be different, but I’ll provide two examples below. One for a generic Docker implementation and one for a Synology NAS where ports 80/443 are conflicts. The Synology implementation uses a macvlan network interface to avoid those port conflicts.
Generic Docker Compose File for Nginx Proxy Manager
Modify the volumes and any other parameters you’d like.
version: '3.8'
services:
  app:
    image: 'jc21/nginx-proxy-manager:latest'
    restart: unless-stopped
    ports:
      # These ports are in format <host-port>:<container-port>
      - '80:80' # Public HTTP Port
      - '443:443' # Public HTTPS Port
      - '81:81' # Admin Web Port
    volumes:
      - ./npm/data:/data
      - ./npm/letsencrypt:/etc/letsencrypt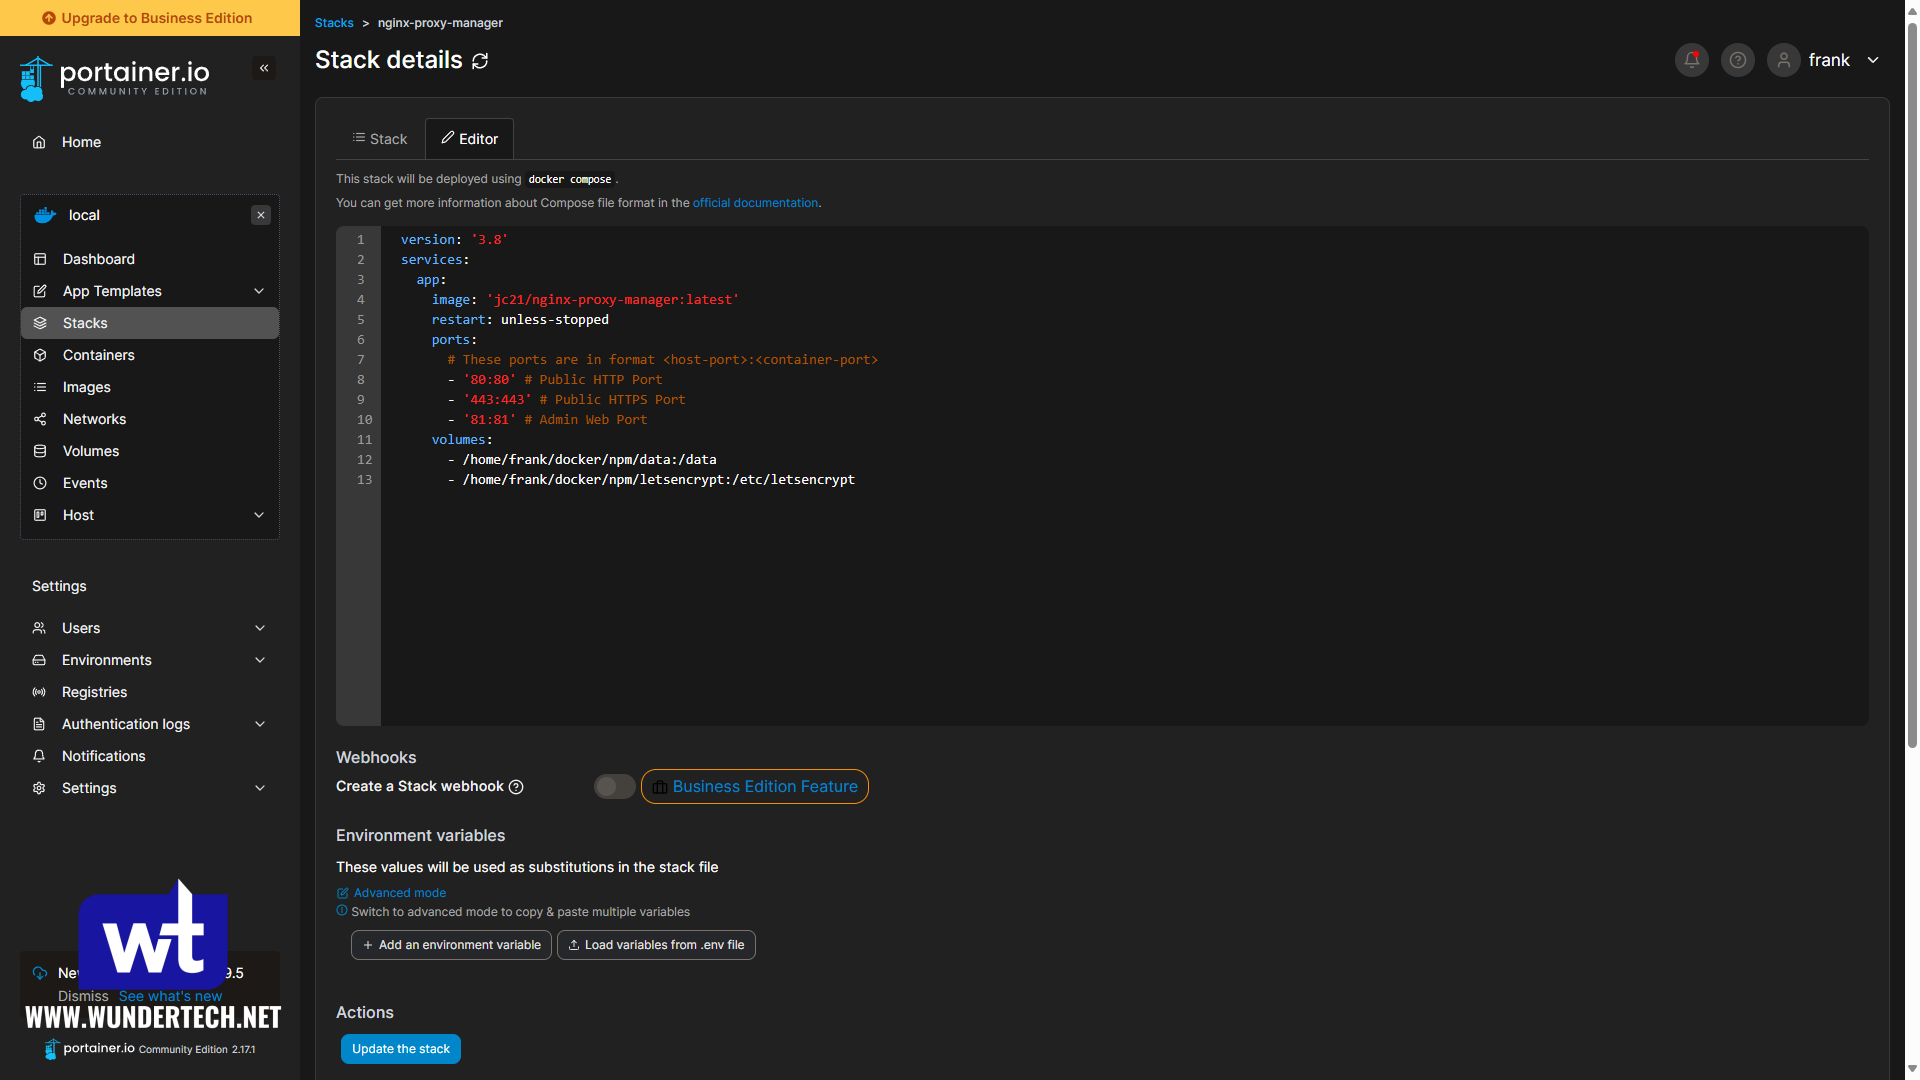
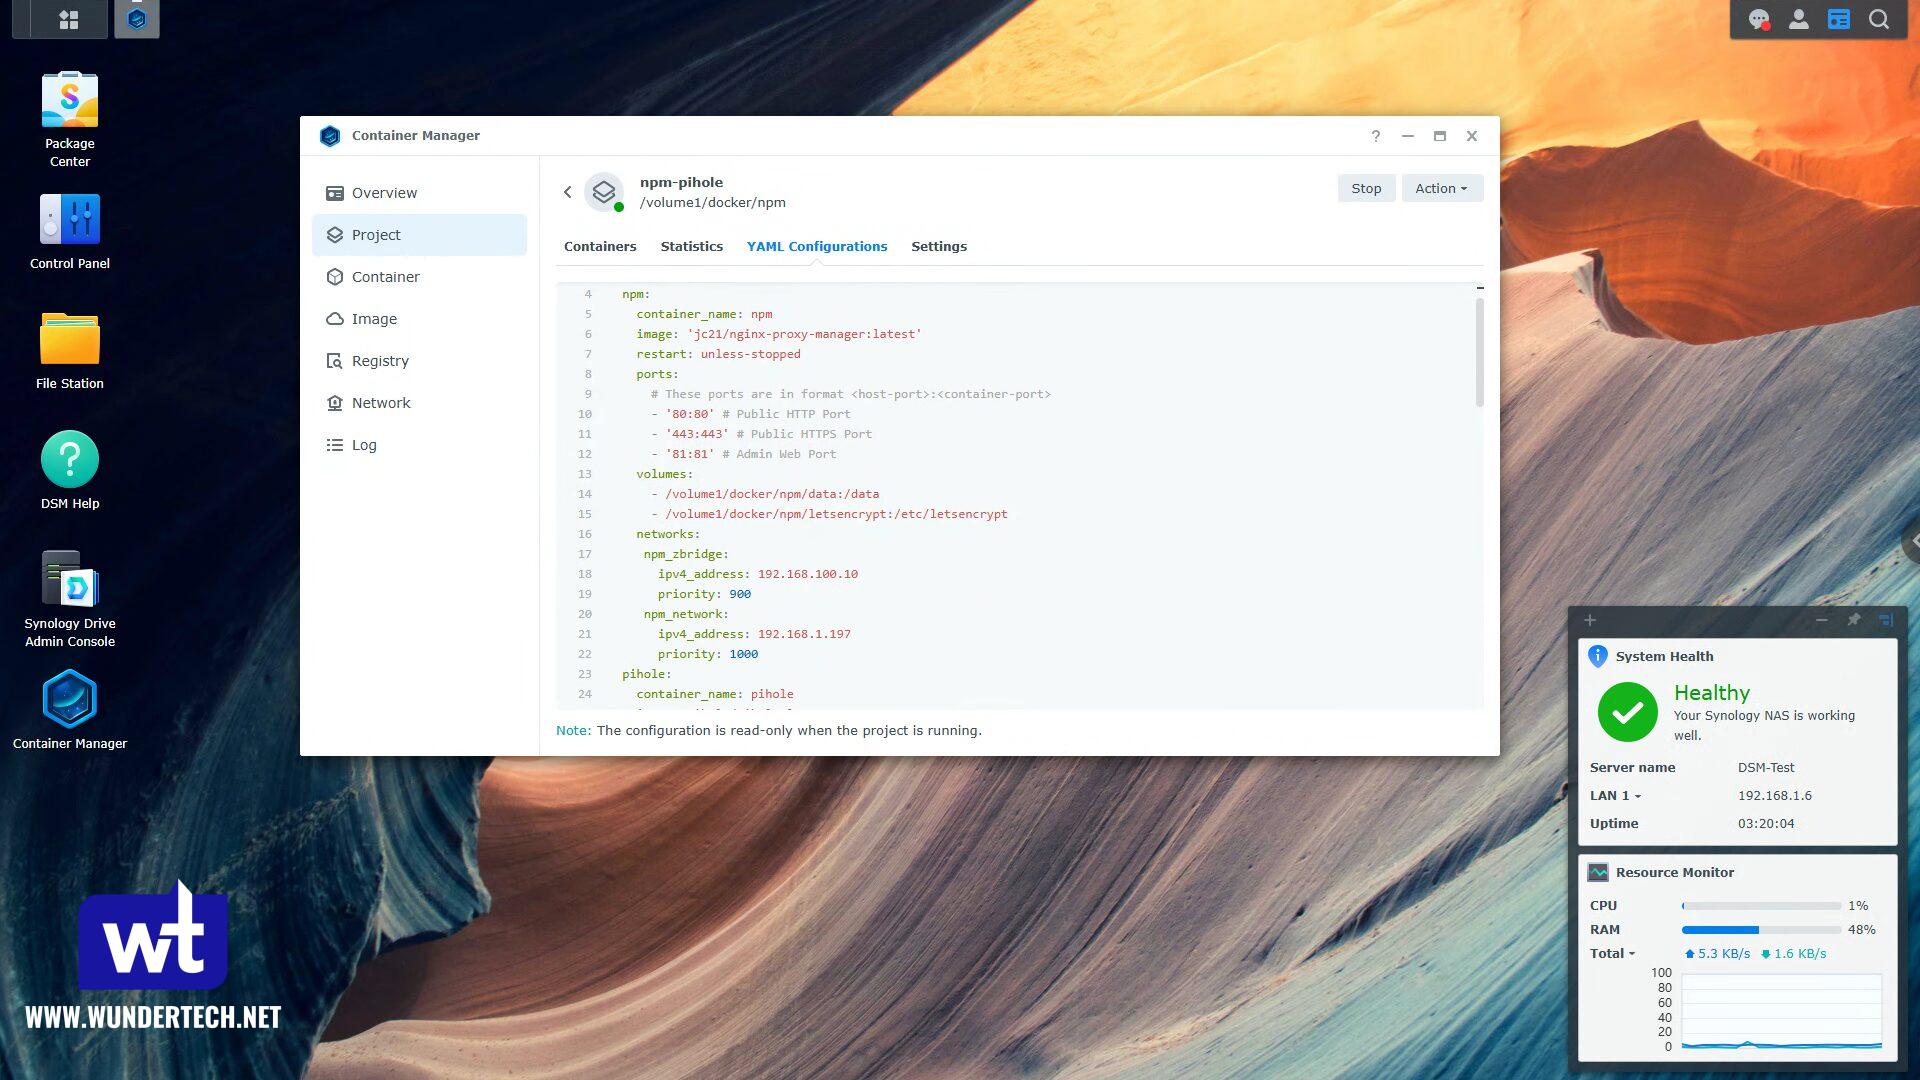
Synology NAS Docker Compose File for Nginx Proxy Manager
The Docker Compose file for Container Manager includes a configuration for Pi-hole as well, which I’ve highlighted in red. If you want to, you can remove the entire block to only add Nginx Proxy Manager, the macvlan network interface, and the bridge network interface.
You might have to adjust the IP address, subnet(s), or mount locations in the example below. For the “parent: ovs_et0” line, you’ll have to modify the interface name (ovs_eth0) which can be found by following steps 1 and 2 in this tutorial.
You’ll also have to ensure that a npm folder with the subfolders data, letsencrypt exist in the Docker folder in DSM. For Pi-hole, it’s pihole with the subfolders pihole and dnsmasq.d.
version: "3"
# Instructions: https://www.wundertech.net/local-ssl-for-home-lab-services-nginx-proxy-manager/
services:
  npm:
    container_name: npm
    image: 'jc21/nginx-proxy-manager:latest'
    restart: unless-stopped
    ports:
      # These ports are in format <host-port>:<container-port>
      - '80:80' # Public HTTP Port
      - '443:443' # Public HTTPS Port
      - '81:81' # Admin Web Port
    volumes:
      - /volume1/docker/npm/data:/data
      - /volume1/docker/npm/letsencrypt:/etc/letsencrypt
    networks:
     npm_zbridge:
       ipv4_address: 192.168.100.10
       priority: 900
     npm_network:
       ipv4_address: 192.168.1.197
       priority: 1000
  pihole:
    container_name: pihole
    image: pihole/pihole:latest
    ports:
      - "53:53/tcp"
      - "53:53/udp"
      - "67:67/udp" # Only required if you are using Pi-hole as your DHCP server
      - "80:80/tcp"
    environment:
      TZ: 'America/Chicago'
      WEBPASSWORD: 'password'
      DNSMASQ_LISTENING: local
    # Volumes store your data between container upgrades
    volumes:
      - '/volume1/docker/pihole/pihole:/etc/pihole'
      - '/volume1/docker/pihole/dnsmasq.d:/etc/dnsmasq.d'
    networks:
     npm_network:
       ipv4_address: 192.168.1.198
    cap_add:
      - NET_ADMIN # Required if you are using Pi-hole as your DHCP server, else not needed
    restart: unless-stopped
networks:
    npm_zbridge:
      name: npm_zbridge
      driver: bridge
      ipam:
        config:
          - subnet: 192.168.100.0/24
            gateway: 192.168.100.1
            ip_range: 192.168.100.0/24
    npm_network:
      name: npm_network
      driver: macvlan
      driver_opts:
        parent: ovs_eth0
      ipam:
        config:
          - subnet: 192.168.1.0/24
            ip_range: 192.168.1.0/24
            gateway: 192.168.1.1
If you decide to implement Pi-hole as well, you’ll have to fully configure Pi-hole. You can follow the steps from this point forward (steps 4 and 5) in the Synology NAS Pi-hole tutorial I have. This will configure Pi-hole and update your DNS servers to use Pi-hole.
Adding Local SSL Certificates to Home Lab Services
With Nginx Proxy Manager configured and potentially Pi-hole as well (again, it’s not required, but you must have a local DNS server), we can move on to configuring our hosts.
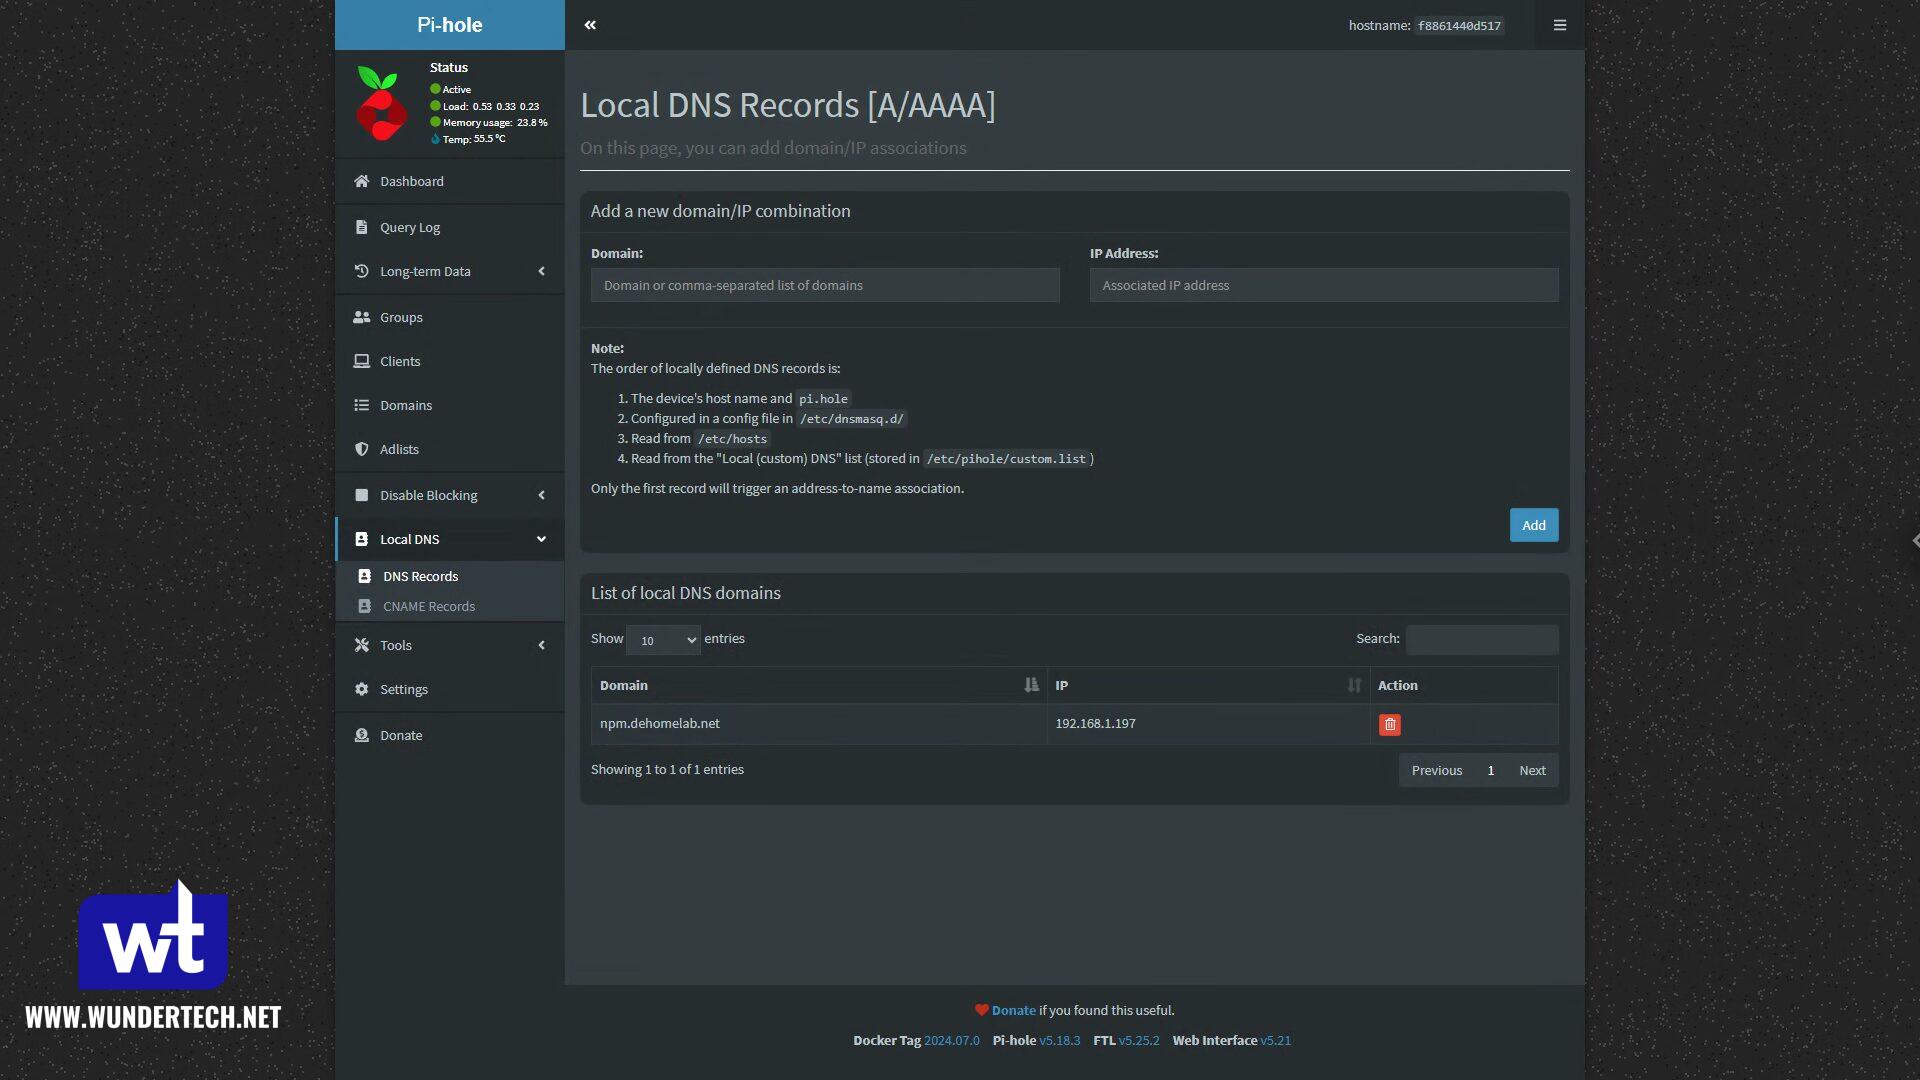
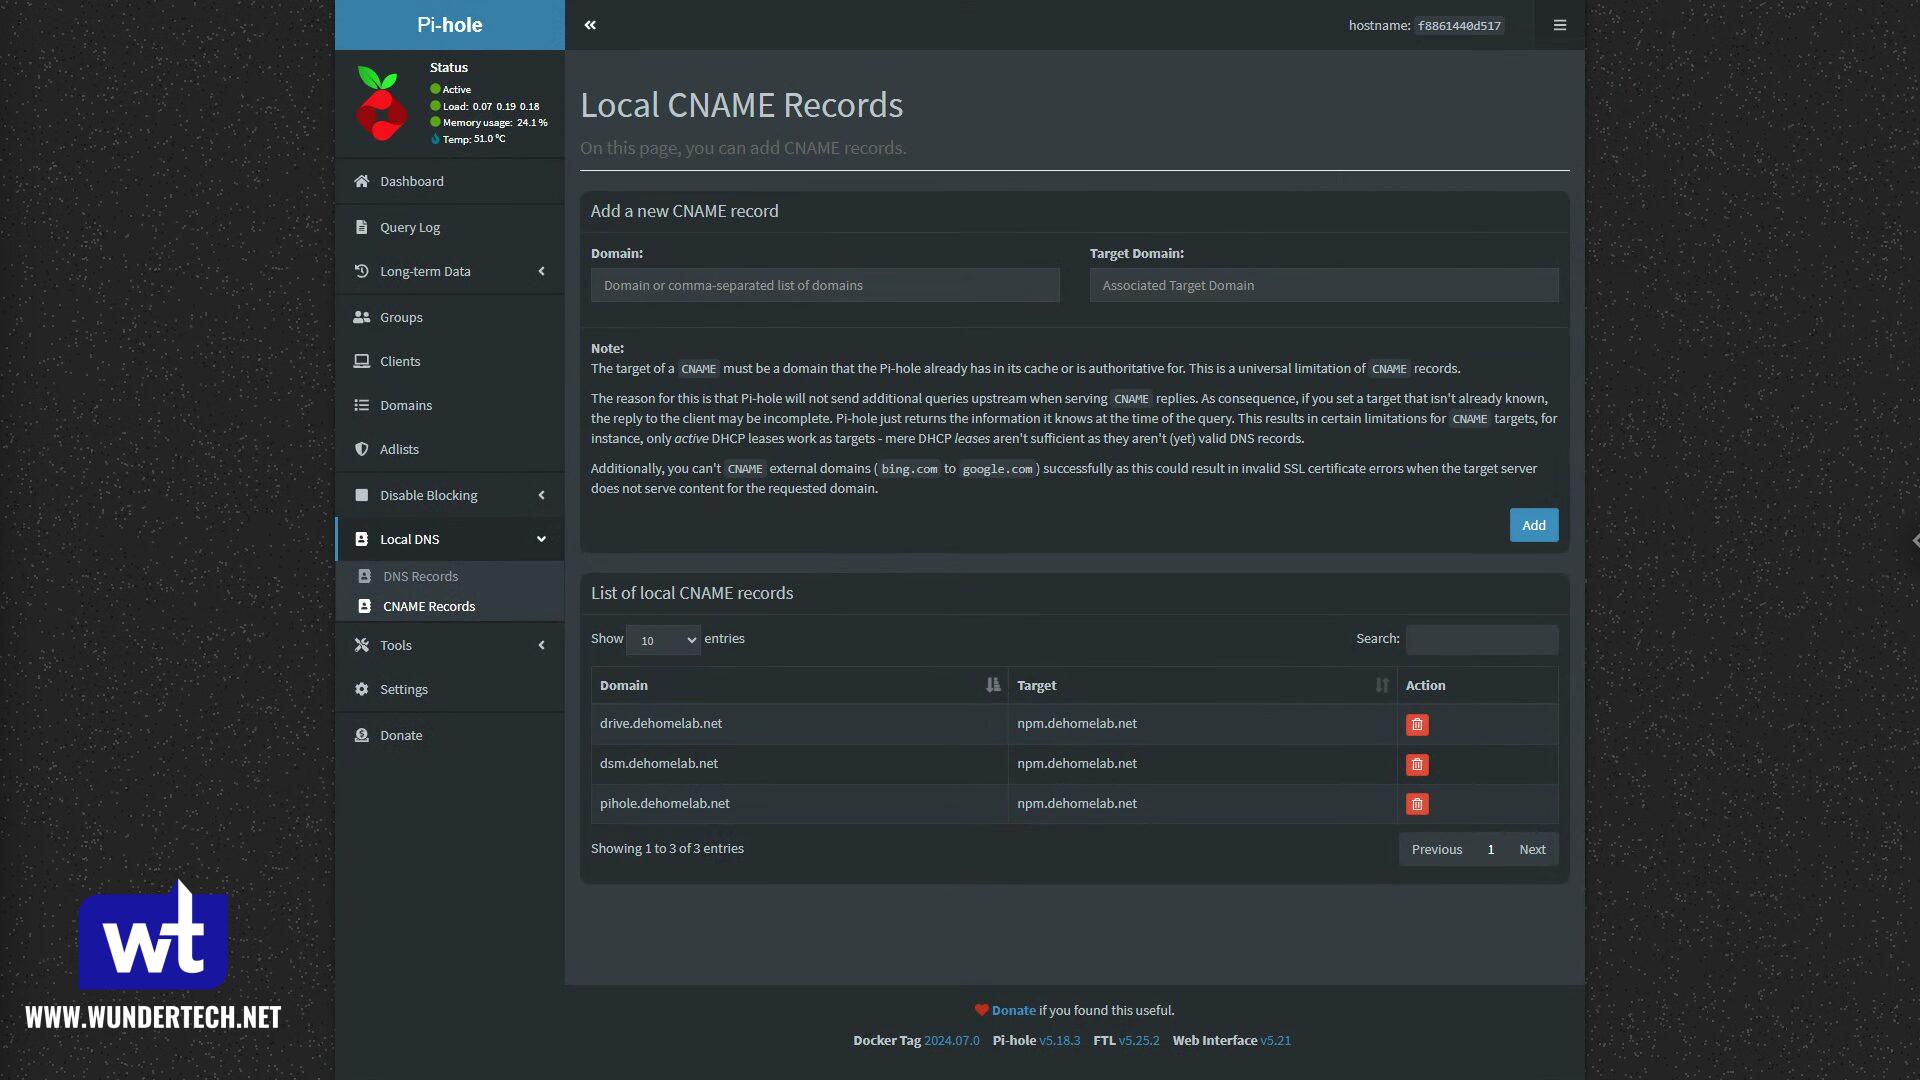
Step 1: Add a Local DNS Record
Create a local DNS record pointing to the Nginx Proxy Manager server. You’ll point clients to Nginx Proxy Manager, and then they’ll be pointed to the correct local server from there.
The first record will be an A (DNS) Record pointing our subdomain + domain to the local IP address of the NPM server.
After that’s created, all records moving forward will be CNAME Records pointing to the initial NPM record that was created. This is so that the one record above can be modified if the Nginx Proxy Manager server ever changes IPs – simply update the A record above and the rest will function as expected.
Step 2: Getting a Wildcard Certificate with DNS Validation
With the record created, access Nginx Proxy Manager. That’s where we’ll get our wildcard certificate. You’ll have to either use your own domain and Cloudflare, or DuckDNS (which provides a free subdomain). If you want to use Cloudflare, you’ll have to purchase your own domain and connect it to Cloudflare which can be done by following the video below.
If you’re using Cloudflare, you’ll have to create an API Token which we’ll need for Nginx Proxy Manager.
- Zone – DNS – Edit
- Include – Specific Zone – [YOUR SITE] (this is only needed if you have multiple sites).

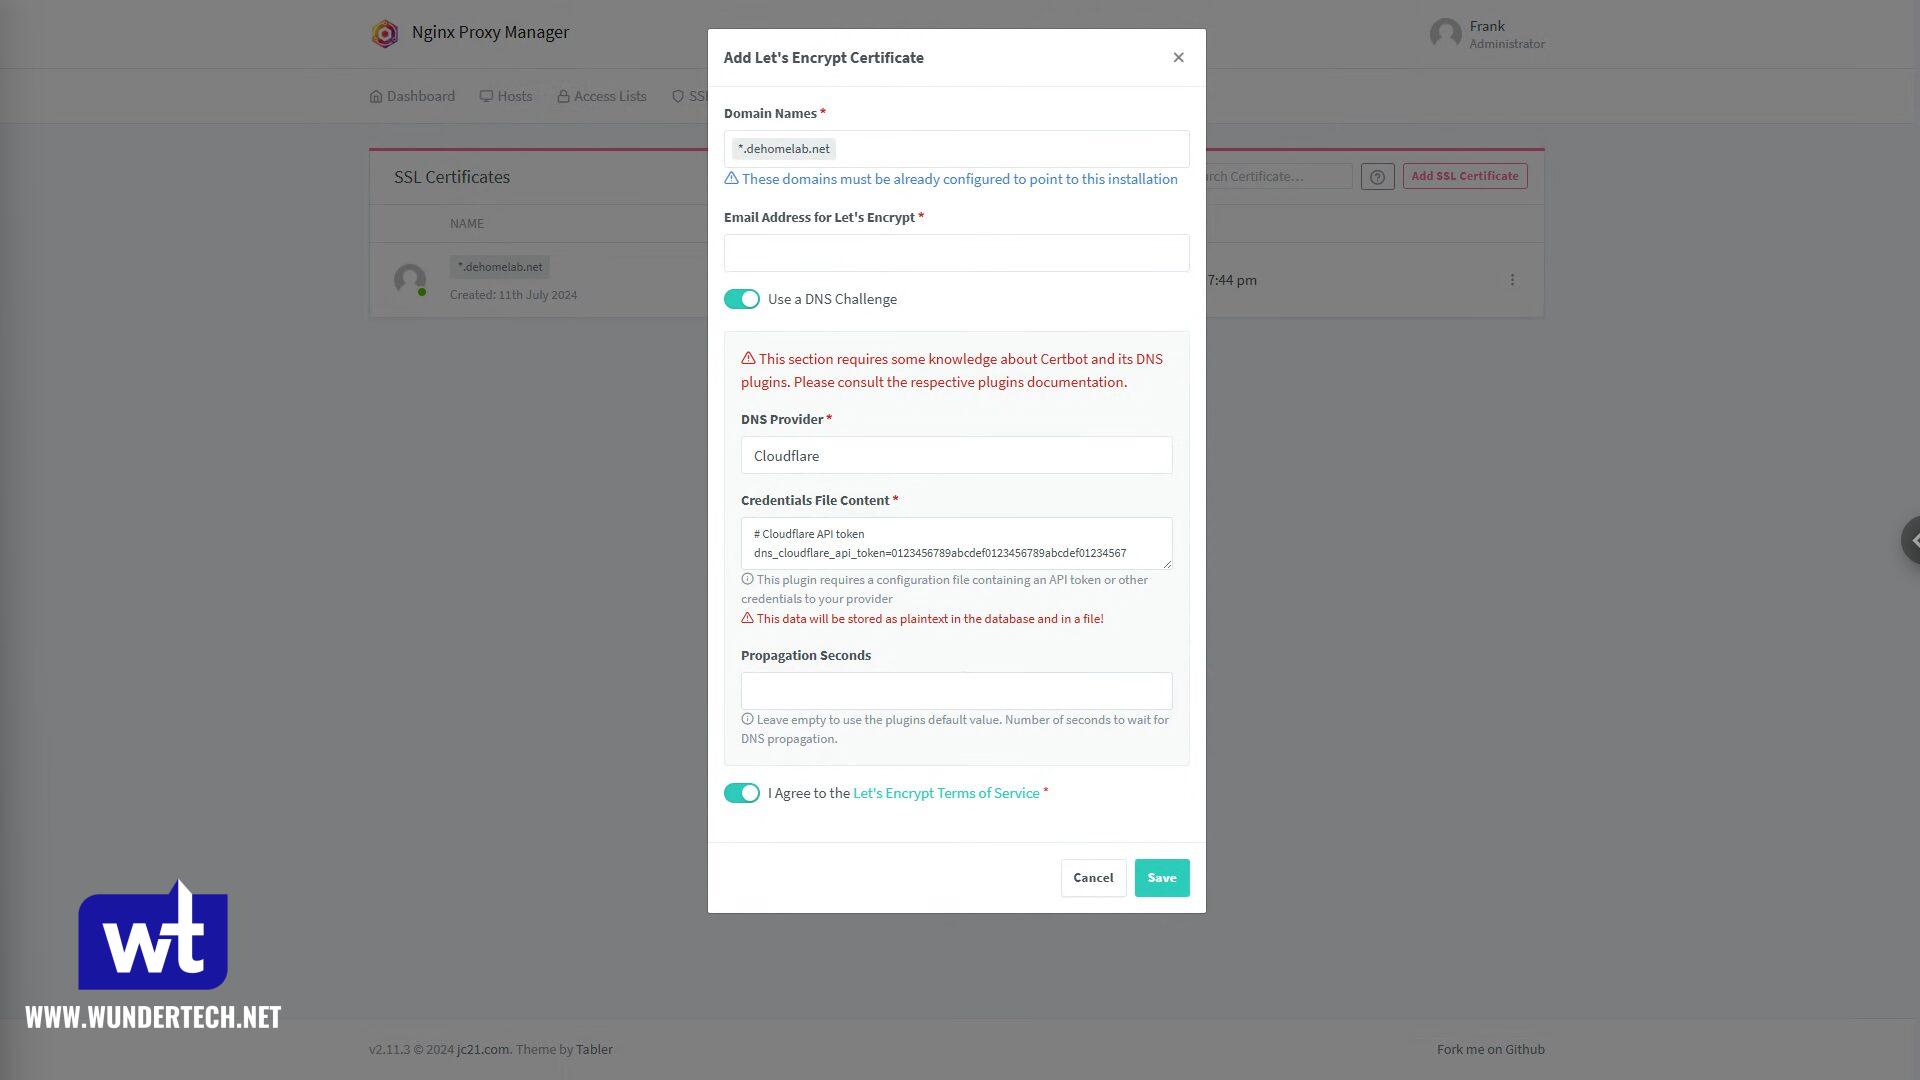
After you have the API token, head back to Nginx Proxy Manager, go to SSL Certificates, and add a new Let’s Encrypt Certificate.
- Add your domain name as a wildcard for the subdomain (*.domain.com or *.subdomain.domain.com)
- Enter your email address.
- Use a DNS Challenge, then select Cloudflare or DuckDNS.
- Paste in the API token for Cloudflare, or the DuckDNS Token
- Select Save to get the certificate.
NOTE: If you’re using DuckDNS, it’ll be *.[subdomain_selected].duckdns.org.
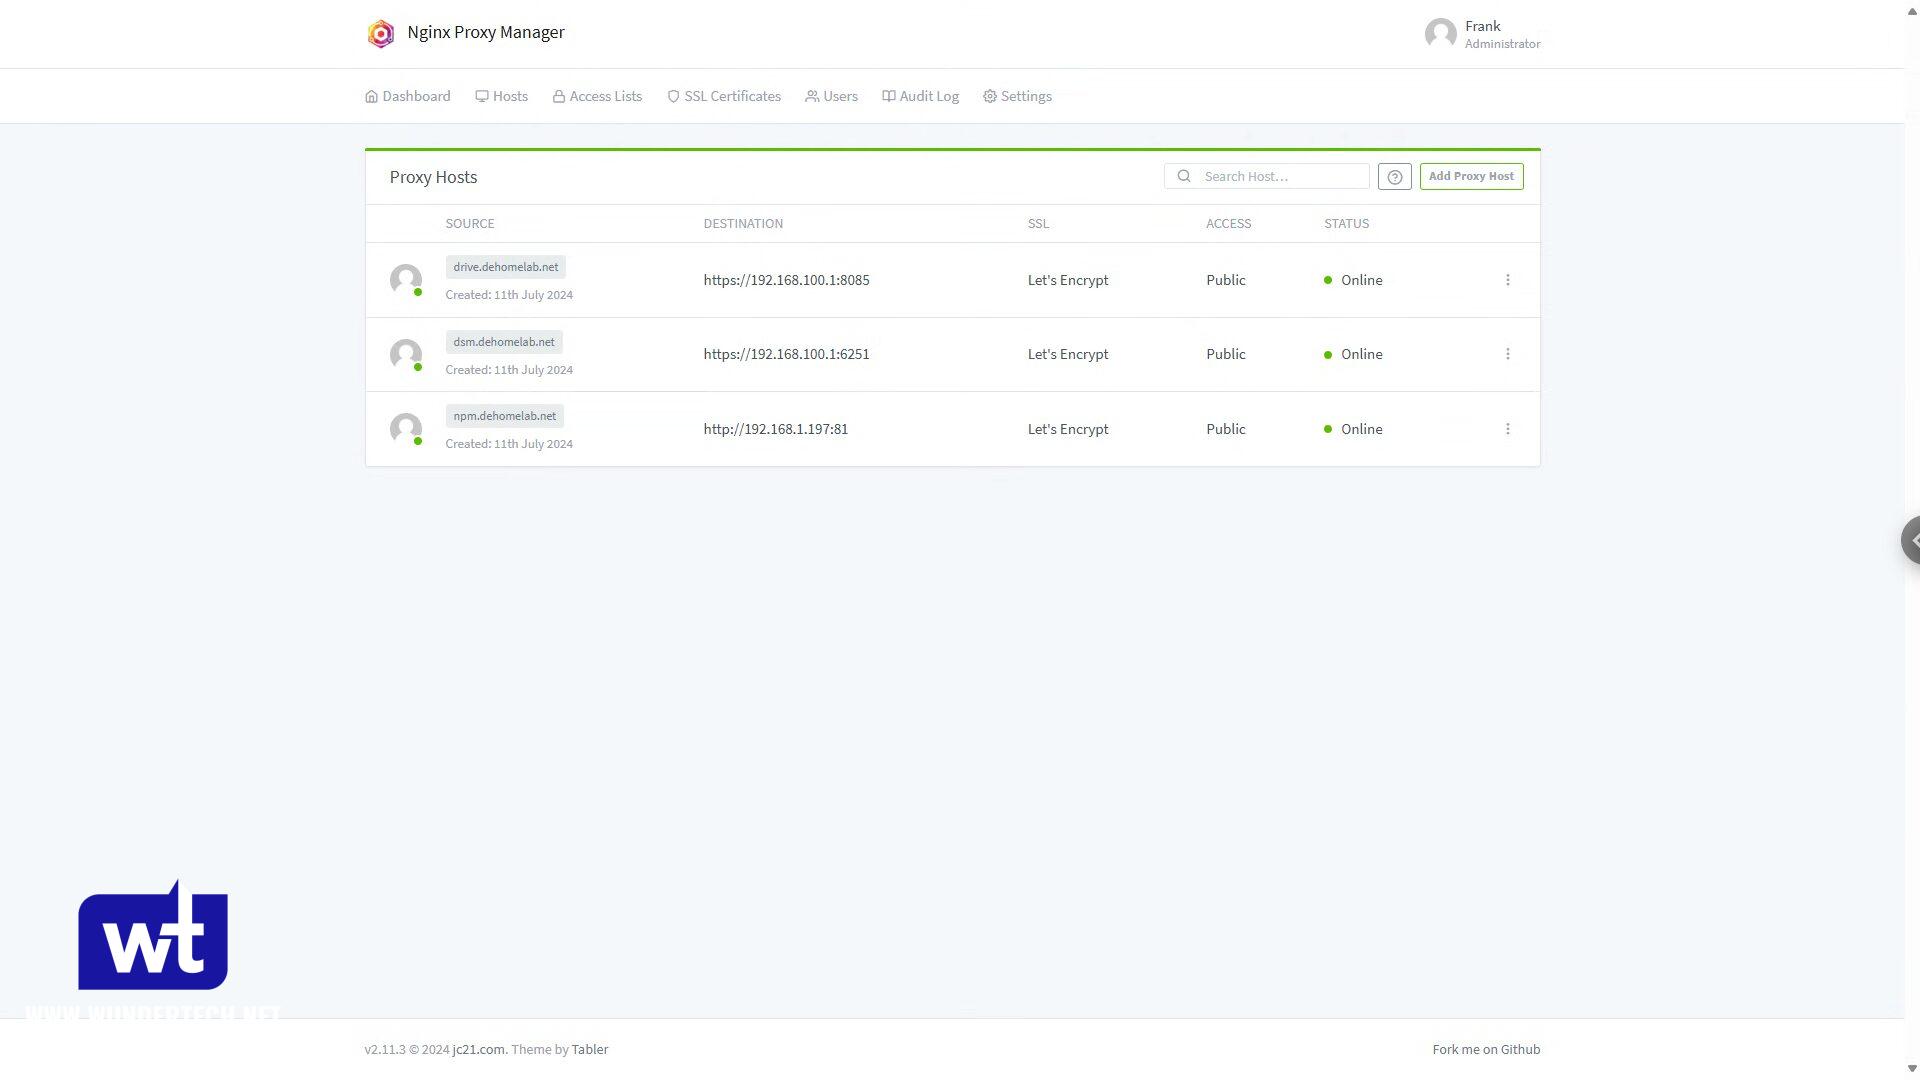
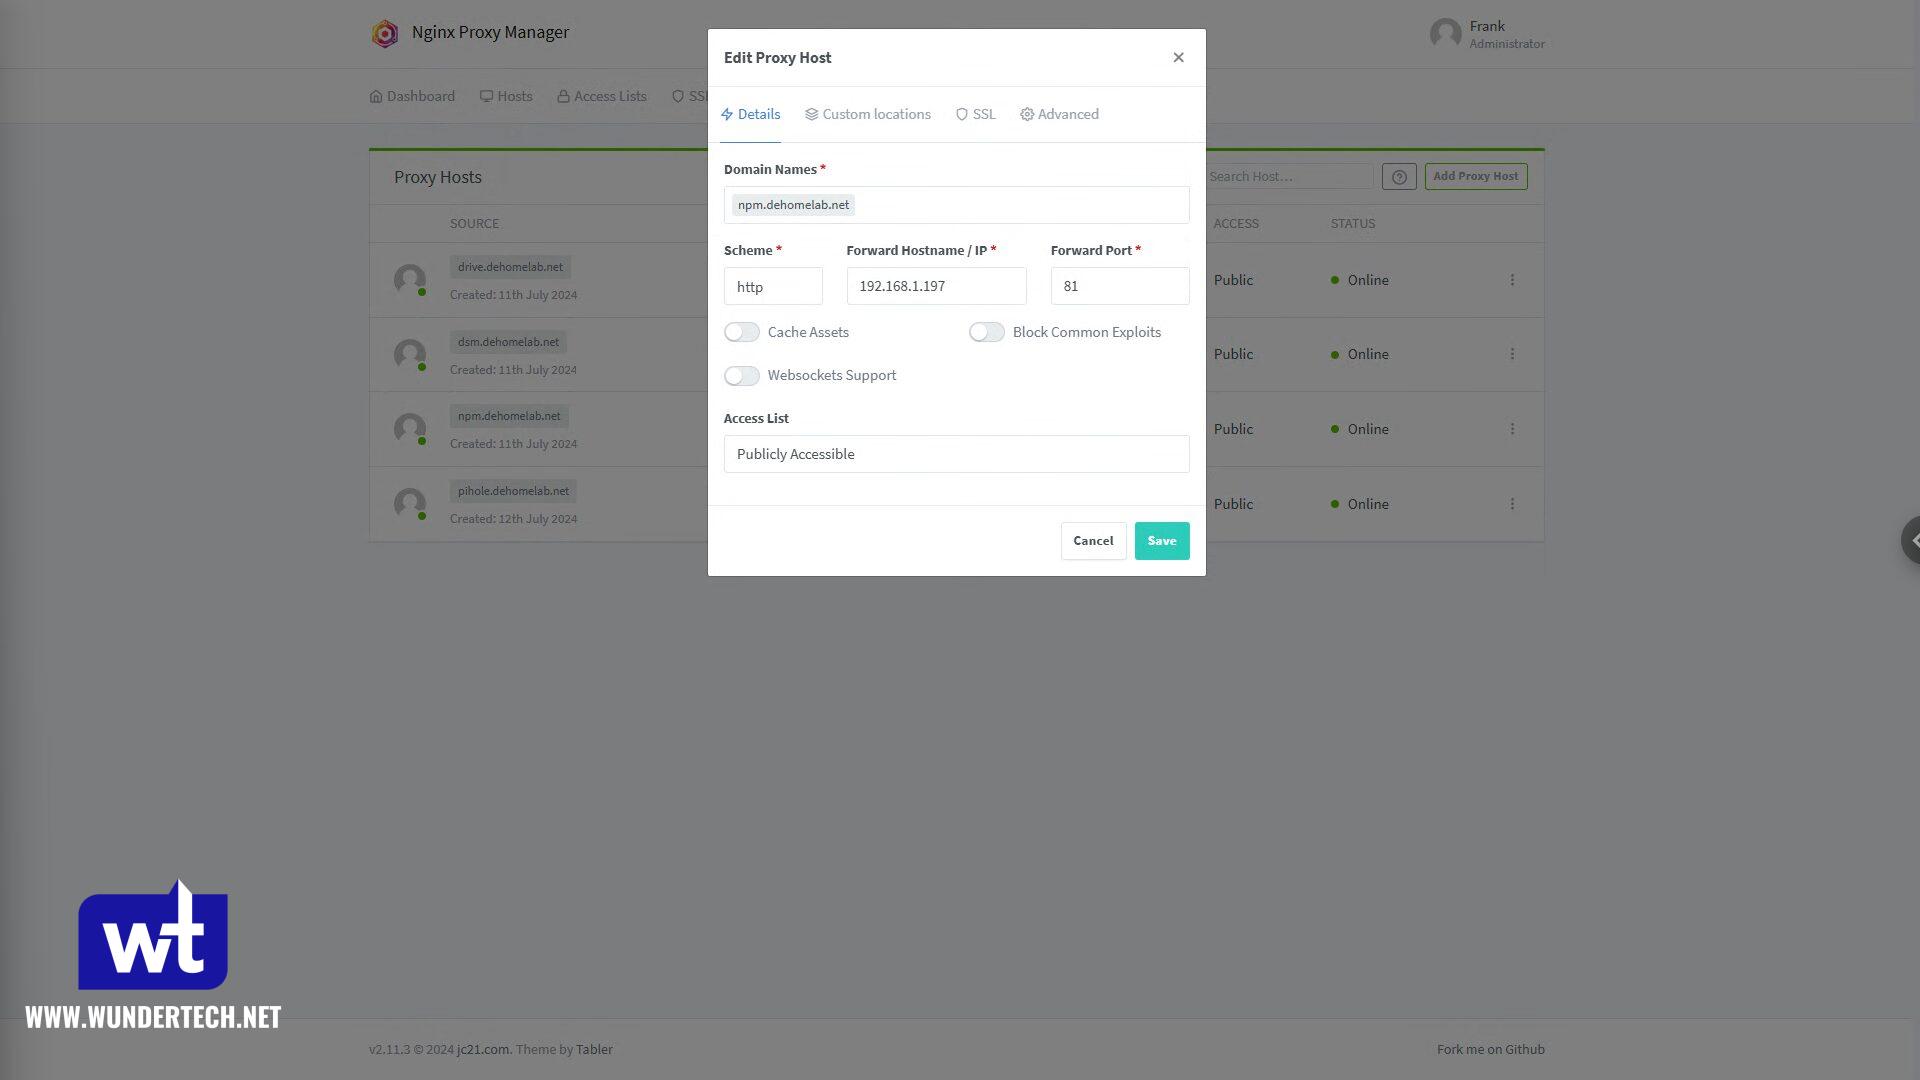
Step 3: Creating the Reverse Proxy Rule
Now that the certificate is created, you’ll have to create a Proxy Host. Add a subdomain + domain (for the service), then point it to HTTP or HTTPS (depending on what the service is listening on), and finally, add the port.
If you’re using certain services, you might have to enable websockets support. Two services that I know need websockets support are Home Assistant and Proxmox, but it will depend on the service.
In the SSL section, select the wildcard certificate we received above, Force SSL and HTTP/2 Support, then Save.
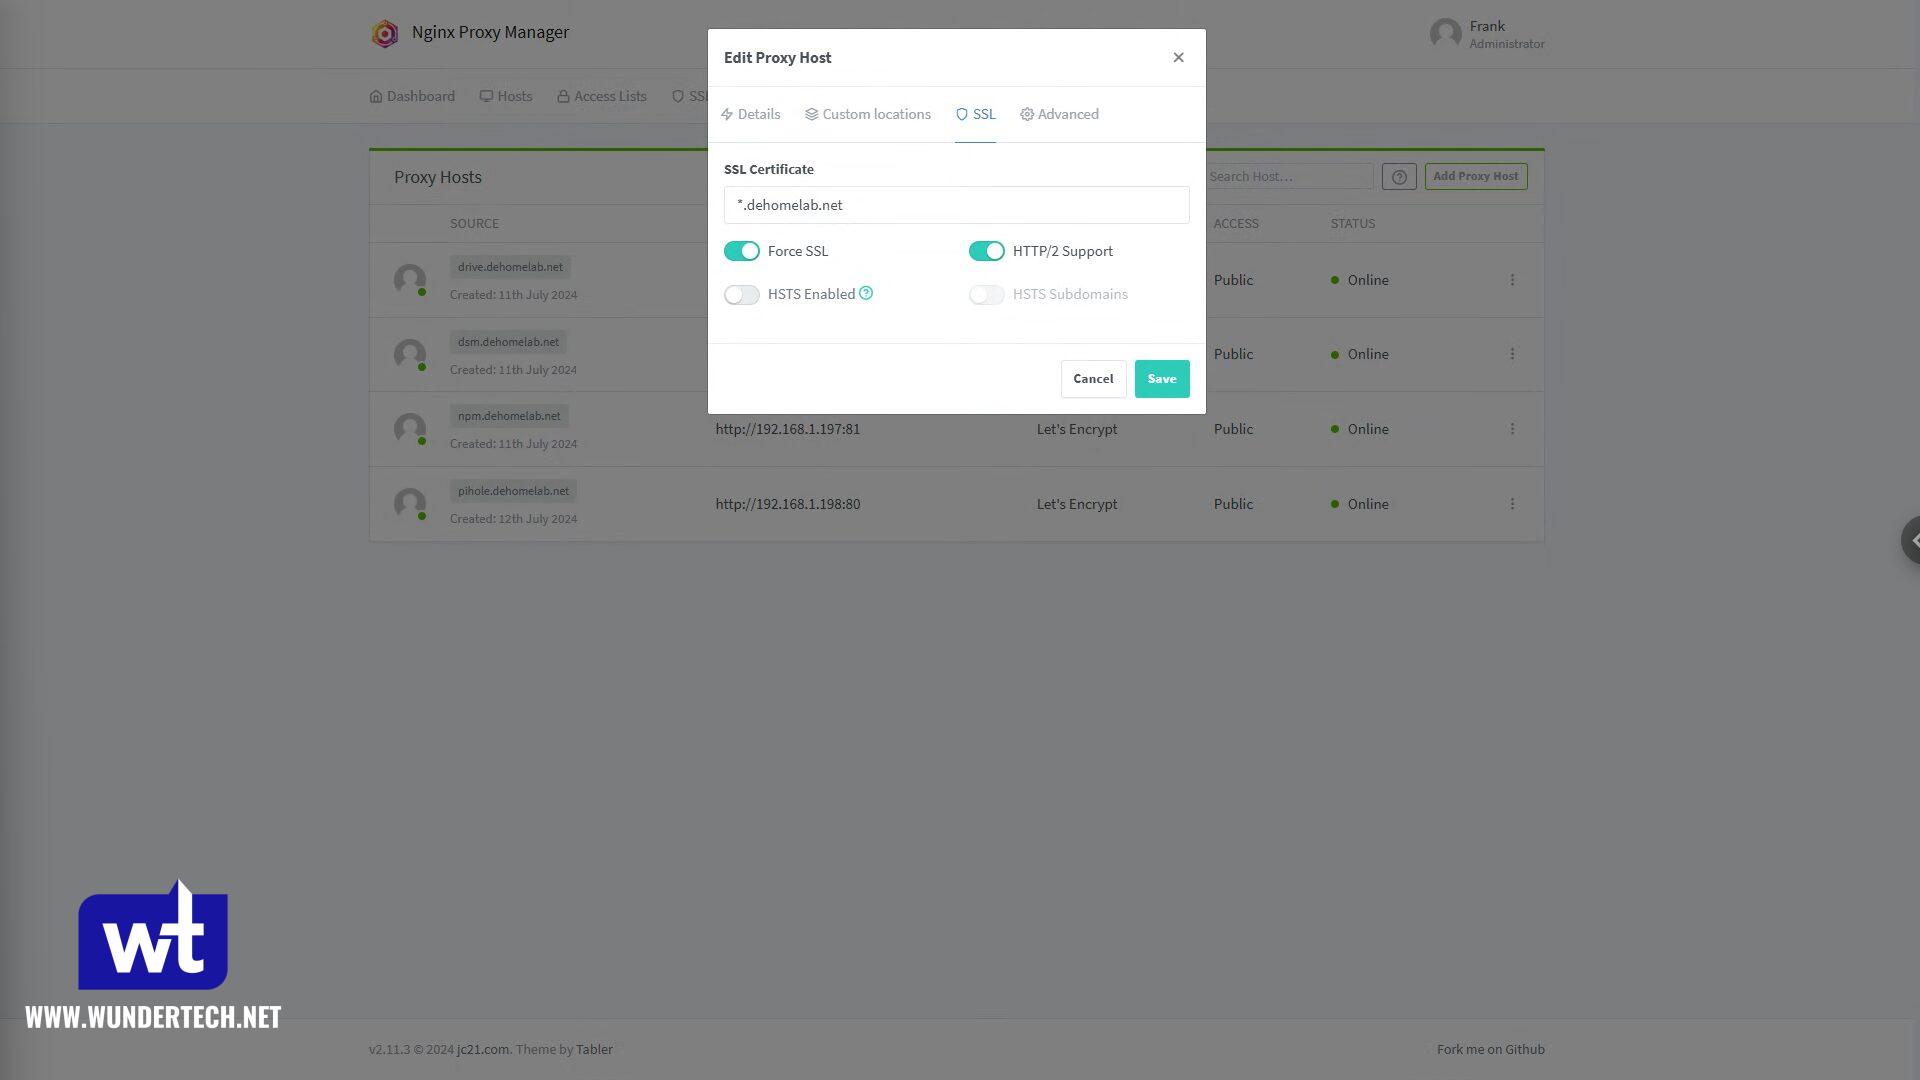
After creating the rule, you should have a valid SSL certificate when you try and access your service! The certificate will automatically update when required, no ports will be open, and you’ll be good to go!
Final Thoughts & Conclusion
There are a ton of benefits to using a local DNS server – many of which we didn’t discuss. If you have a DNS record for your service, you’ll never have to update applications or just about anything that refers to the service. Adding Nginx Proxy Manager to it will allow you to have a valid SSL certificate too, and once you add all of this to your home lab, you won’t go back to typing in IP addresses or dealing with certificate warnings.
Thanks for checking out the tutorial. If you have any questions, please leave them in the comments!