In this article, we’re going to look at how to set up and configure a Synology router. Synology Routers run an operating system called Synology Router Manager (SRM). If you’ve ever used a Synology NAS, it’s very similar to the DSM operating system but has a few key differences. However, a lot of the knowledge translates, especially if you’ve ever used DSM’s firewall.
Before we get started, I want to point out that this will not be an initial setup guide. The expectation is that at this point, you’ve plugged the router into your ISP modem and accessed the NAS at the default IP address listed below, as well as configured a user account.
https://192.168.1.1How to Set Up and Configure a Synology Router
As mentioned above, we’ll be looking at the SRM operating system to configure a more advanced configuration consisting of VLANs, firewall rules, and more. This will ultimately show how to set up and configure a Synology router.
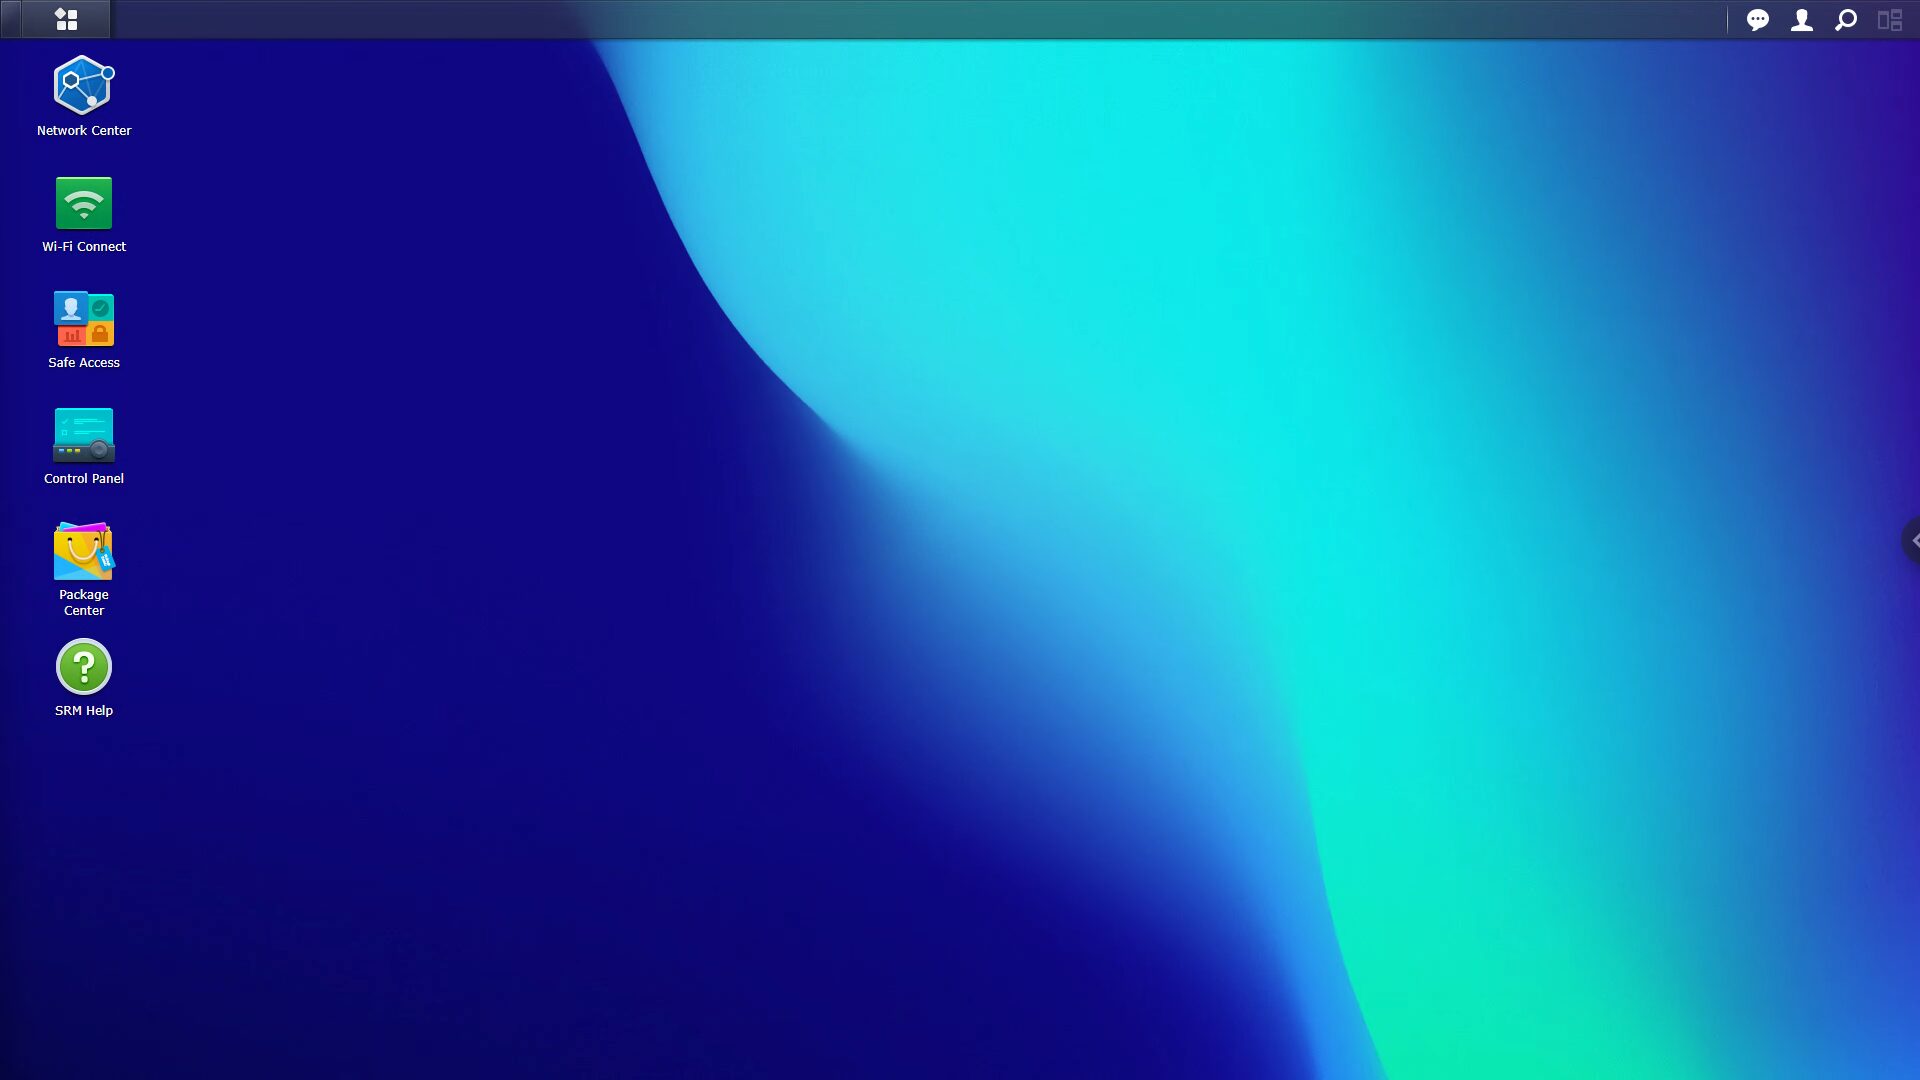
Almost everything for the router itself is done in the Network Center or Wi-Fi Connect application. For almost everything outside of Wi-Fi configuration and management, it’ll be handled in the Network Center, so that’s where we’ll start.
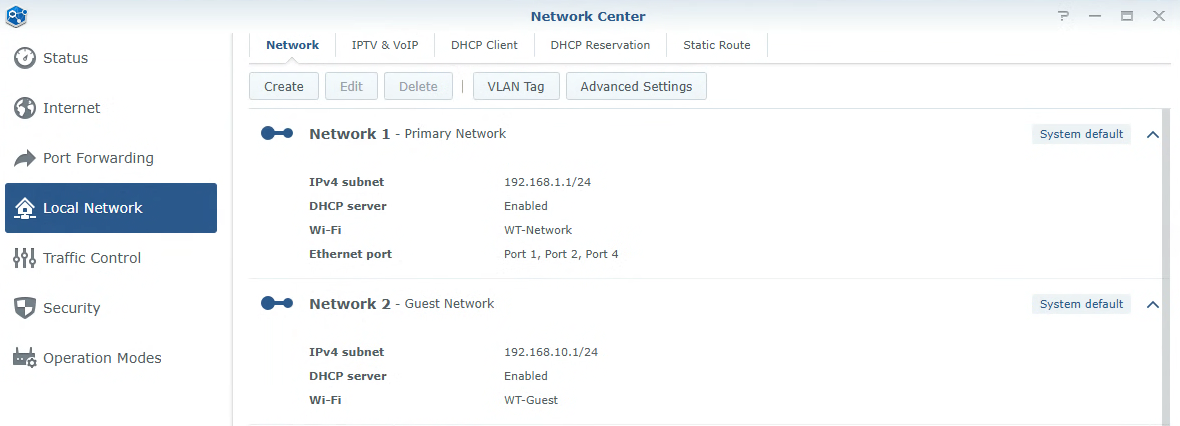
By default, a Primary and Guest network will exist in the Local Network section of the Network Center. However, we can create additional networks by configuring VLANs. VLANs allow you to separate traffic and will ultimately segregate your network. This is a great security benefit as you can limit access to your trusted devices, from untrusted devices.
Creating an IoT VLAN in SRM
In SRM, open the Network Center, select Local Network, and then Create. This is how we’ll create a VLAN. From there, give your VLAN a Name and enter the Local IP Subnet you’d like to use. In this example, I’m going to set it as 192.168.40.1. The VLAN ID can be anything you want, but I like to match it with the subnet, so I set mine as 40.
There are a few additional settings that can be managed and configured for the network itself. By default, Network Isolation is enabled, meaning that the network will not be able to communicate with other networks. If you do want to this VLAN to communicate with other networks, this should be disabled.
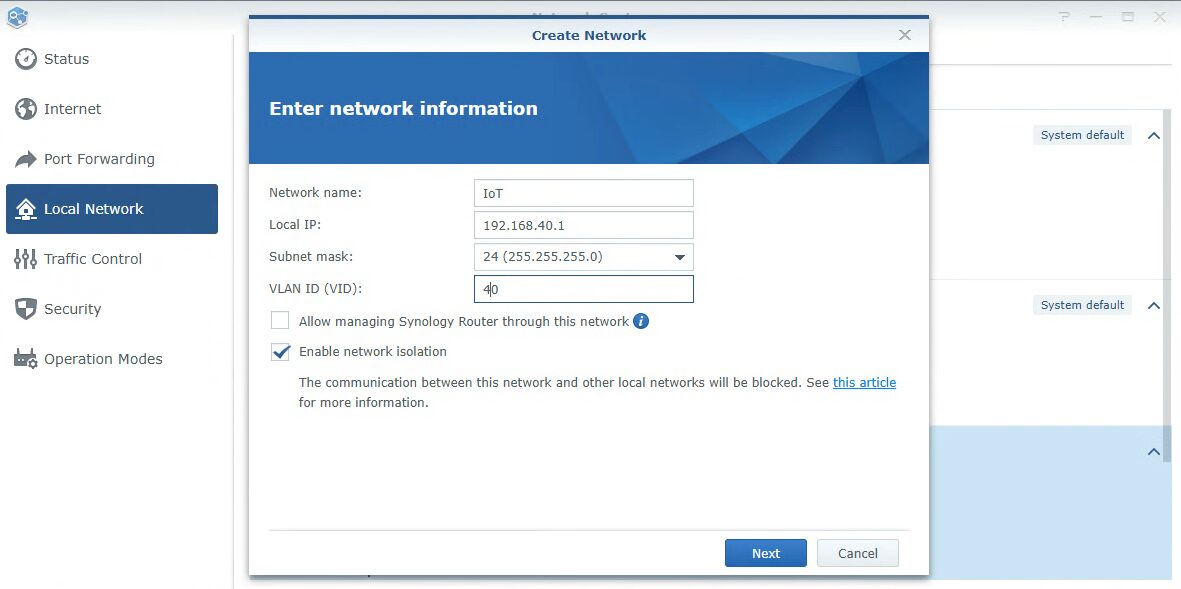
Finally, if you’d like to be able to manage SRM through this network (which I don’t suggest), you can enable the Allow managing Synology Router through this network setting as well.
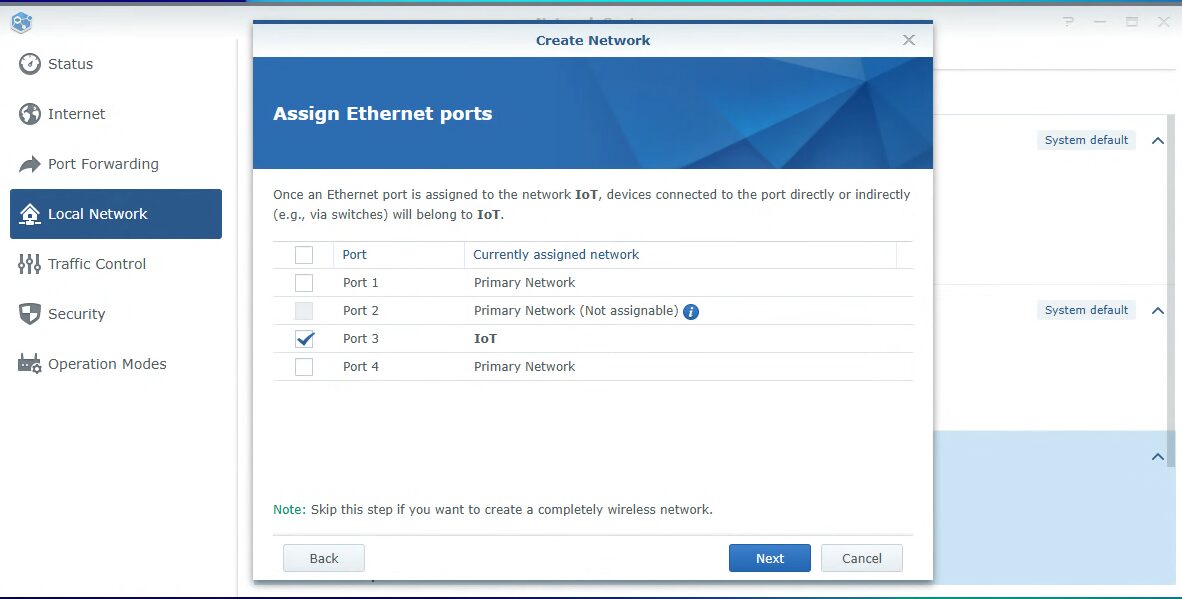
The next section will allow you to assign an individual network port to this VLAN. This can be done if you’d like, or skipped. A good example of using this would be if you wanted to connect a Switch to that port and ensure that the Switch can only communicate with IoT devices. If not, you can use VLAN tagging to manage access.
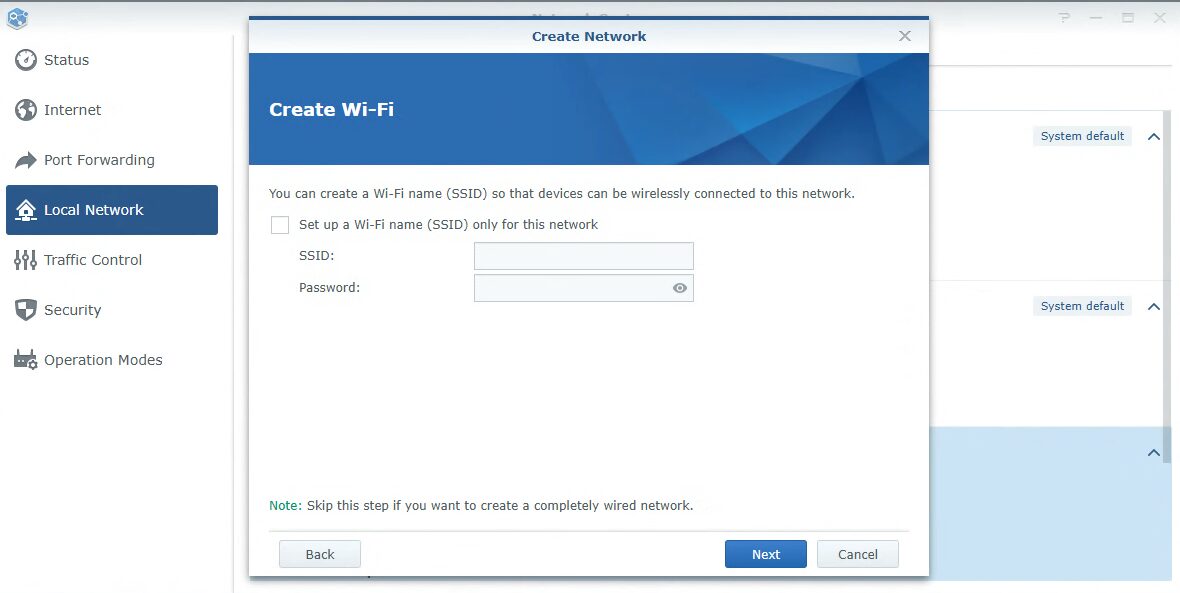
If you’d like this VLAN to have an SSID for Wi-Fi connectivity, it can be configured at this step.
Finally, confirm the settings and create the network!

At this point, a new VLAN was created. You can follow the steps above to create as many VLANs as you need, just keep in mind that they’ll all have a separate subnet and VLAN ID.
How to Port Forward in SRM
Port forwarding, while not necessary (and something that should be used with caution), is a way to allow external access into your network. For example, if you want to access an application on your local network from an external location (without using a secure option like a VPN), this is the way to do it. Again, use this with caution.
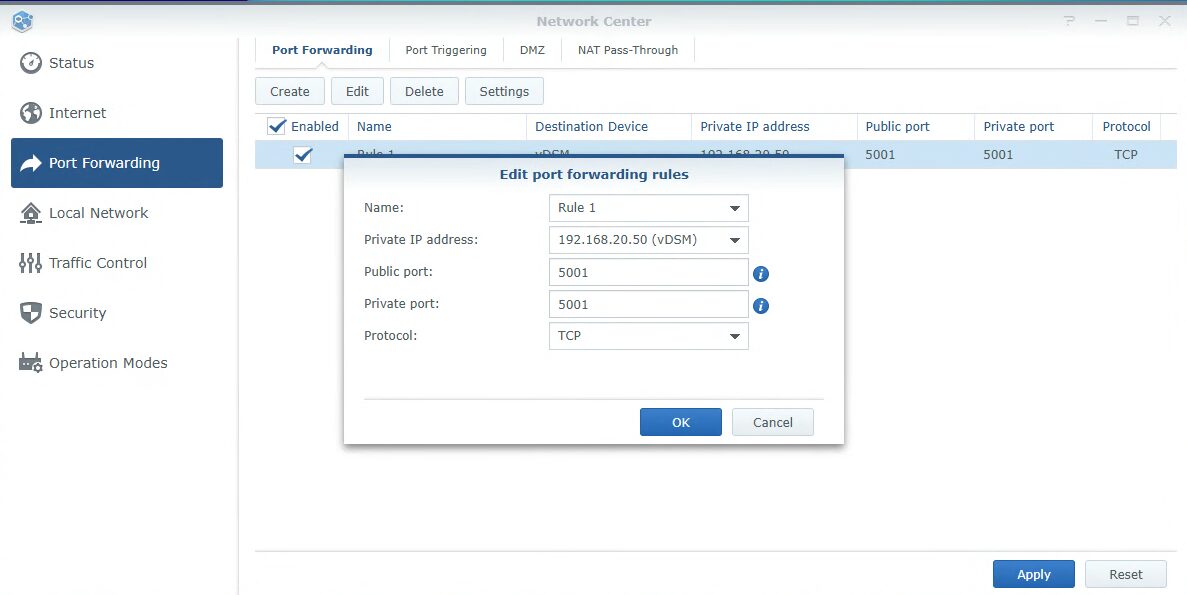
In the Port Forwarding section, create a new rule. Select the IP address of the device you’d like port forwarding enabled on, then enter the public, and private port, as well as the protocol.
A few important notes:
- The public and private ports do not have to match. It’s generally a better practice if you’re only allowing one service to use a more discreet port (than the default port for the service you’re using), or even better, configure a reverse proxy server and route all traffic through TCP port 443.
- Port forwarding rules should be combined with firewall rules as explained below. The goal is to limit traffic to the service as much as you can. An example would be limiting access to your country only as opposed to the entire world, but even further down than your country is best.
Configuring Firewall Rules in SRM
This is the most important part of this entire article. Firewall rules will ultimately determine what is and isn’t allowed between networks. They determine what access port forwarding rules are allowed, and it’s ultimately a way for you to securely manage your entire network. Everyone should configure Firewall rules, even if you’re only managing internal networks and VLANs.
In the Security > Firewall section, the Allow/Deny option ultimately determines if traffic is allowed by default, or denied. I suggest keeping it as deny so that you know you must configure allow rules for traffic to work. Overall, if the traffic isn’t explicitly allowed in this list, it will be blocked.
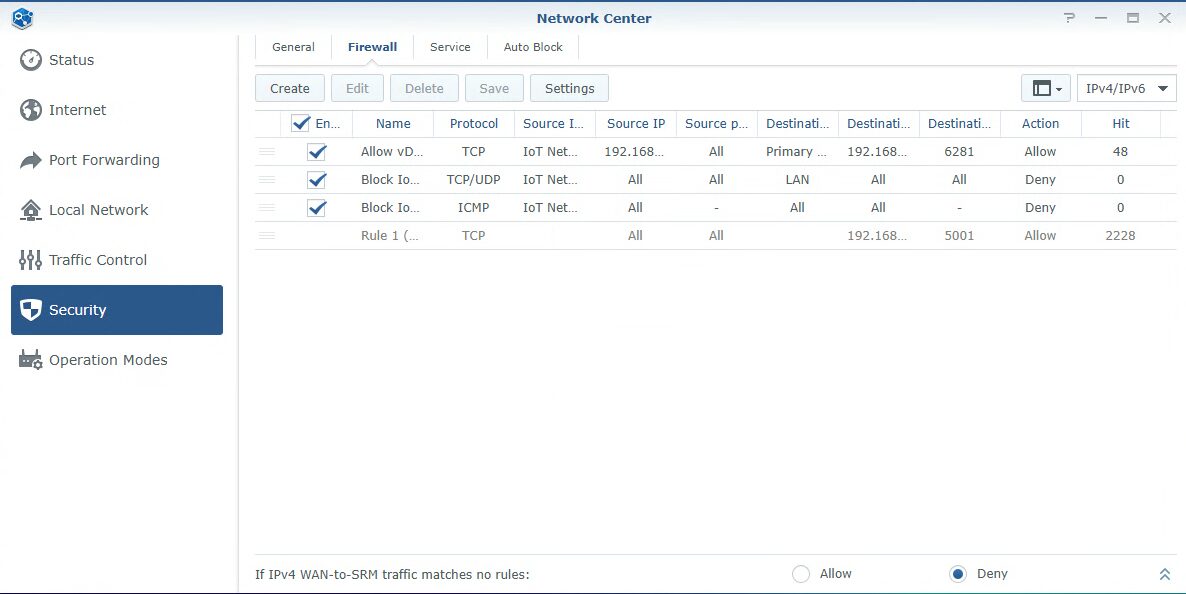
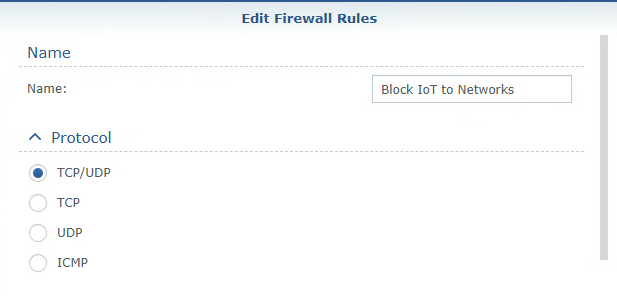
Next, firewall rules can only be created for TCP/UDP/ICMP traffic. Keep in mind that you cannot create one rule that hits them all, so if you want to block or allow traffic for TCP/UDP and ICMP, it’ll require two separate rules.
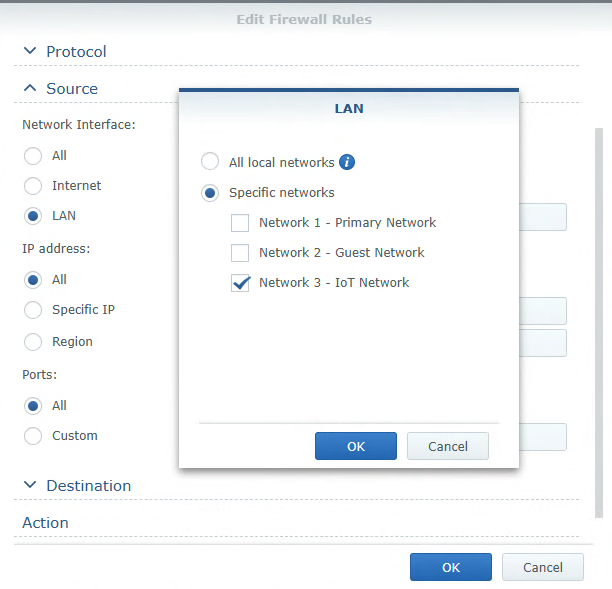
The Source and Destination rules are what will ultimately determine what the firewall rule does. An example would be if you want to deny traffic from the IoT Network to all other networks. In that case, the rule would look like this:
- Source:
- Network Interface: LAN
- IoT Network
- IP Address: All
- Ports: All
- Network Interface: LAN
- Destination:
- Network Interface: LAN
- All Local Networks
- IP Address: All
- Ports: All
- Network Interface: LAN
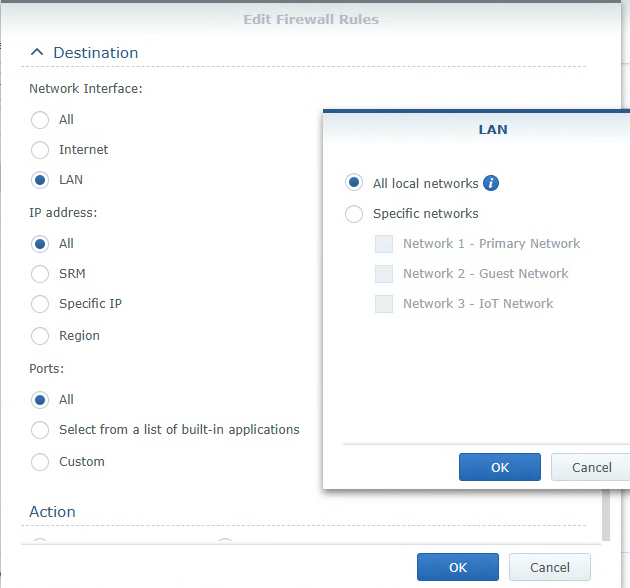
This rule will block traffic from the IoT network to all other networks on the device, but again, your goal is to limit traffic as much as you can. I go into firewall rules in much greater detail in the video below and highly suggest you watch it if you’re interested in learning how firewall rules work.
Configuring a DNS Server, VPN Server, and More on SRM
This section ultimately requires a separate tutorial and one that I hope to make in the future, but in general, you can configure many different things on a Synology router, with the most notable being a DNS server and a VPN server.
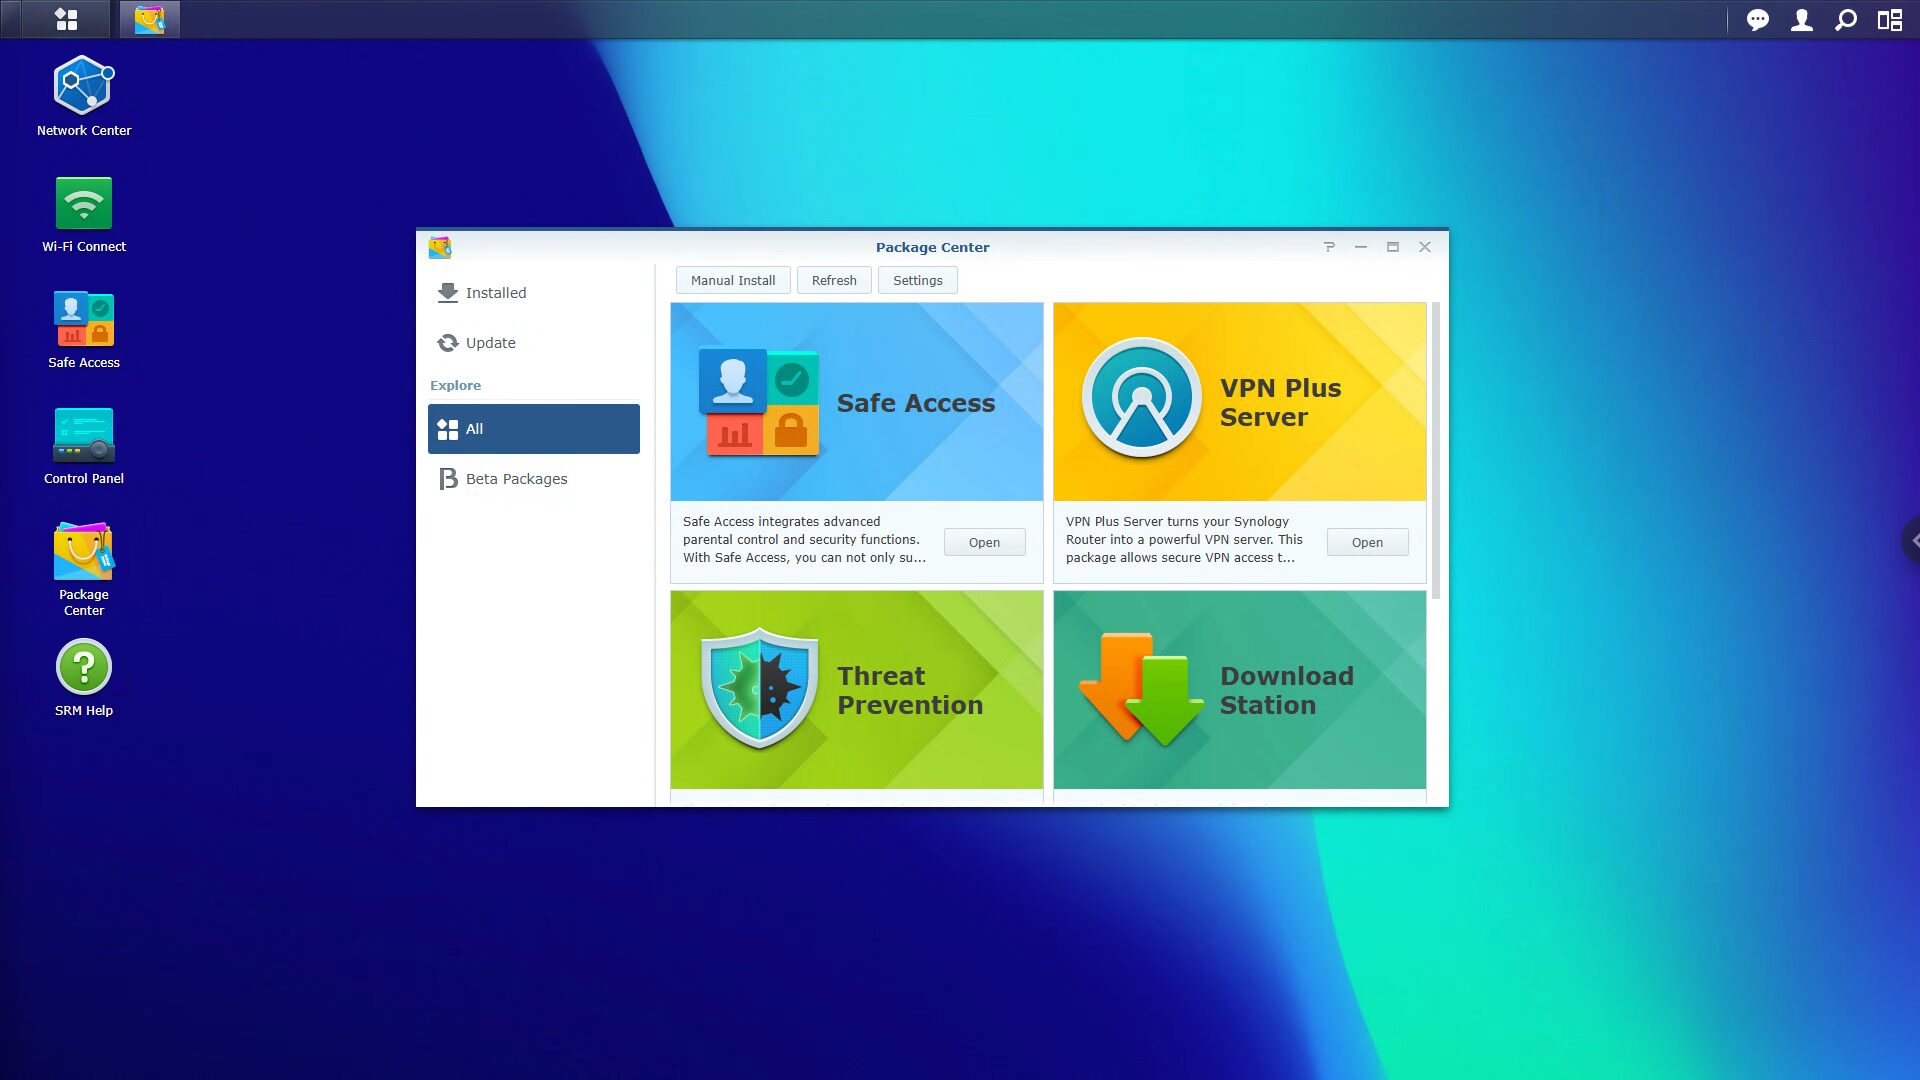
If you want secure remote access to your local network, configuring OpenVPN in SRM is a great option, but all of the packages are initially installed from the Package Center.
There are a few different options for VPNs, but most will probably end up using OpenVPN. If you do, while there are a few minor steps that are different, this OpenVPN tutorial can be followed. It’s based on a Synology NAS, but ultimately, almost all of the settings are the same.
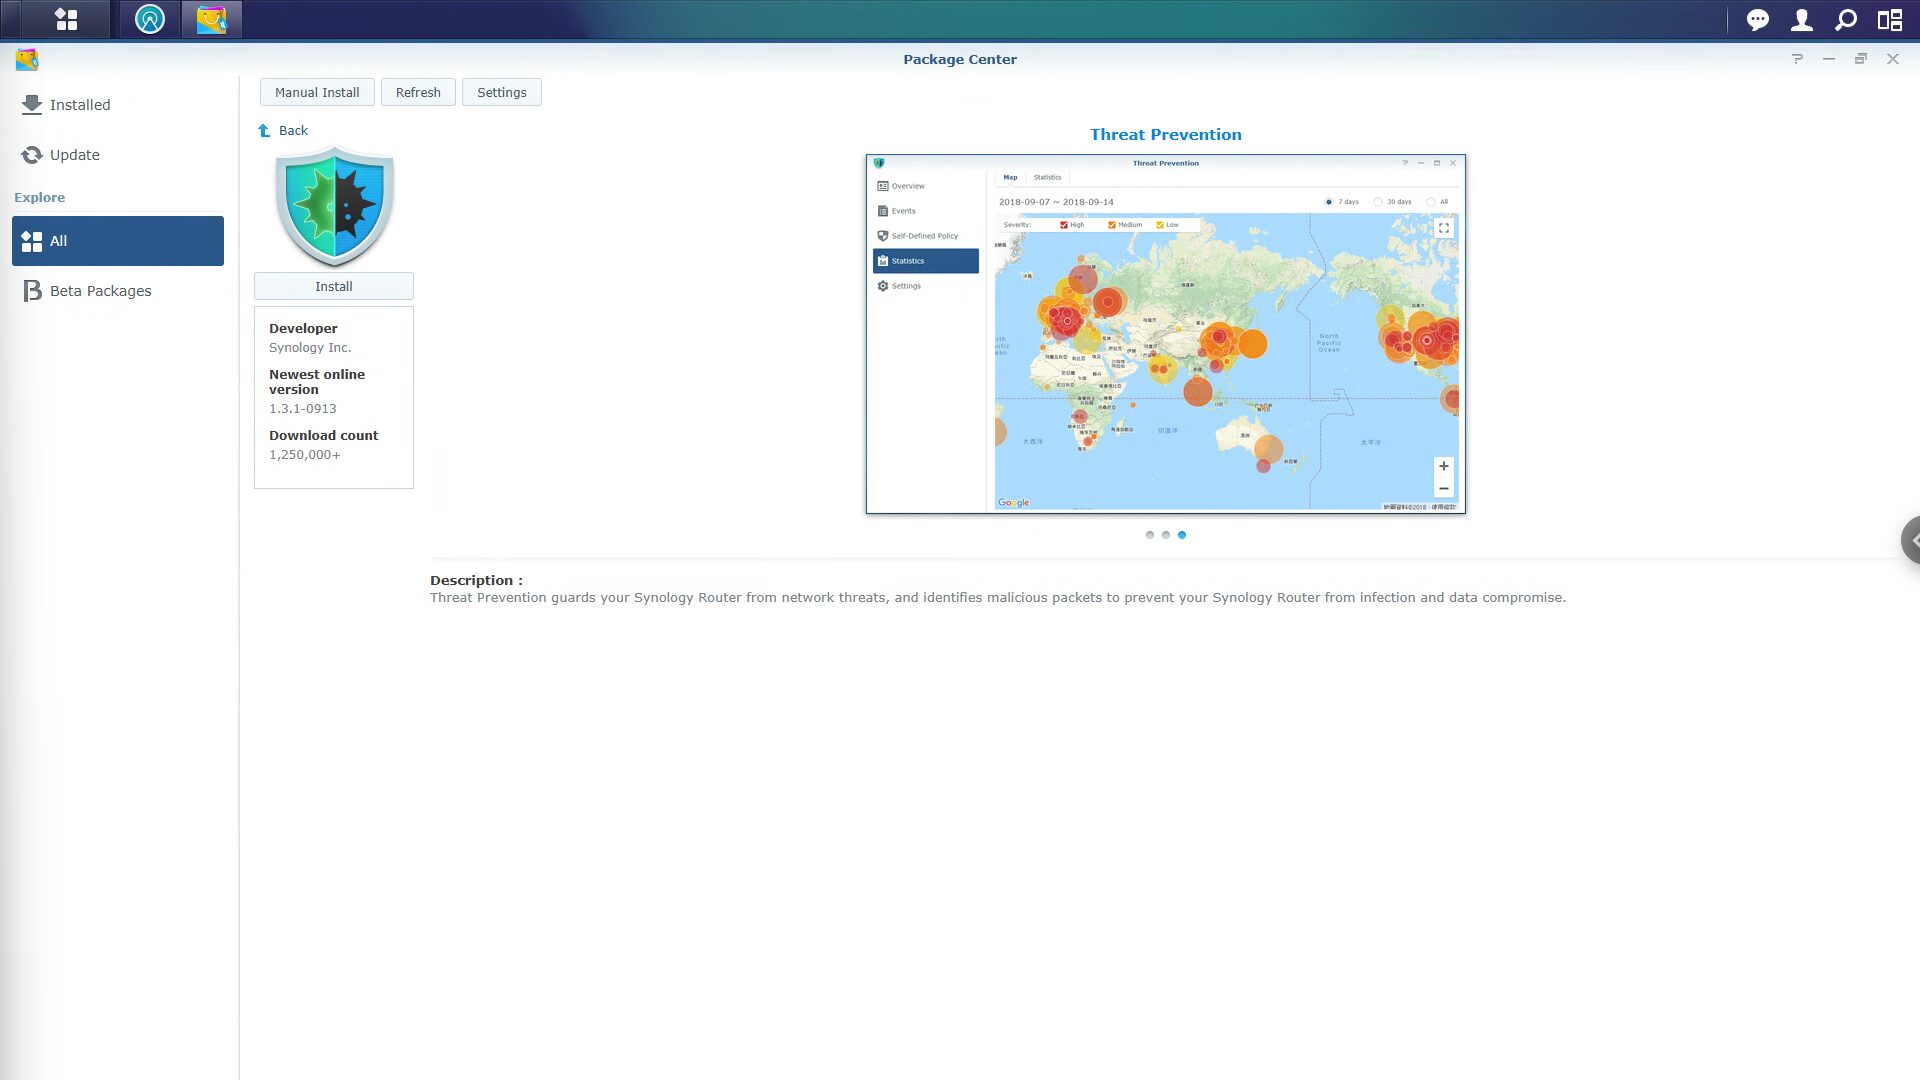
Another great option if interested is the Threat Prevention package. This is a fairly basic IDS/IPS system that can automatically detect and block threats on your router.
Final Thoughts & Conclusion on Configuring SRM
Synology SRM is a great and powerful firewall operating system. Is it as powerful as a system like pfSense, OPNsense, or even a UniFi firewall? No. Is it a great start for a beginner who’s interested in a slightly more powerful firewall that can do fairly powerful things in terms of VLANs, VPNs, etc? Absolutely.
The biggest downside is you have to purchase Synology hardware to use it, but again, for a networking beginner, this is a great option. Thanks for checking out the article on how to set up and configure a Synology router! If you have any questions, leave them in the comments!