If you’ve ever configured Pi-hole, you’ll know just how well it works when it comes to blocking ads. However, did you know that you could add Unbound to Pi-hole to function as a recursive DNS server?
This allows you to use Unbound to directly reach out to the authoritative servers, increasing privacy by removing your reliance on an upstream DNS provider. In this article, we’ll look at exactly how to set up Pi-hole and Unbound on Docker so that you can utilize both.
How to Set Up Pi-hole and Unbound on Docker
Before we get started, you must have Docker installed and configured. We’ll be utilizing a Docker Compose file, so if you’re using something like Portainer, you’ll have to create a stack.
If you’re using a Synology NAS and Container Manager, the second option below will show the Docker Compose file that you need to use (which contains the macvlan network interface required).
Docker Compose File for Pi-hole and Unbound
The only parameters you may have to update below are the volume mappings (point them to the local folder you’d like to use), and the IP_ADDRESS#5053 line. This MUST be the IP address of the Unbound server. Since we’re using the host network interface, it should be the IP address of the Docker server.
If for whatever reason port 53 is in use (for Pi-hole), you must use a macvlan network interface. If 80 is in use, you can modify the host port 80 and access the web interface on a separate port.
version: "3"
# Instructions: https://www.wundertech.net/how-to-set-up-pi-hole-and-unbound-on-docker/
services:
  pihole:
    container_name: pihole
    image: pihole/pihole:latest
    ports:
      - "53:53/tcp"
      - "53:53/udp"
      - "67:67/udp" # Only required if you are using Pi-hole as your DHCP server
      - "80:80/tcp"
    network_mode: host
    environment:
      TZ: 'America/Chicago'
      WEBPASSWORD: 'password'
      DNSMASQ_LISTENING: local
      PIHOLE_DNS_: 'IP_ADDRESS#5053'
    # Volumes store your data between container upgrades
    volumes:
      - './pihole/pihole:/etc/pihole'
      - './pihole/dnsmasq.d:/etc/dnsmasq.d'
    cap_add:
      - NET_ADMIN # Required if you are using Pi-hole as your DHCP server, else not needed
    restart: unless-stopped
  unbound:
    container_name: unbound
    image: "mvance/unbound:latest"
    ports:
      - "5053:53/tcp"
      - "5053:53/udp"
    network_mode: host
    volumes:
      - './unbound:/opt/unbound/etc/unbound/'
    restart: unless-stopped
Docker Compose File for Unbound + Pi-hole on a Synology NAS
This Docker Compose file is for a Synology NAS.
Keep in mind that everything in bold might require updating, but in general, this is a default Docker Compose file you can use to install Pi-hole and Unbound. If you’d like a complete explanation, please watch this video:
version: "3"
# Instructions: https://www.wundertech.net/how-to-set-up-pi-hole-and-unbound-on-docker/
services:
pihole:
container_name: pihole
image: pihole/pihole:latest
ports:
- "53:53/tcp"
- "53:53/udp"
- "67:67/udp" # Only required if you are using Pi-hole as your DHCP server
- "80:80/tcp"
networks:
ph_network:
ipv4_address: 192.168.1.198
priority: 1000
ph_bridge:
ipv4_address: 192.168.100.2
priority: 900
environment:
TZ: 'America/Chicago'
WEBPASSWORD: 'password'
DNSMASQ_LISTENING: local
PIHOLE_DNS_: '192.168.1.199#53'
# Volumes store your data between container upgrades
volumes:
- '/volume3/docker/pihole/pihole:/etc/pihole'
- '/volume3/docker/pihole/dnsmasq.d:/etc/dnsmasq.d'
cap_add:
- NET_ADMIN # Required if you are using Pi-hole as your DHCP server, else not needed
restart: unless-stopped
unbound:
container_name: unbound
image: "mvance/unbound:latest"
ports:
- "53:53/tcp"
- "53:53/udp"
networks:
ph_network:
ipv4_address: 192.168.1.199
volumes:
- '/volume3/docker/unbound:/opt/unbound/etc/unbound/'
restart: unless-stopped
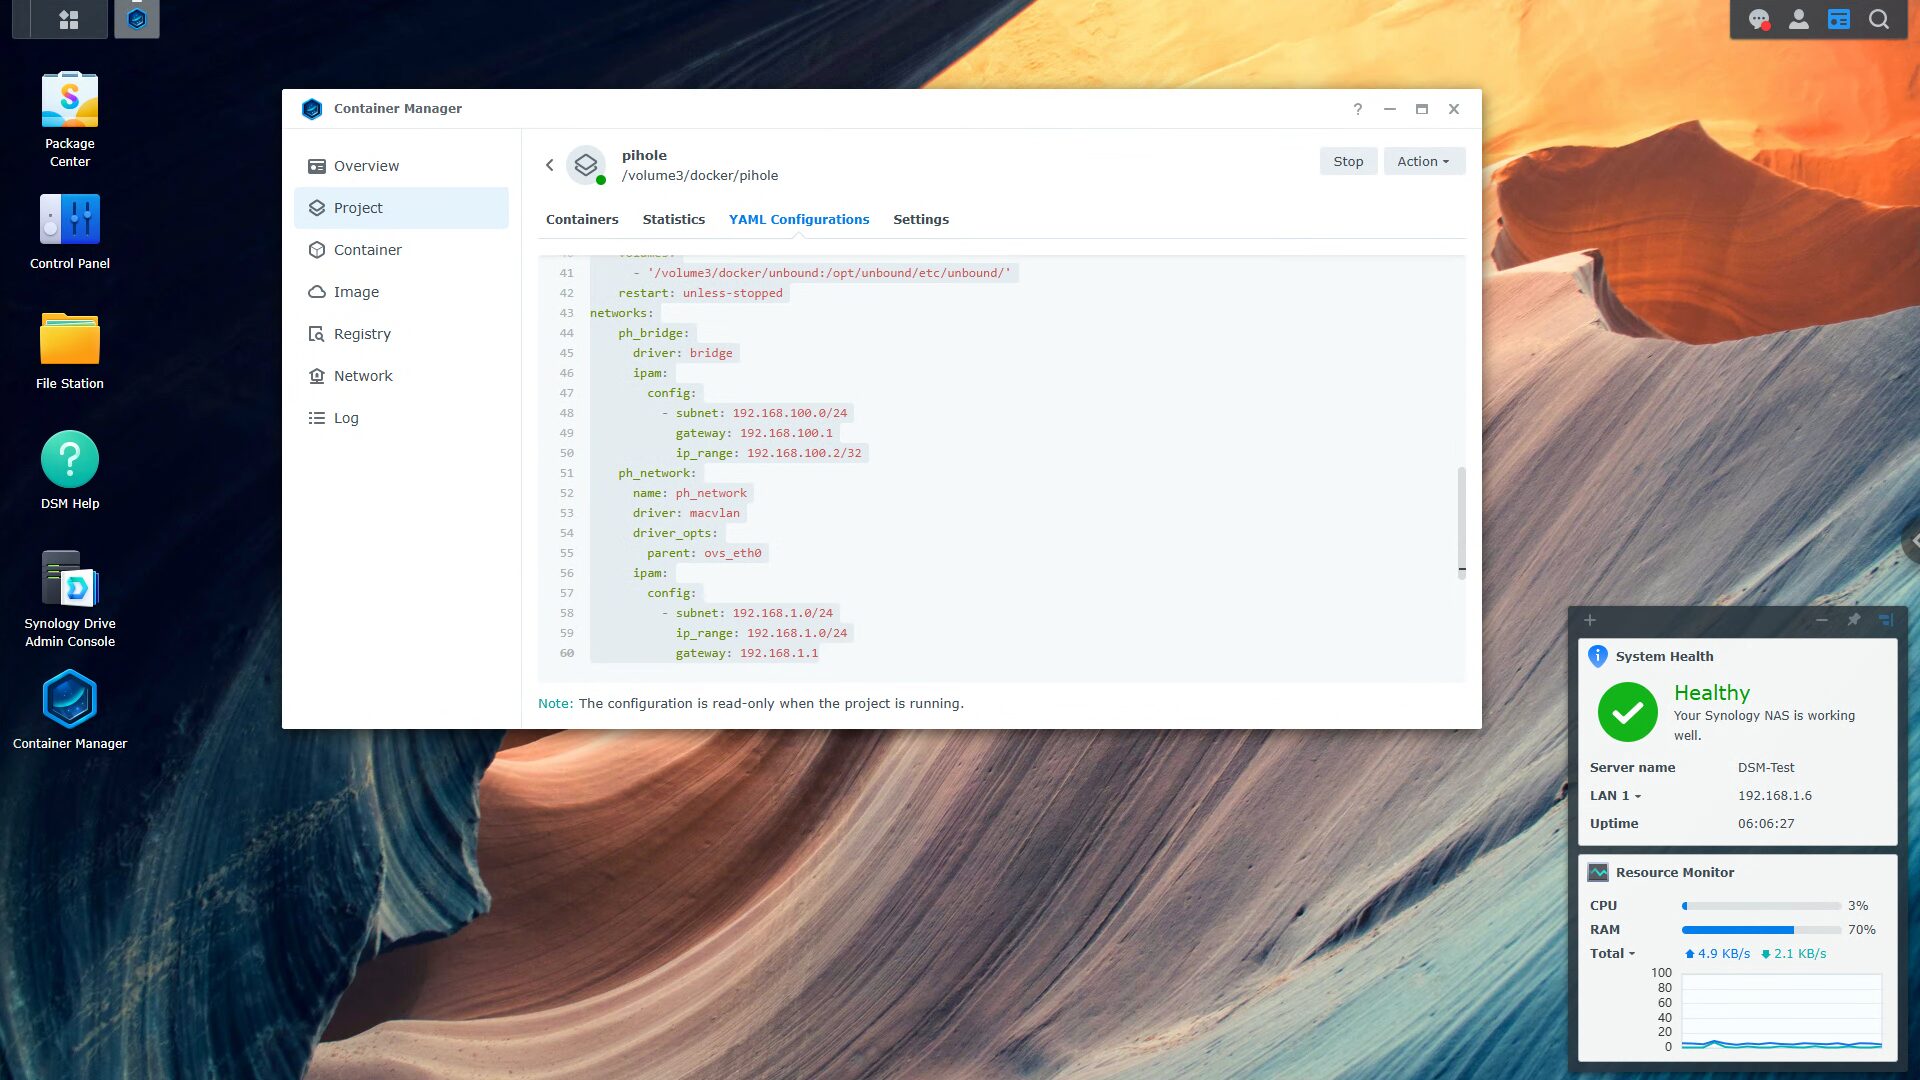
networks:
ph_bridge:
driver: bridge
ipam:
config:
- subnet: 192.168.100.0/24
gateway: 192.168.100.1
ip_range: 192.168.100.2/32
ph_network:
name: ph_network
driver: macvlan
driver_opts:
parent: ovs_eth0
ipam:
config:
- subnet: 192.168.1.0/24
ip_range: 192.168.1.0/24
gateway: 192.168.1.1Unbound Configuration File Changes
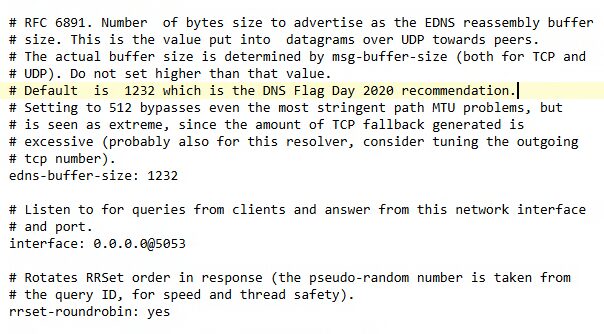
There are a lot of changes that can be made to Unbound, however, we have one main goal with this: we want Unbound to function as a recursive DNS server. This means that it’ll function locally only, and won’t reach out to any upstream DNS servers. To accomplish this, you’ll need to modify the unbound.conf file created in the unbound directory.
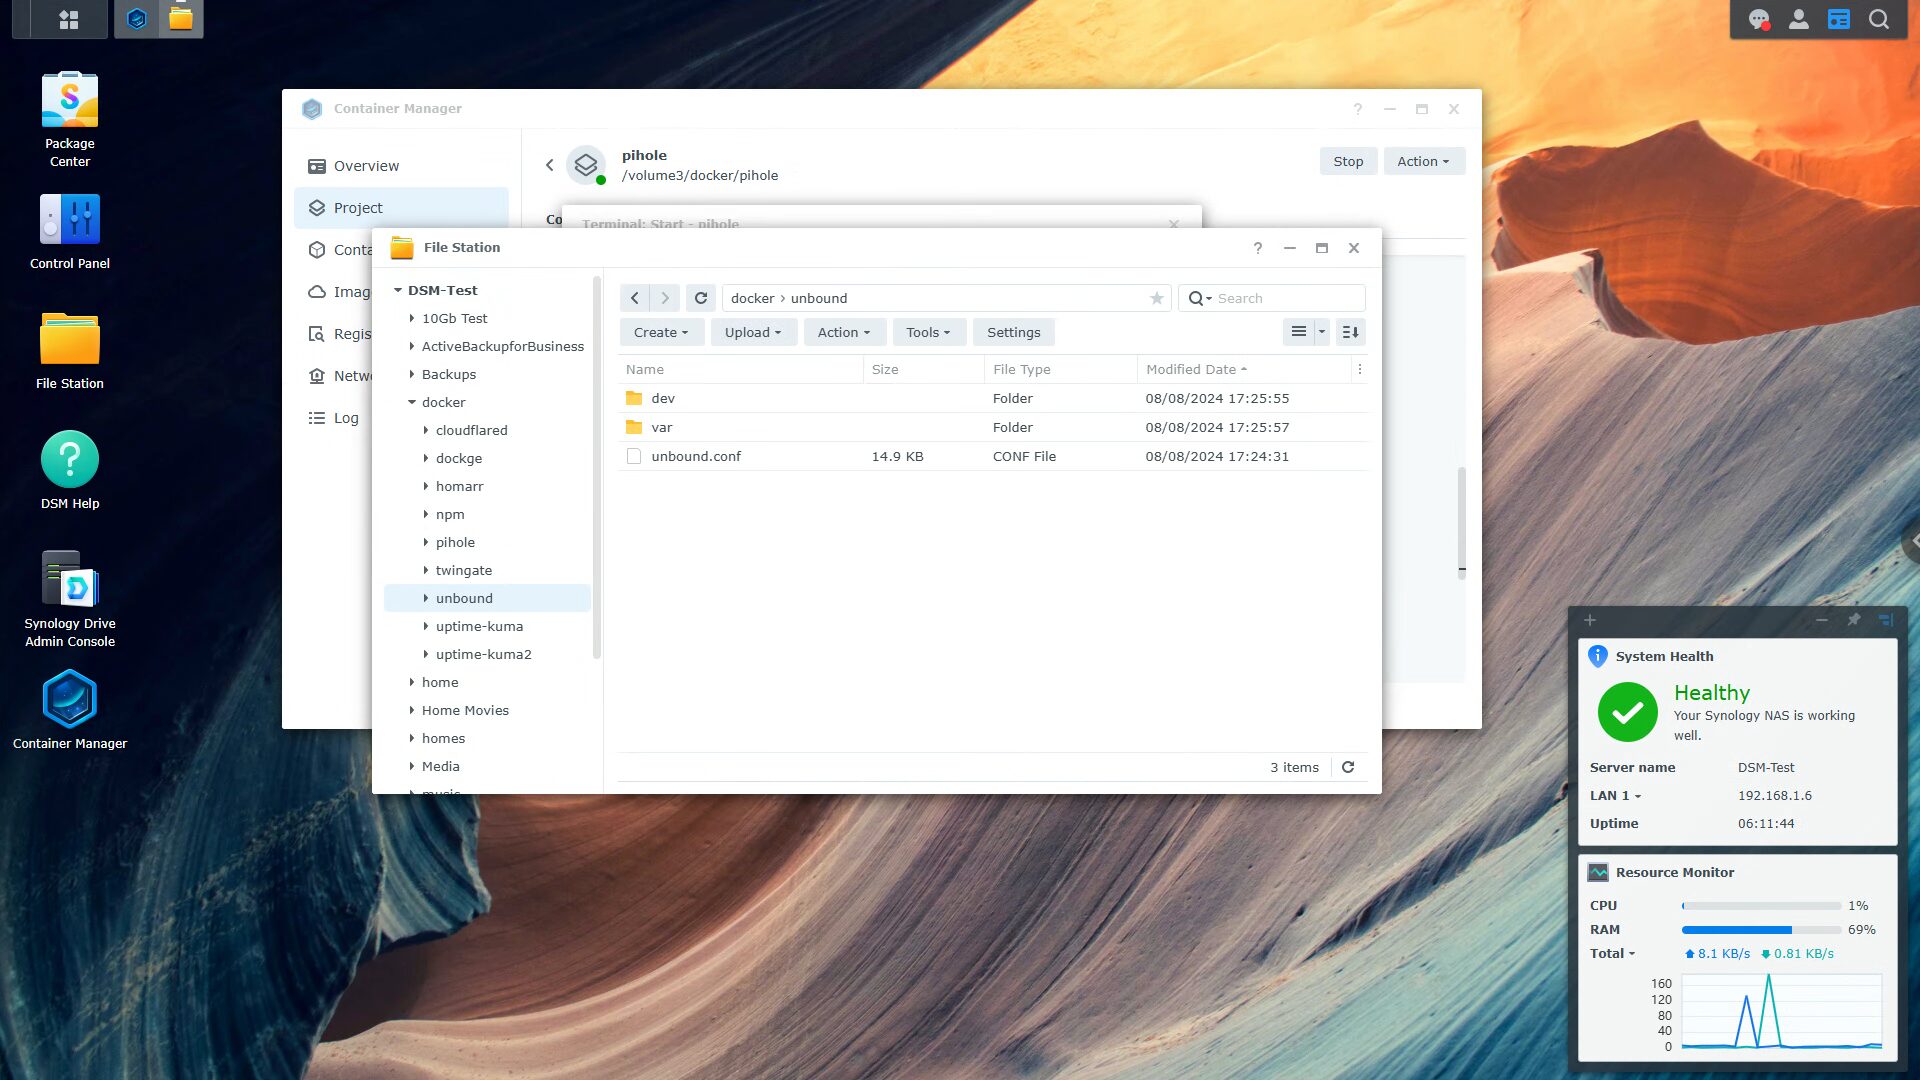
Once that file is opened (you can use Text Editor in the Package Center if you’re using a Synology), we want to delete everything in the LOCAL ZONE and FORWARD ZONE sections.
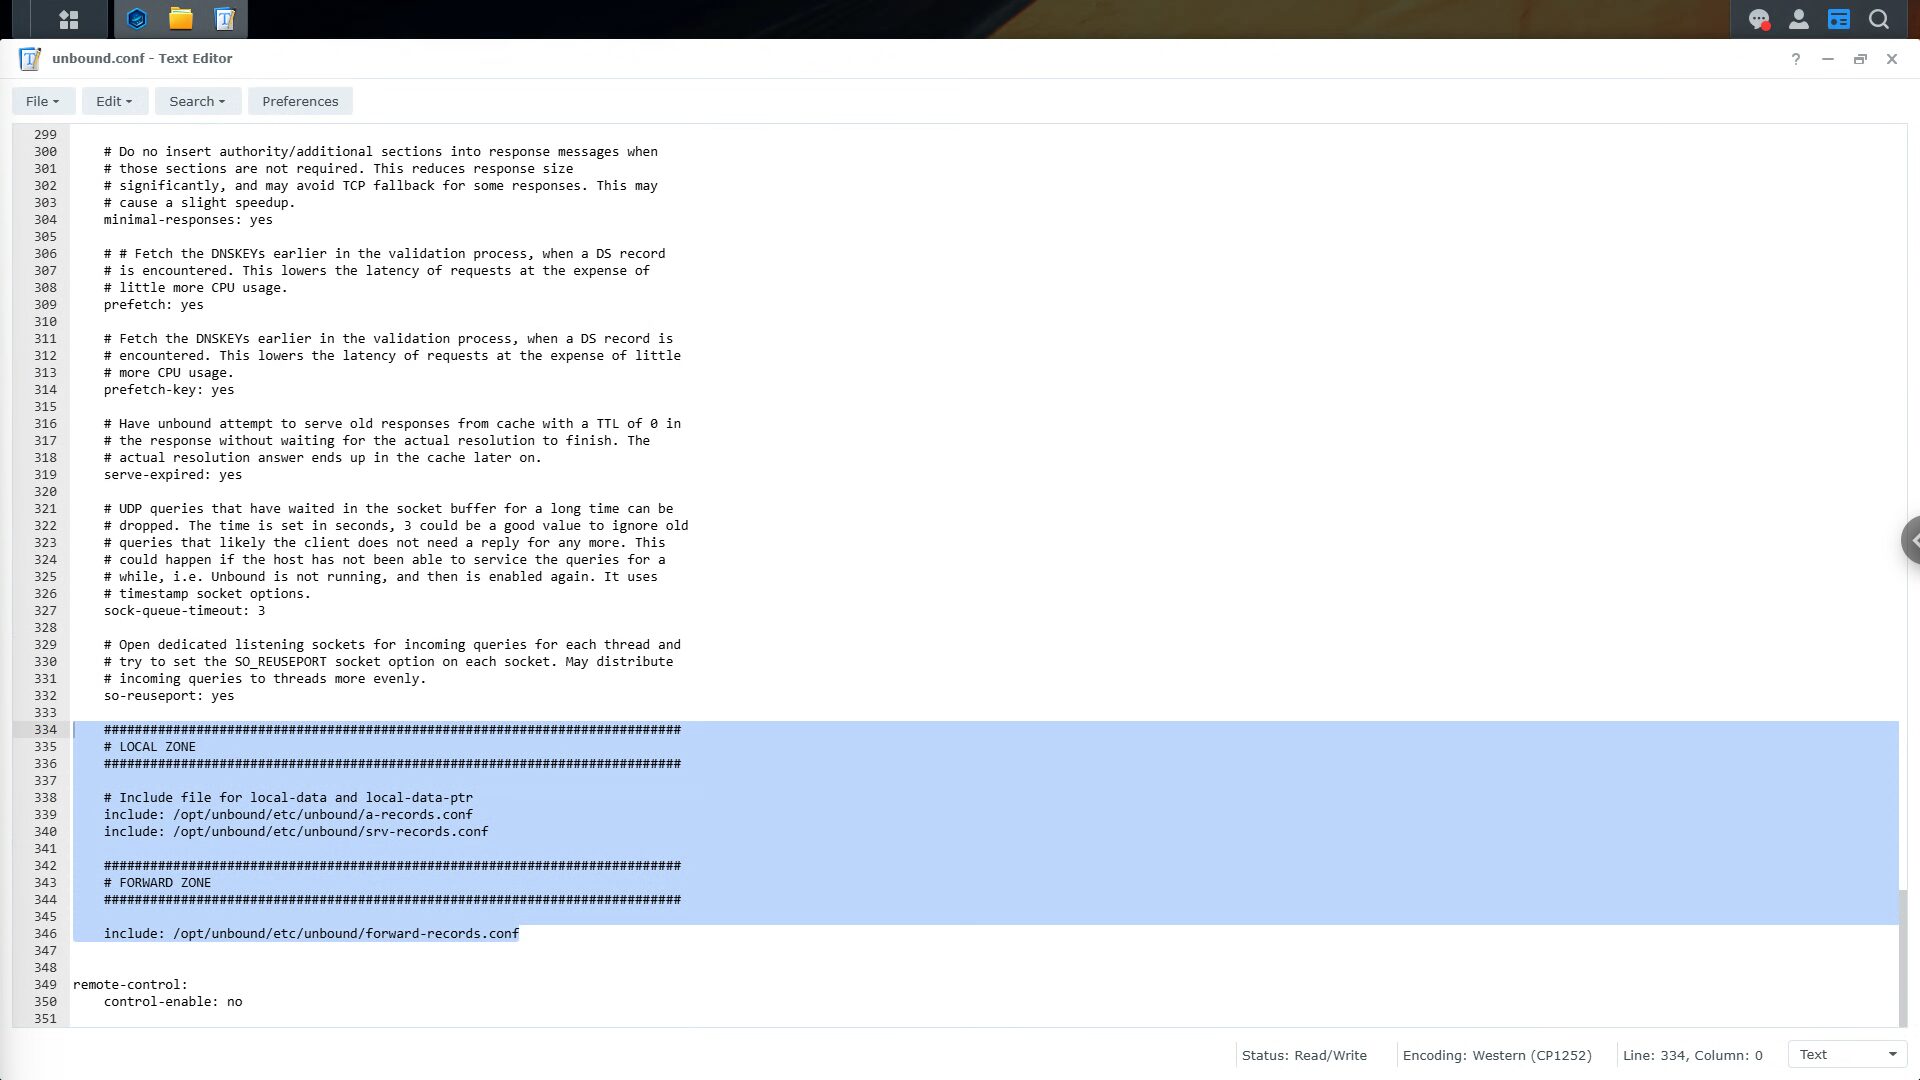
If you are using the Docker version above (not on the Synology), you must also modify the 0.0.0.0@53 line to be 0.0.0.0@5053 as well. This is because we modified the port for Unbound to use 5053 instead of 53 (to avoid a port conflict).
Save the file and restart Unbound and Pi-hole. You should see that the Unbound IP address (whatever you specified) is set as the upstream DNS server in Pi-hole as soon as you log into the admin interface!
http://PI-HOLE_IP/admin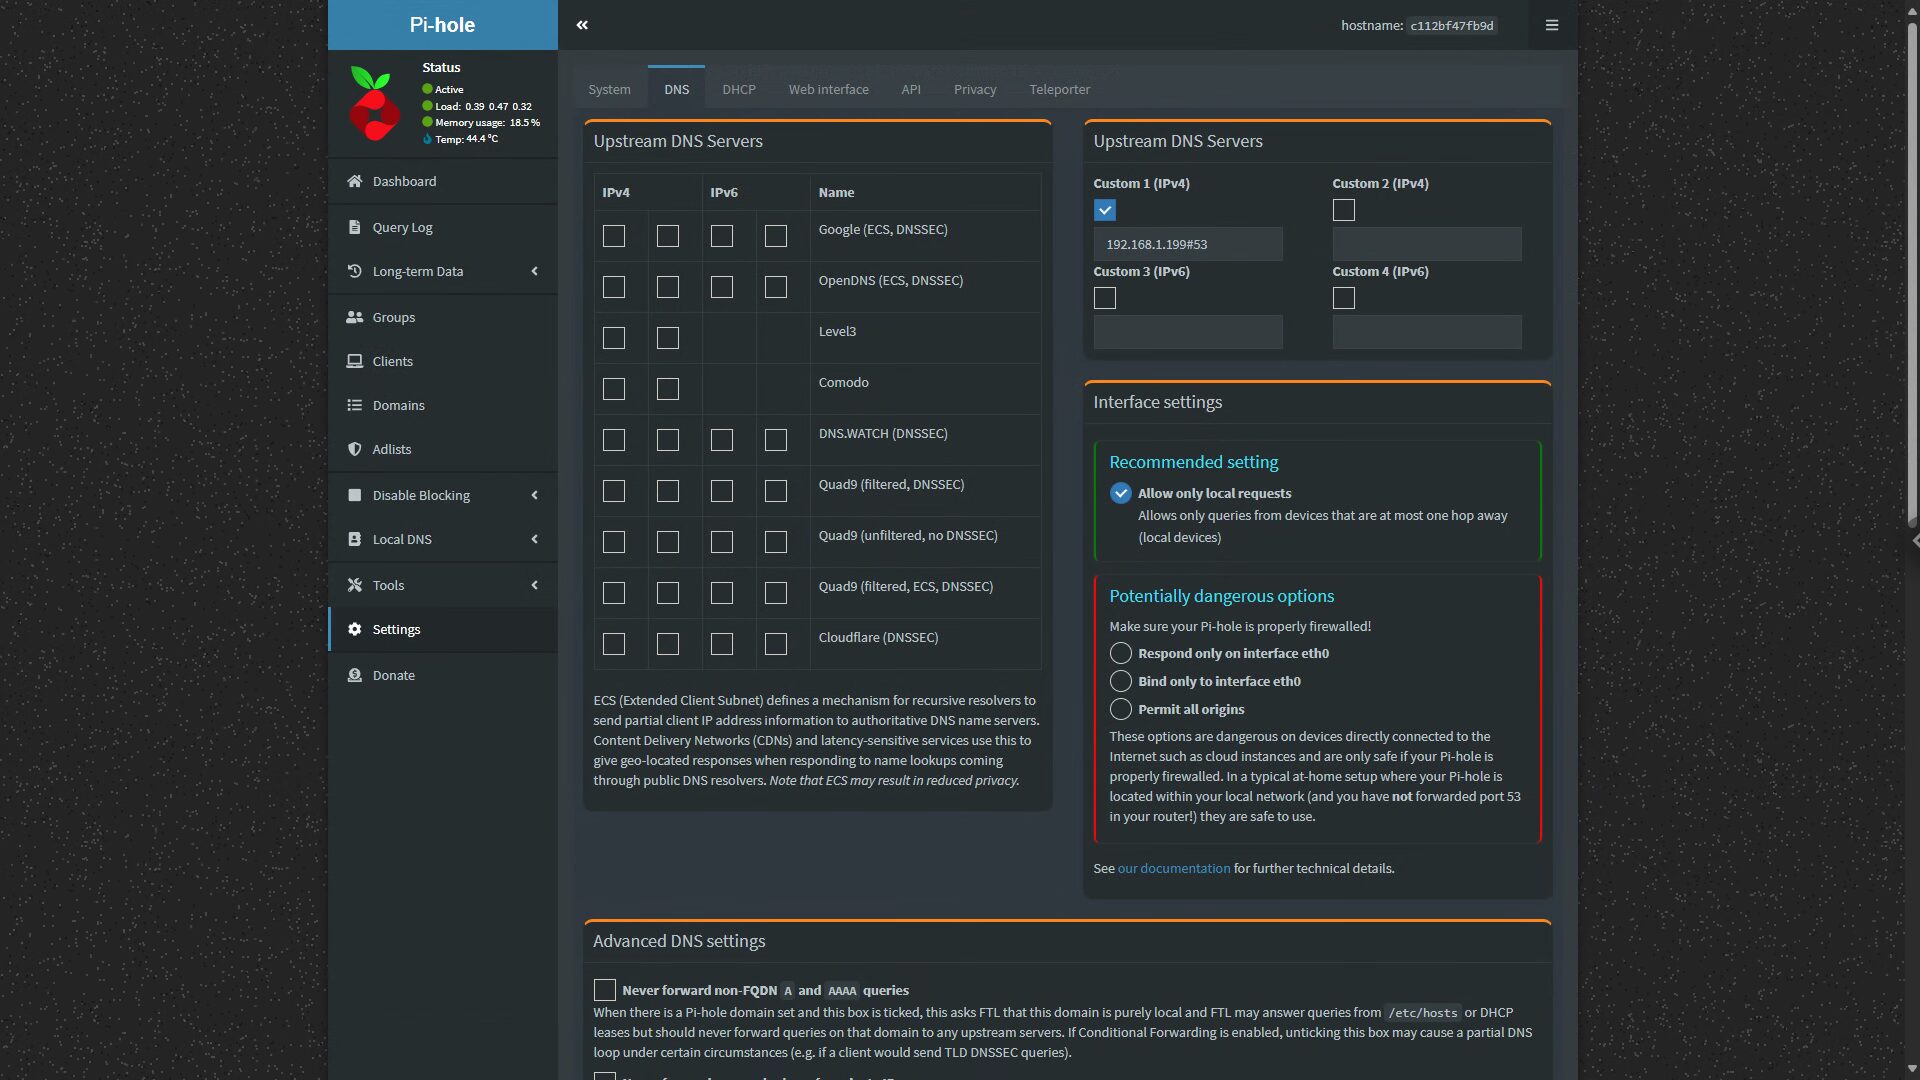
Validating Unbound is Working and Recursive
Now that everything has been configured, you can run an NSLOOKUP command to ensure that everything is functioning as expected:
nslookup google.com <UNBOUND_IP>If you receive a response, it is, so you can set the DNS server of your DHCP server to use the IP address of Pi-hole. This will ensure that everything is routed through Pi-hole, and then sent to Unbound.
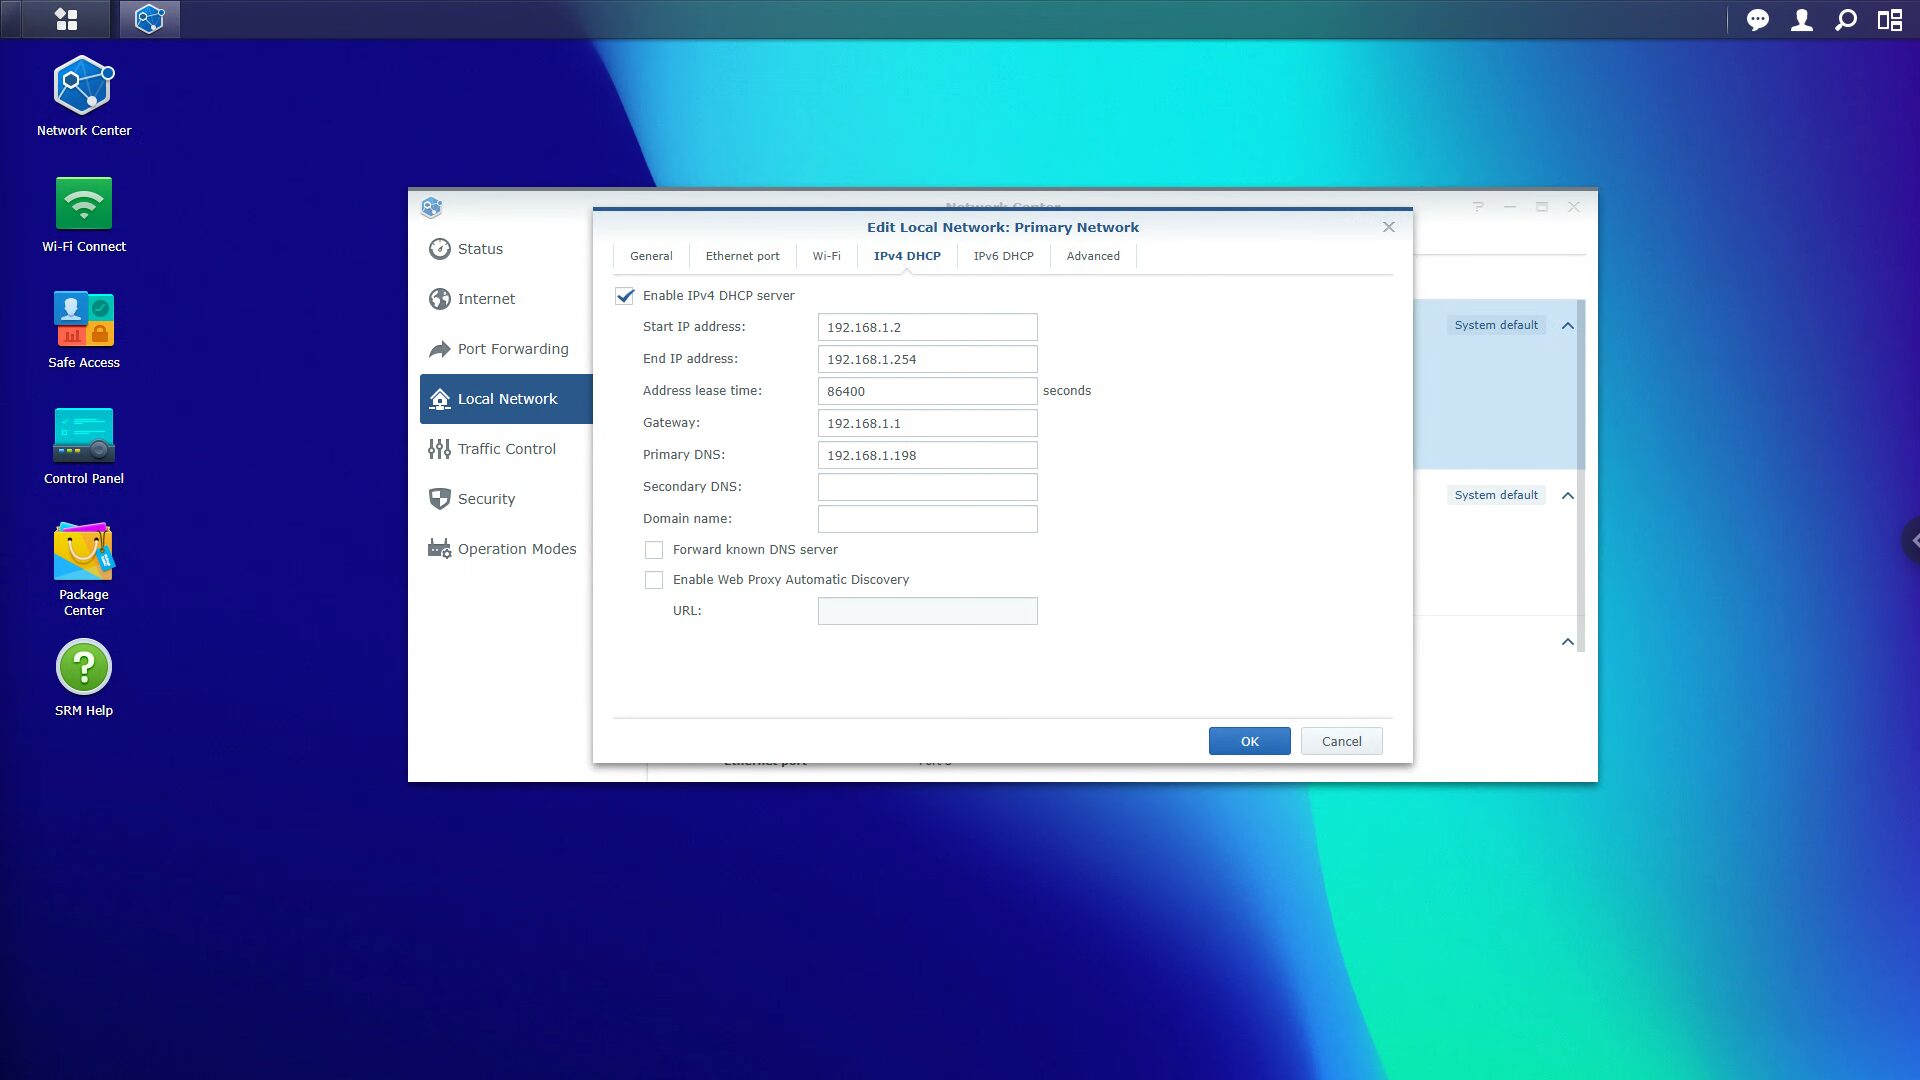
As a best practice, try and have a secondary DNS server as well (in case this goes offline). If you want to use Pi-hole and Unbound, a Raspberry Pi is a great option.
Validating Unbound is Functioning as a Recursive DNS Server
If you’d like, you can validate that Unbound is acting as a recursive DNS server by running a DNS leak test. After accessing the website, select Extended Test. If the only result that’s there is your external IP address, Unbound is functioning properly!
Final Thoughts & Conclusion on Unbound + Pi-hole
Unbound simply makes Pi-hole better. It’s not necessary and if privacy isn’t a concern of yours, then there’s no real reason that you should proceed with this (though you might see a slight performance increase after caching begins). However, the main benefit is privacy and from that perspective, Unbound is simply awesome.
Thanks for checking out the article on how to set up Pi-hole and Unbound on Docker. If you have any questions, leave them in the comments!