In this article, we’re going to take a look at how to set up Proxmox Backup server using NFS storage. Proxmox Backup Server is an operating system designed to handle backups from virtual machines and LXC containers in the Proxmox hypervisor. After configuring Proxmox Backup Server, you’ll configure it as storage in Proxmox, then back your VMs and containers up to it on a scheduled basis.
Proxmox Backup Server (PBS) Disclaimers
First things first, using any network storage is not the recommended solution. In fact, this is generally an unrecommended option, and one that should not be implemented in enterprise environments. Proxmox Backup Server is designed to run bare-metal on dedicated hardware, with dedicated drives for the operating system and backups.
The issue is…in home labs, that’s not always the best, or most desirable option, so this is the alternative solution that I think…might be best. Before we get there, we need to look at some findings to explain why I think this might be the best solution for home labs.
PBS Findings During Setup
I tried just about everything you can try to determine what is the best option for using Proxmox Backup Server (PBS) with shared storage. From running PBS as an LXC Container, to a dedicated virtual machine, using NFS/SMB, changing permissions on NAS devices, using NFSv4 with ID-mapping…and a lot more. I learned a lot about how the operating system works, and these are some of those findings:
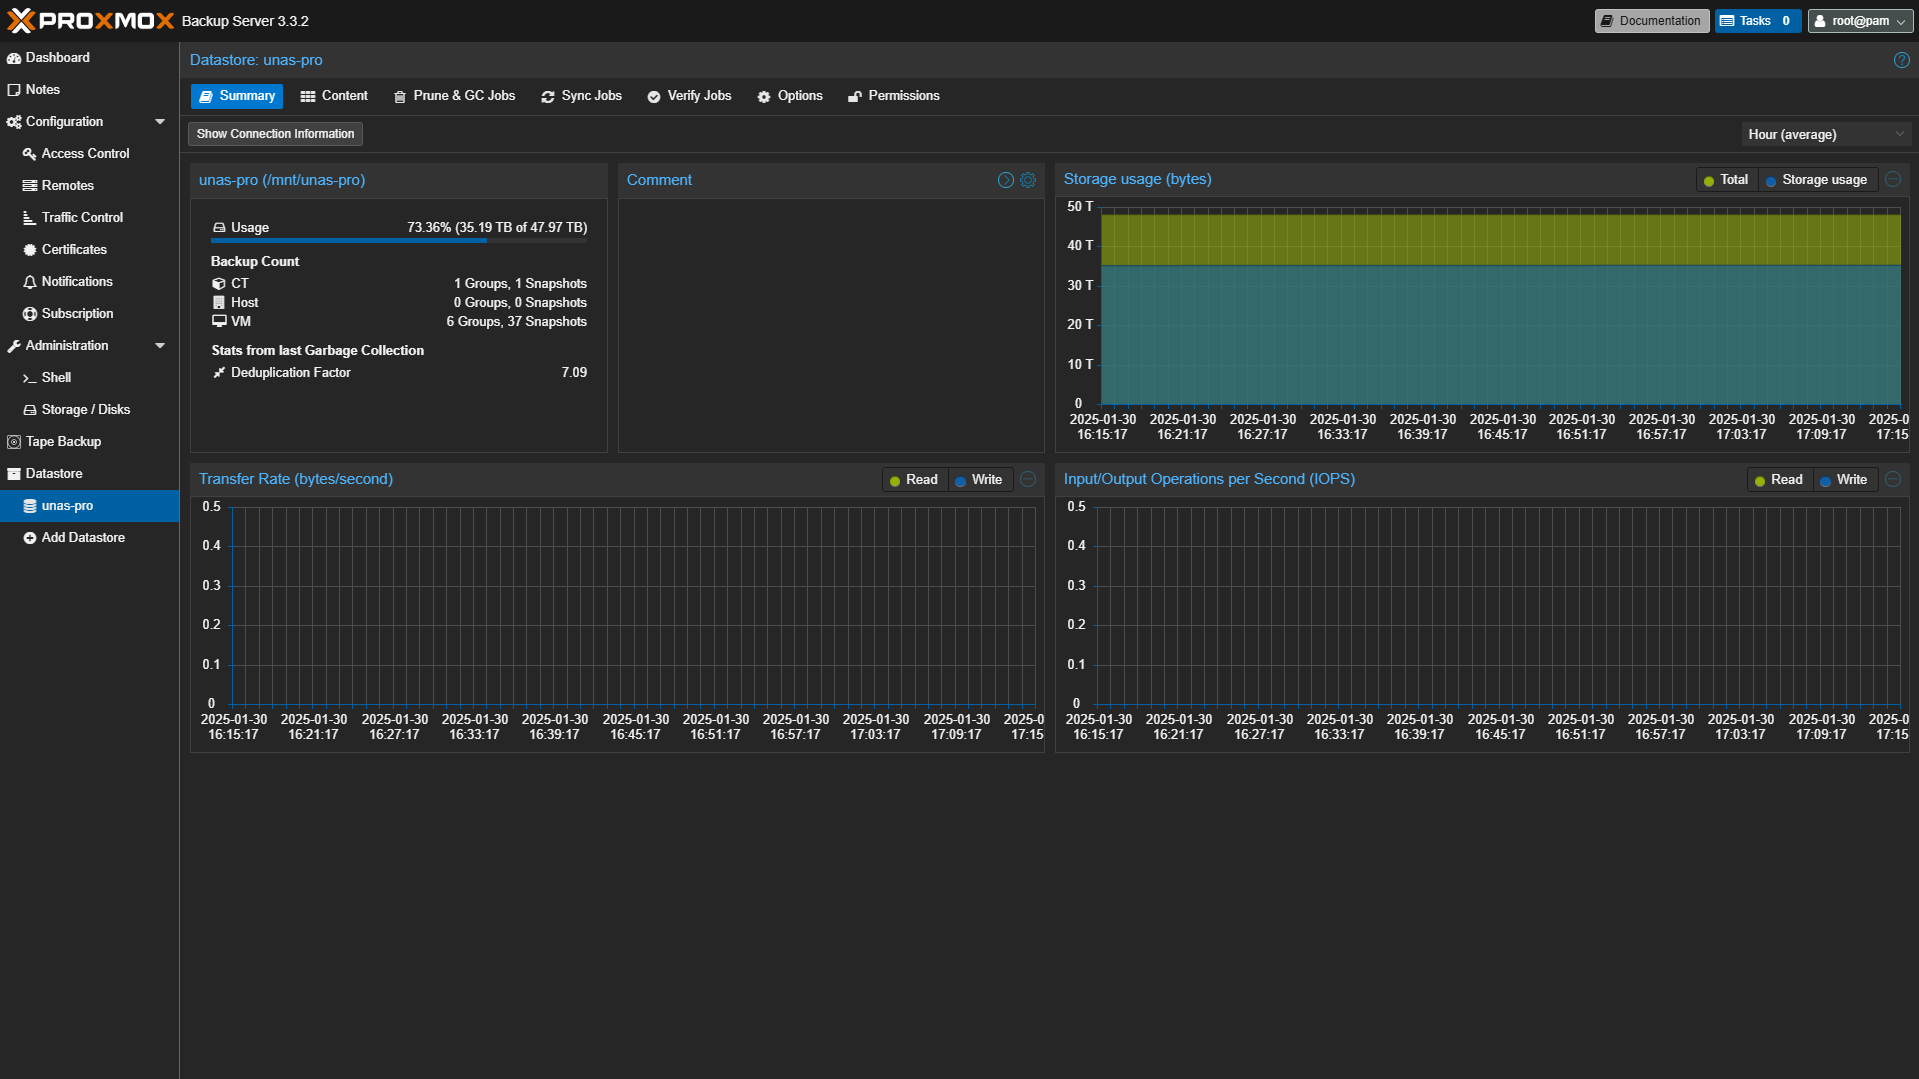
- When you configure a datastore in Proxmox Backup Server, it creates one hidden folder (.chunks) and one hidden file (.lock). These files must be created by the backup user (UID:34 / GID:34).
- This is the ultimate problem with using shared storage – most users don’t have a user and group named backup with the UID/GID of 34. This is a problem, because you’ll immediately run into permission issues attempting to create the two folders above.
To get around this, you can change the ownership (chown backup:backup [mounted_folder]) to ensure the backup user and group own the folder….if your NAS allows it.
To attempt to resolve this, you can use NFSv4 with ID-mapping enabled to translate the backup user in PBS to a backup user on the NAS. With newer Kernels, you can use ID-mapping with AUTH_SYS, and it should work (meaning it’ll map to the correct users), but you might still run into permission issues.
Running PBS as a VM/LXC
After you get passed those hurdles, there’s the whole debate on if this should be virtualized, and if it is, if you should use an LXC or VM. After testing both, I think I’m settled on saying that a VM is best. With an LXC, you can pass through an SMB/NFS share by using an unprivileged container with a mount path added to the LXC’s configuration file. I would not recommend using a privileged container for security purposes.
However…and there’s always a however…passing through the share from the host will force it to map to the nobody user/group, which again, will cause permission issues. To get around it, you have to add lxc.idmap changes for the UID/GID 34 to the LXC config file…which works great for the share, but breaks PBS (at least in my experience).
This is all to say that a VM is what I recommend, but I think that I’m comfortable saying it’s not impossible to get an LXC working with shared storage, but it might be harder with an unprivileged container.
How to Configure Proxmox Backup Server using NFS Storage
After banging my head against the wall for many hours, I came across this post which had the solution I was searching for. The easiest way to handle all of this is to let the .chunks folder and .lock file be created locally, then move them to shared storage. It seems as if the initial creation part is where the permissions have to be correct, and this is the easiest way to get around it.
1. Install Proxmox Backup Server as a virtual machine or on bare-metal (you can follow the steps in the video above).
2. Make two directories in the PBS shell – one will be mapped temporarily, and the other will be used for creating the datastore.
mkdir /mnt/pbs-backups
mkdir /mnt/temp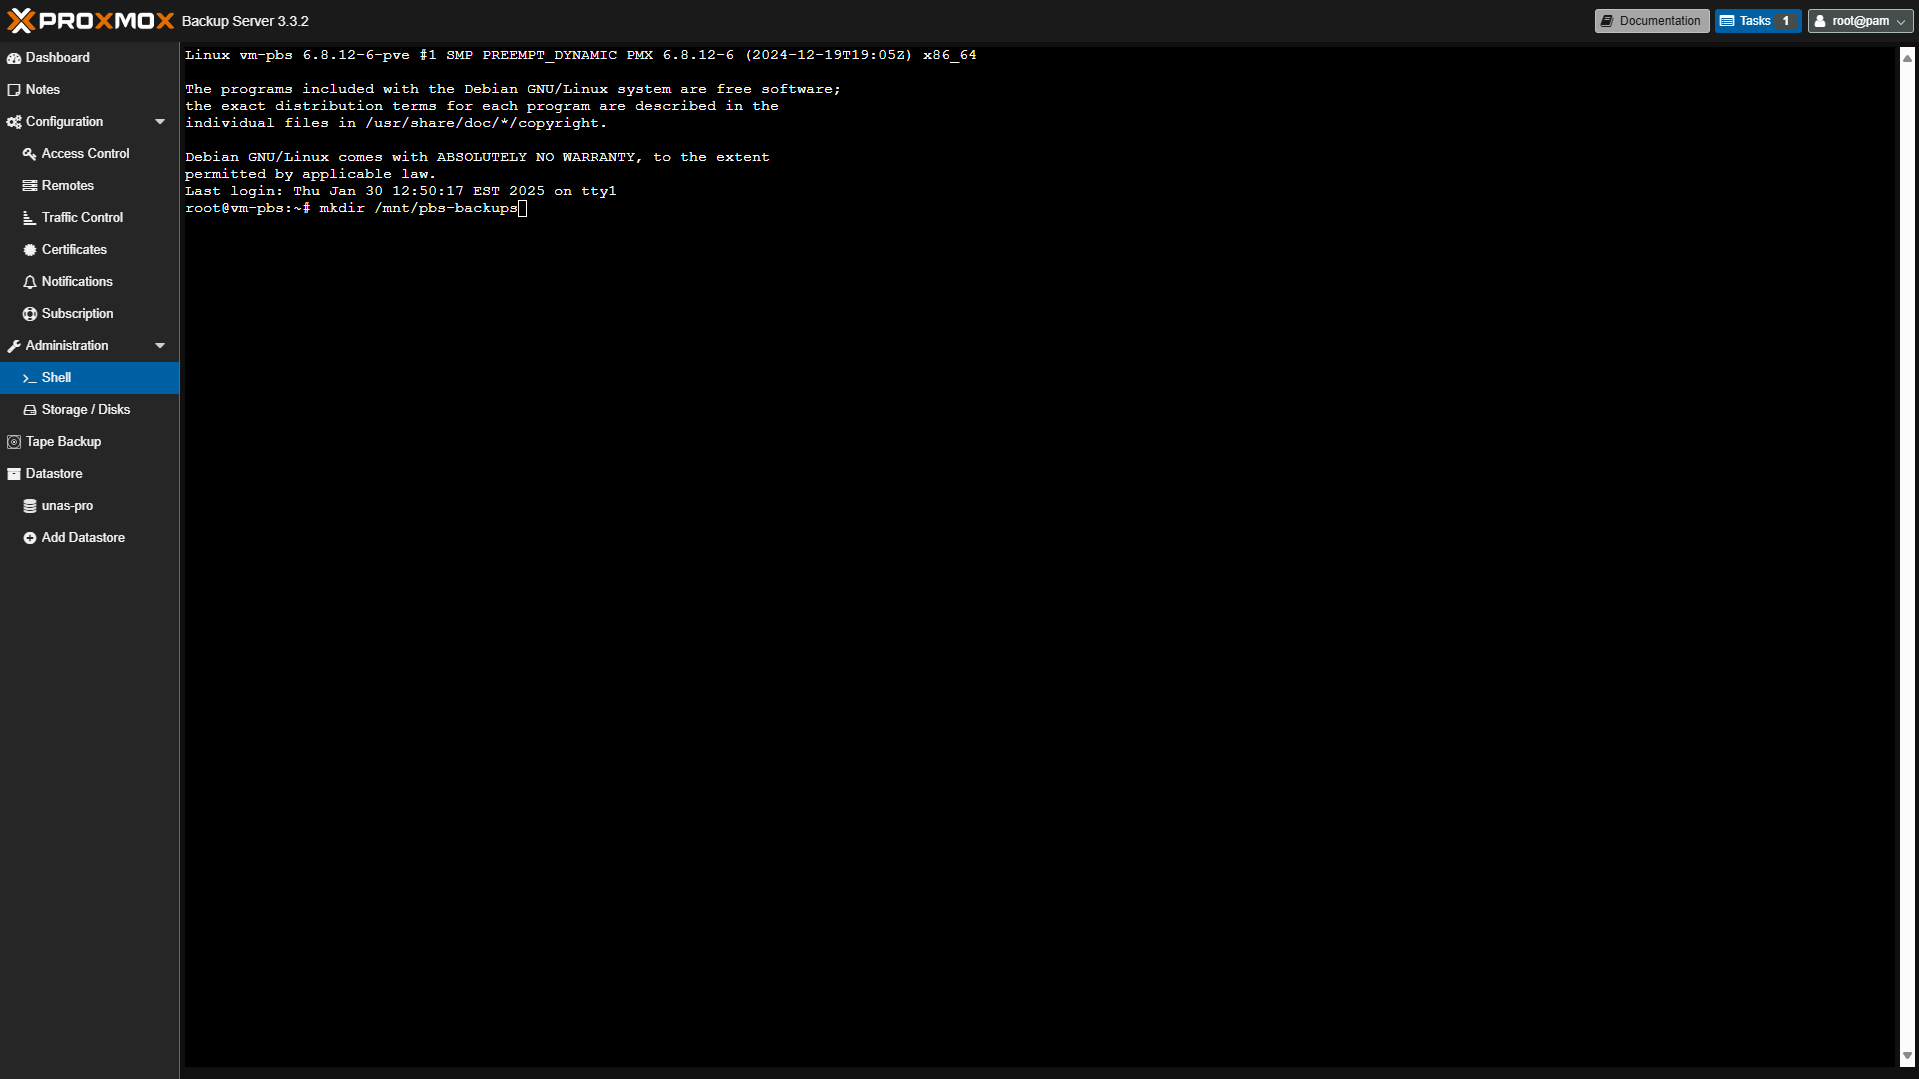
3. Change the ownership of the folder to the backup user and group. The system should do this automatically, but I like to do it regardless.
chown backup:backup /mnt/pbs-backups4. Add the permissions on your NAS for NFS to the IP address of your PBS server. This will be slightly different depending on the NAS you’re using.
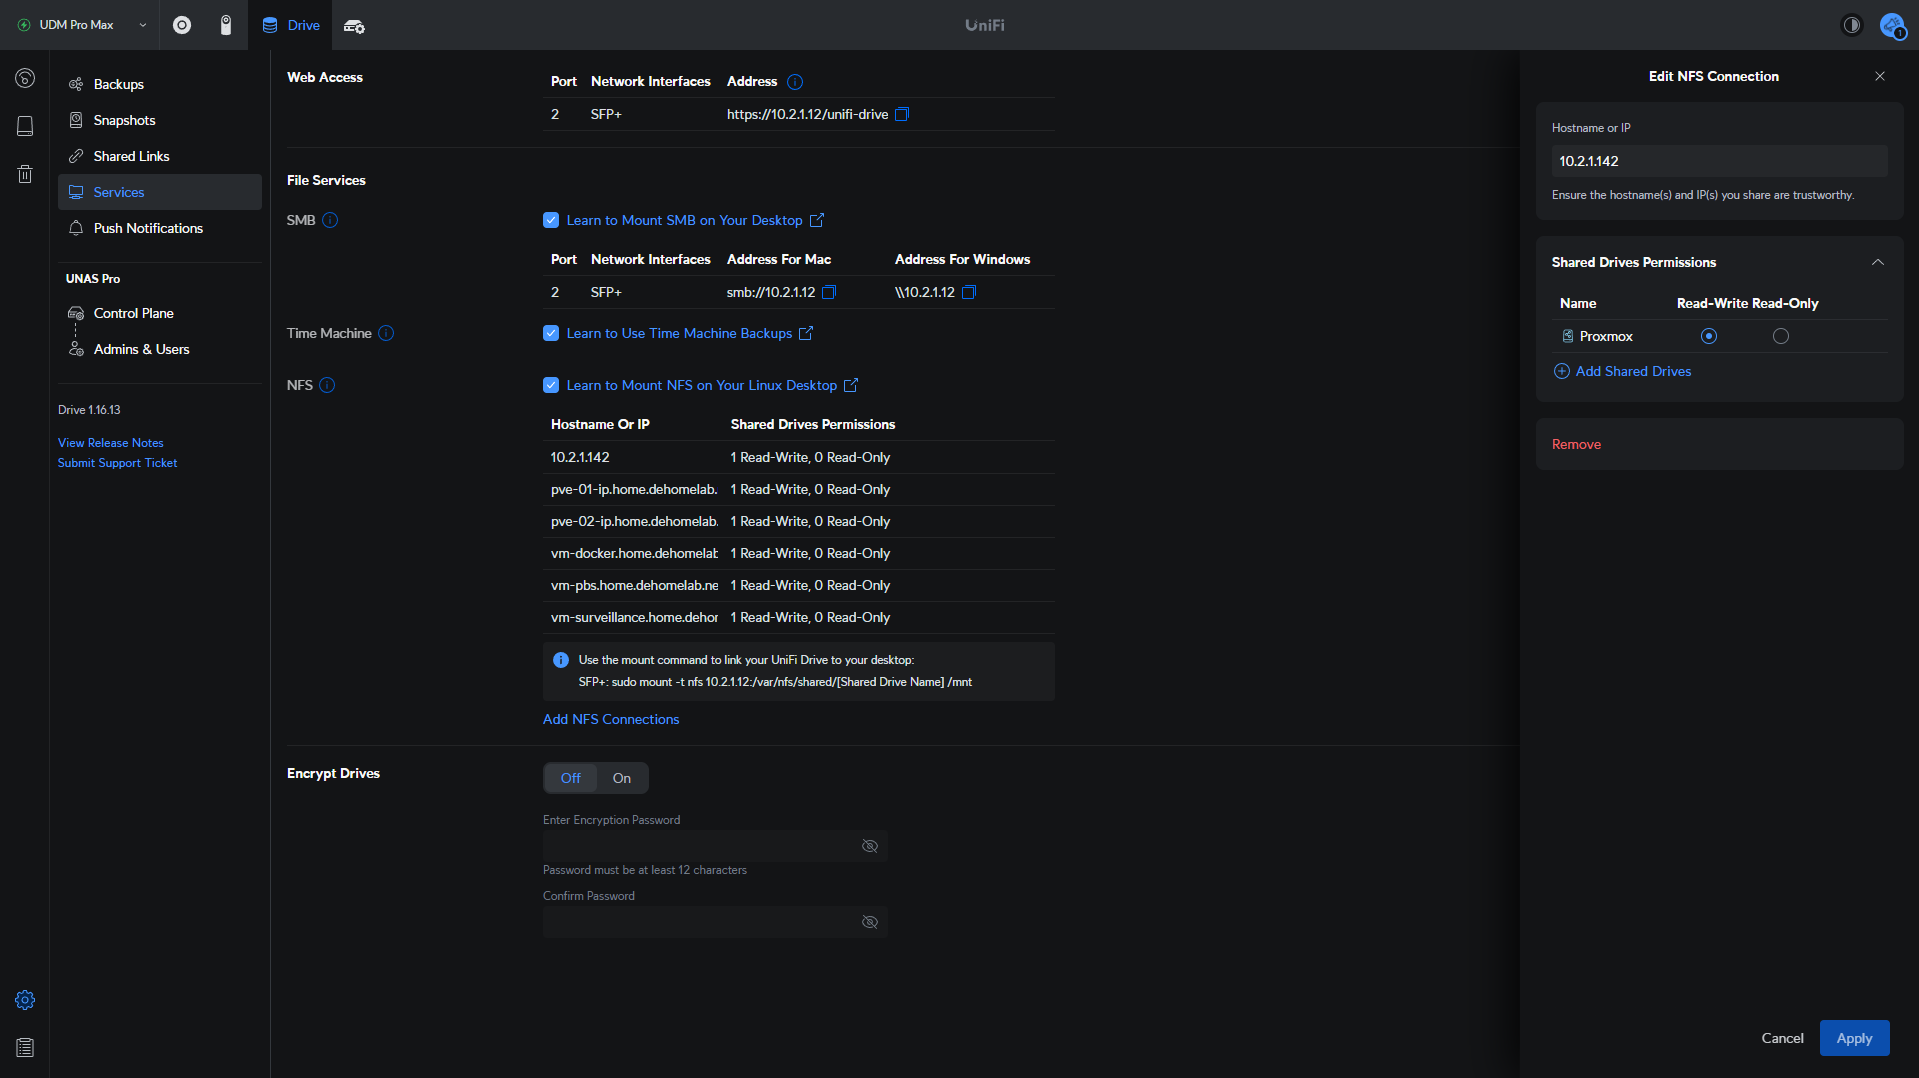
NOTE: If you’re using a Synology NAS, there are permission issues after creating the NFS share at a later step. The best way to get around this (to avoid giving everyone access on the folder in Proxmox Backup Server) is to set the Squash to “map all users to admin”.
Not the most ideal solution, but if you set up an individual Proxmox Backup Server folder on the NAS (which I’d recommend you do), the PBS server will only be able to access the folder you created.
5. Update the fstab file so that the directory mounts automatically at boot to the NAS. This is done temporarily so that we can move the files from the local directory to the NAS.
nano /etc/fstabAdd the information below to the file if you’d like to use NFS (you can use SMB as well if you’d like, but it will be slightly different).
[IP_ADDRESS]:[LOCATION/FOLDER_ON_NAS] /mnt/temp nfs defaults 0 0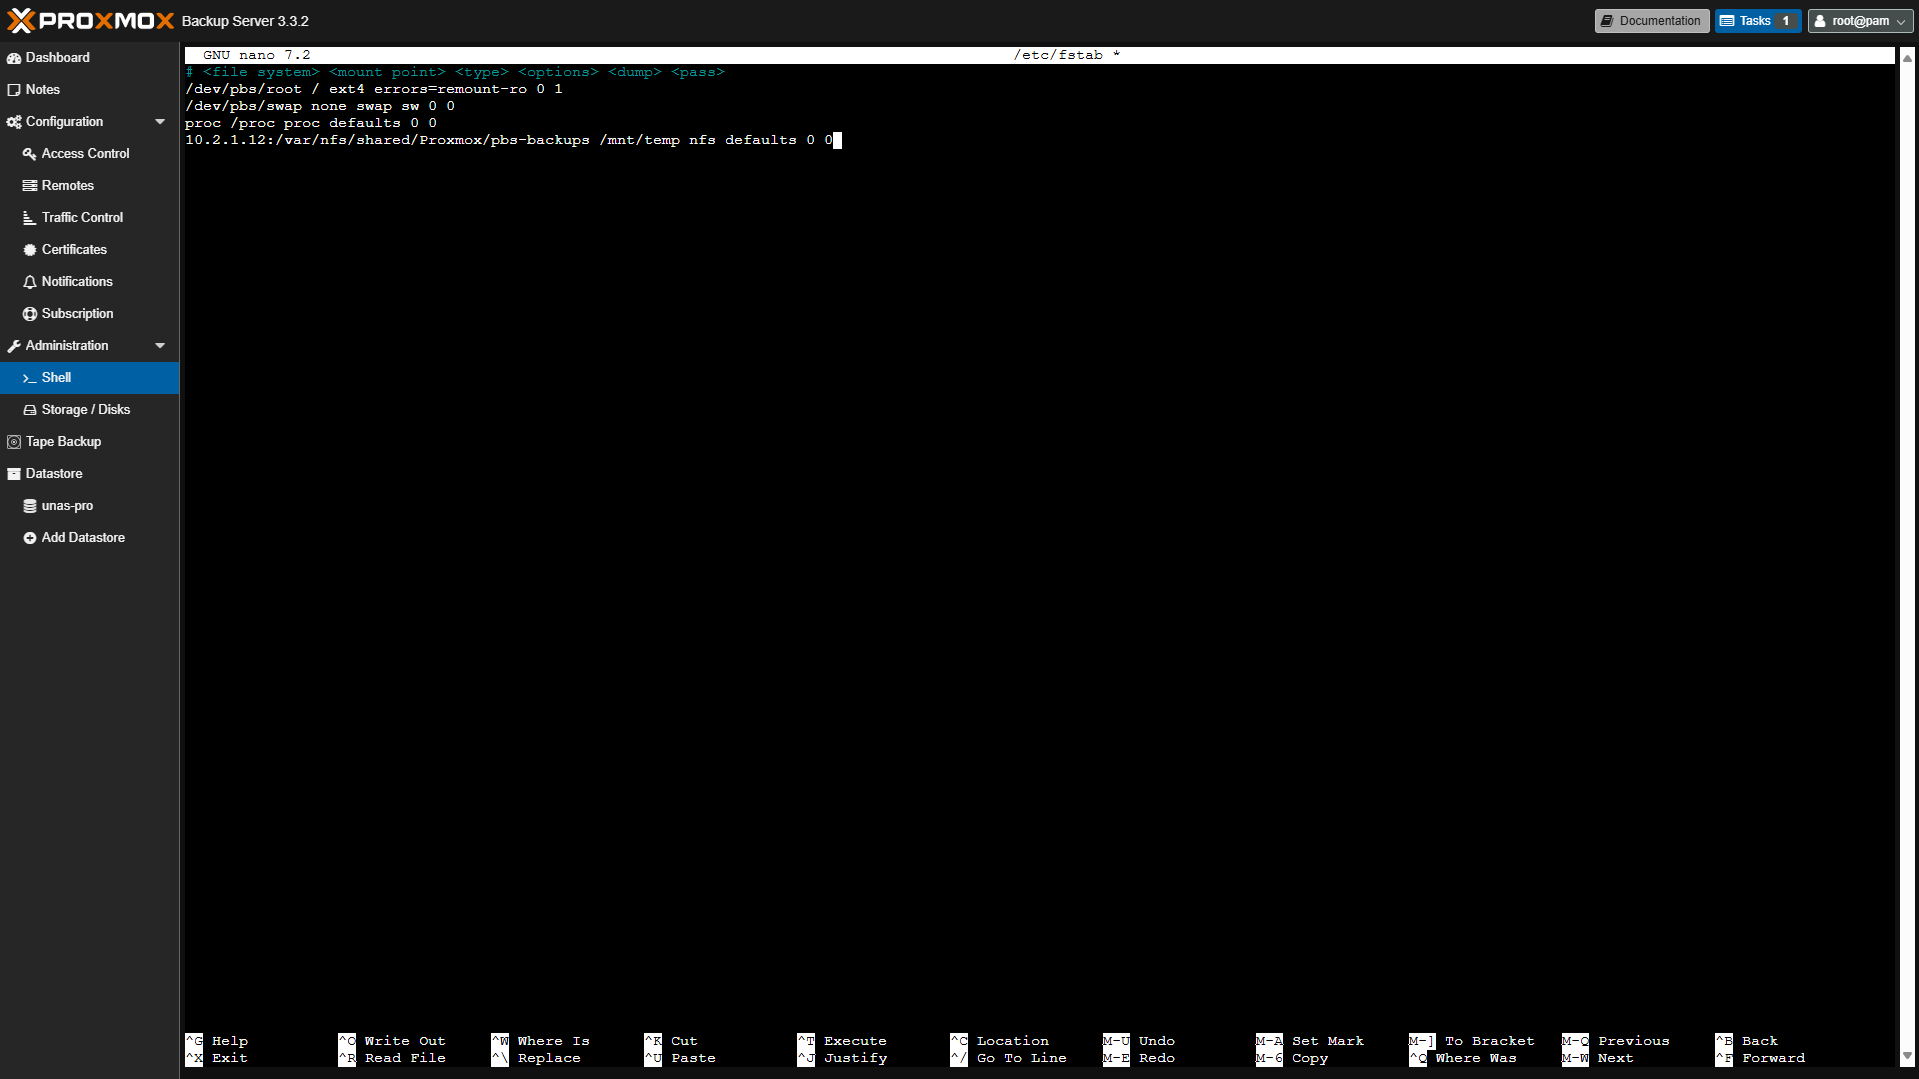
After it’s added, save it (CTRL + O), then mount it using the command below.
mount -a6. Next, we have to add a Datastore in PBS. Select Add Datastore, then give it a name, and add the backing path below. Remember, this will temporarily write the data locally, which we’ll then move to the NAS.
/mnt/pbs-backups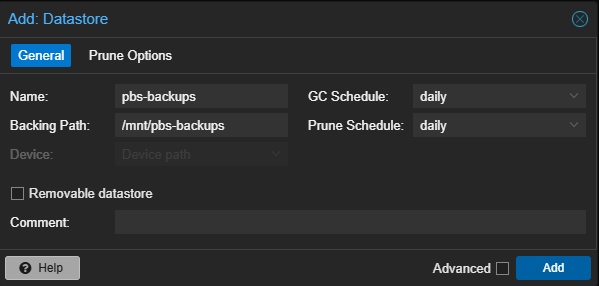
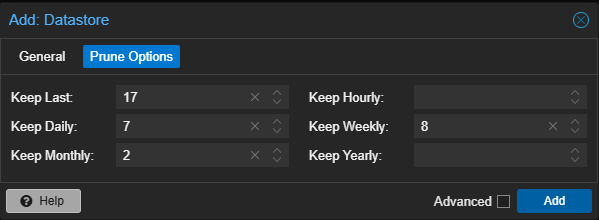
NOTE: This is also where you’ll configure the prune options, which is the total number of backups that PBS will store. Remember, PBS uses deduplication, so the backups will be significantly smaller than if you were using NFS directly.
The best way to determine exactly how much you need is to use the Proxmox simulator to determine your storage needs.
7. Move the data to the temp folder, which is technically mounted to the NAS. This might take a little while depending on your network speeds.
cp -R /mnt/pbs-backups/.chunks /mnt/pbs-backups/.lock /mnt/temp8. Now that the data has been written to the NAS, we can mount the folder on the NAS to the pbs-backups directory.
[IP_ADDRESS]:[LOCATION/FOLDER_ON_NAS] /mnt/pbs-backups nfs defaults 0 0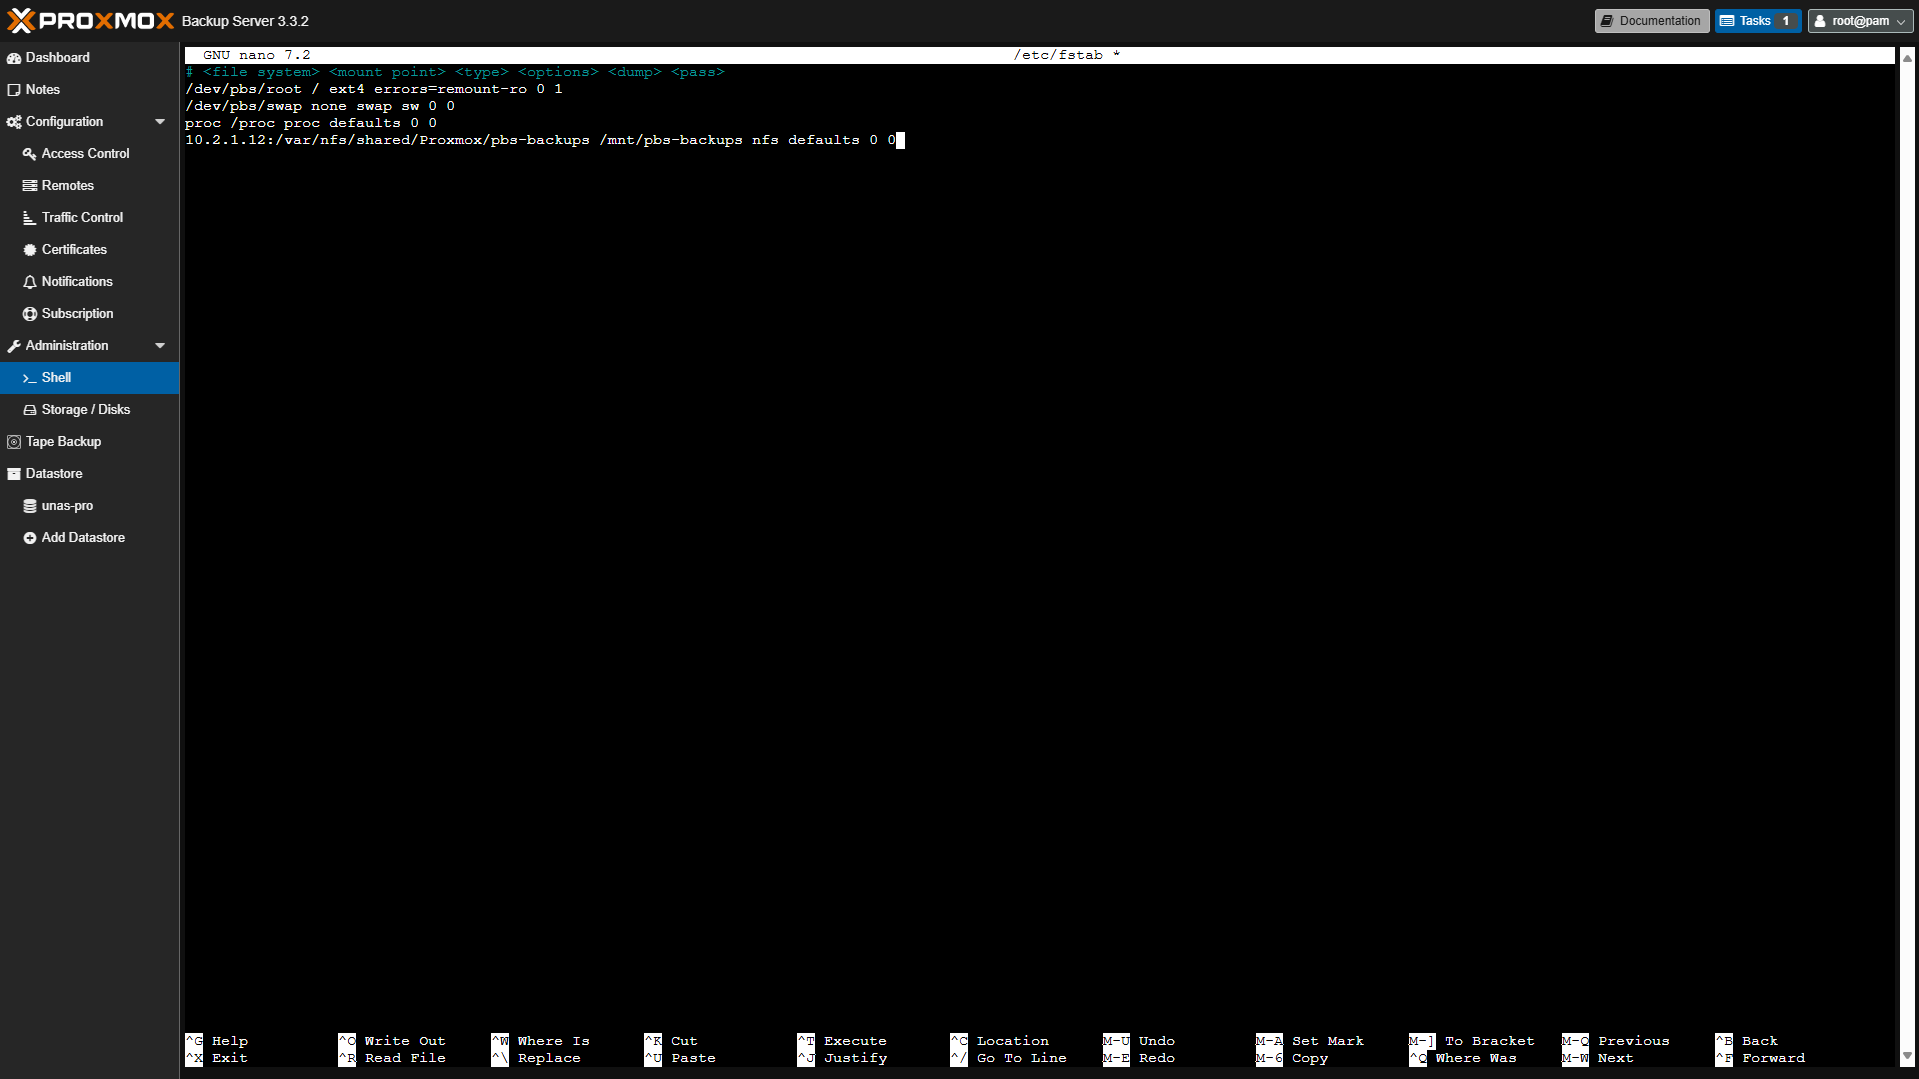
9. Run the commands below to mount the directory to the new folder.
mount-a
systemctl daemon-reload
10. Reboot Proxmox Backup Server and see if the datastore is functional. You should be able to navigate the datastore, see the available storage, and create a prune schedule.
Proxmox VE Backup Setup
Now that Proxmox Backup Server is set up and configured, we have to configure Proxmox VE to back up to it. The easiest way to do this (in my opinion) is to configure an automated schedule. Before we can do that, we have to add the storage.
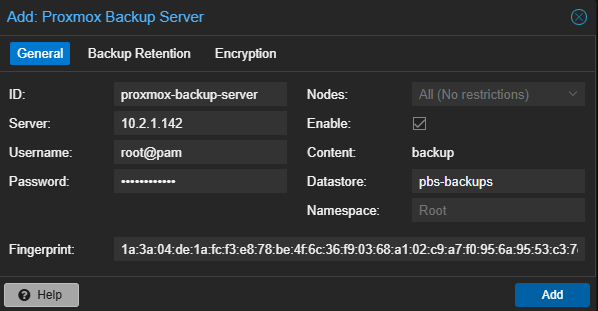
1. Select Datacenter > Storage > Add > Proxmox Backup Server.
2. Set the parameters to match the information below:
- ID: the name you’d like to use (I use pbs-backups).
- Server: IP address of Proxmox Backup Server.
- Username: root@pam (you can also use a different user, if you’d like).
- Password: Password of the root user.
- Datastore: Name of the datastore you created in PBS.
Add the storage, then we’ll create a backup schedule.
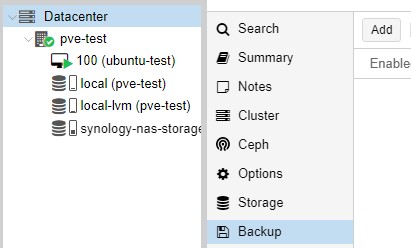
3. Select Datacenter then Backup, then select Add.
4. Select the Storage for your share (Proxmox Backup Server – screenshot below is old), then specify the Schedule, Selection mode, Compression, and Mode.
Do not back up the Proxmox Backup Server VM (if you’re running it as a VM). You can do that in the next section.
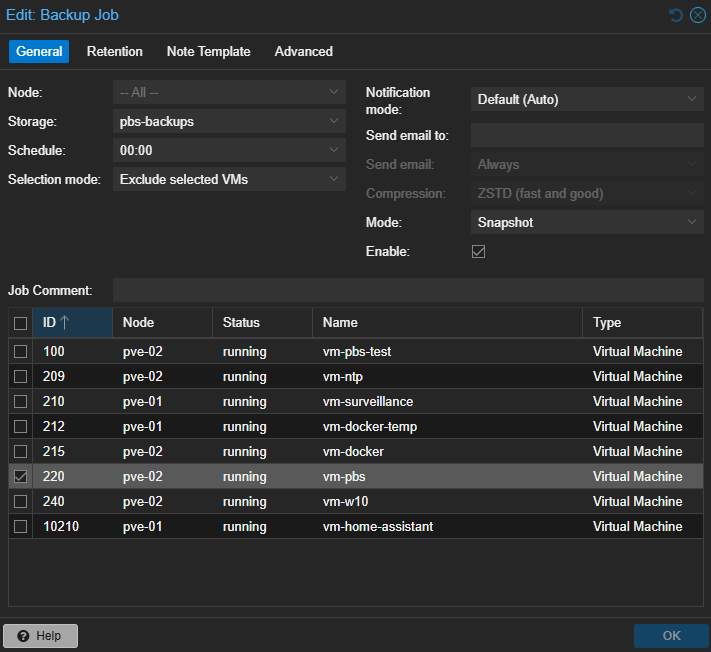
5. If you want to change any of the retention, I’d recommend doing it on the Proxmox Backup Server side.
Proxmox VE Restore Instructions
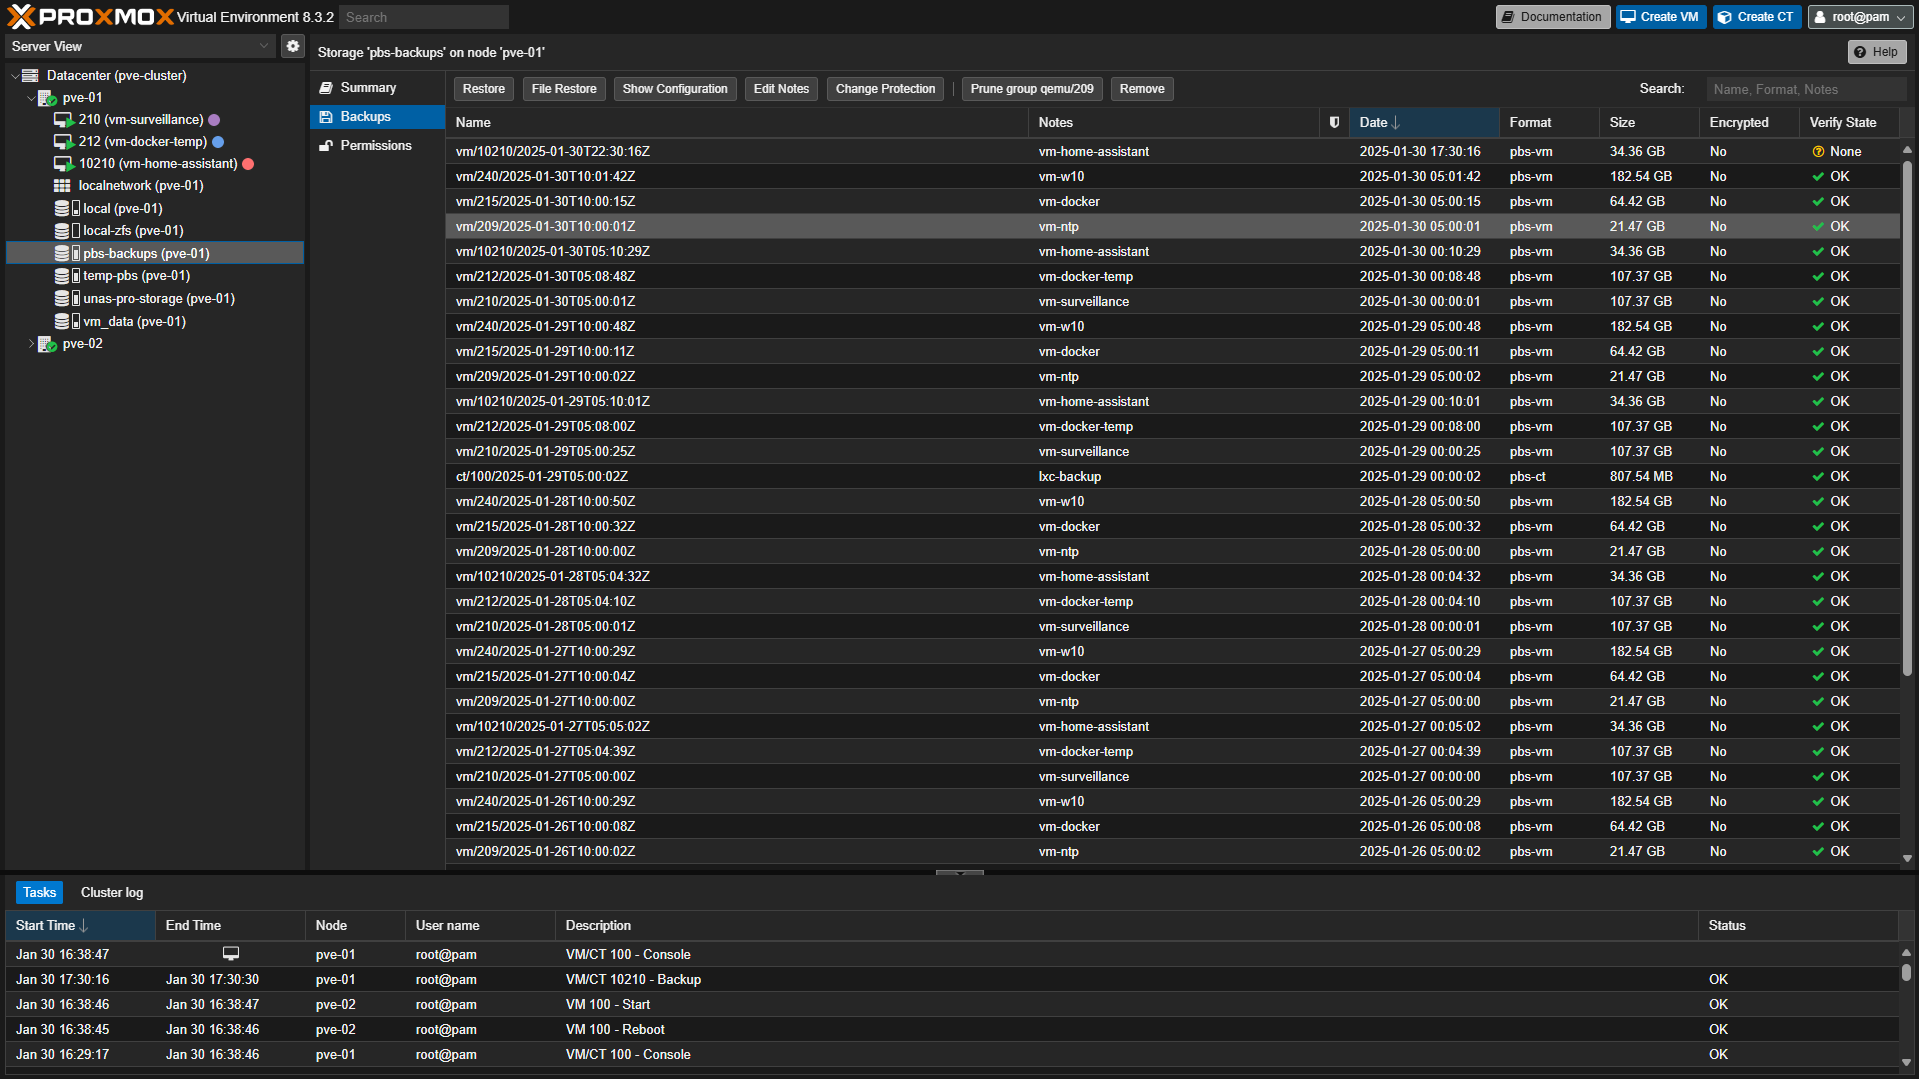
If you ever have to restore from a backup, the easiest thing to do to select the virtual machine, then the pbs-backups storage (top right), select the backup and then hit restore.

If this is new hardware, you’ll have to go through the steps of adding PBS storage to Proxmox VE, but as soon as you do, you can select the storage on the left-hand side, select backups, then restore a VM or LXC.
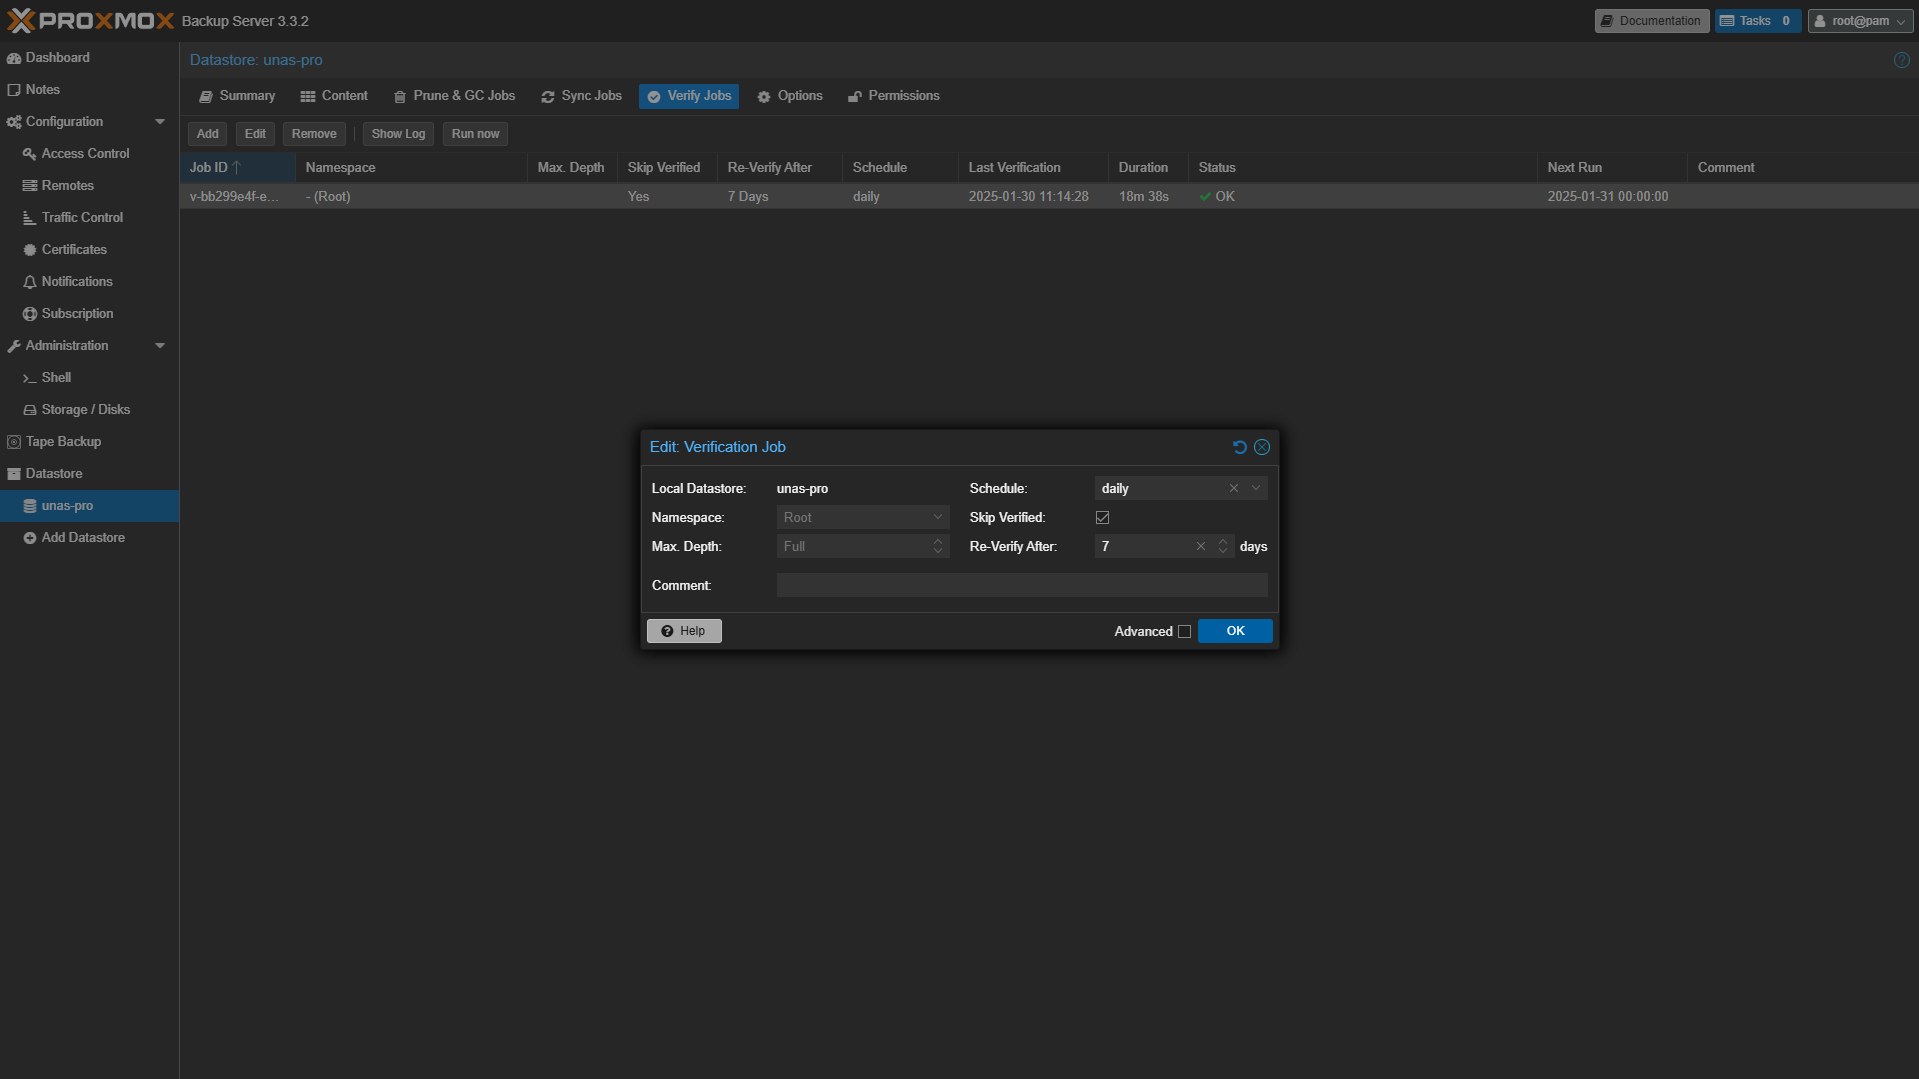
Creating a Verify Job
Verifying that you can actually restore from your backups is an extremely important step, and fortunately, it’s pretty easy with Proxmox Backup Server.
Select your datastore, then select Verify Jobs and add a new schedule. How often you’d like to do it is up to you, but the important part is that this periodically runs. You can also configure Sync Jobs to sync your data to other PBS servers as well.
Creating NFS Backups for Proxmox Backup Server
The reality is that while this has worked fine, I’m skeptical to say that it will work forever, and even more skeptical to say that it should be the only backup you should run. For this reason, I recommend configuring an NFS backup as well.
The difference is that you can set the retention to be significantly shorter than you normally would. Proxmox Backup Server uses deduplication (and it’s really…really good), so the backups are very small in comparison to if you used NFS directly from Proxmox VE. Since this is a backup…to our backup, we don’t need it to be that long. So realistically, it’s up to you, but I’d set it to be 3-7 depending on how much storage space you have available.
This is also where you can (and should) back up the Proxmox Backup Server VM.
The performance is not good for the initial backup. No other way to say it. From what I can tell, it’s because PBS uses extremely small files so by default, the performance will be worse than if you were sending over one large file.
Add shared storage on top, and I was averaging anywhere from 50-150 MB/s on a 10GbE connection. Keep in mind, I was using HDDs, so you might have better performance with SSDs.
While initial backups are slow, future backups are very fast, because you’re only doing an incremental backup and not a full backup. However, restore speeds will be average at best.
I imagine the performance will be significantly better on bare metal (especially with dedicated SSDs), but if a fast initial backup/restore is your priority, this probably isn’t the solution for you.
Final Thoughts on Proxmox Backup Server
Overall, I’ve been pretty happy with how this has been running – especially from a backup size perspective, and the incremental backups have been super fast. Again, I’m skeptical to say this should be the only backup you should run (if you’re using shared storage), but I also can’t say I’ve had any problems with it, though time isn’t on my side with that statement.
I like the fact that it’s running in a VM, I like the fact that I have backups of it, and overall, it’s just worked. I’ve used PBS in the past, but never with shared storage, so I’m confident in PBS itself…I’m just less confident in the shared storage aspect. I haven’t had to restore from it (yet), but have tested it out and everything has worked well.
So again, this is not recommended, and you might not want to do it, but for the home lab…pretty neat little solution to save yourself some storage size with your Proxmox backups.