I’ve been using Blue Iris for a few years, and overall, I’ve been extremely happy with how it functions. The one problem I’ve always had is motion notifications in Blue Iris and how they are handled. For the most part, Blue Iris with CodeProject.AI was great at detecting motion events, but sending those events to a mobile phone was always a challenge.
Why is this the BEST Way to Set Up Blue Iris Motion Notifications?
In order to understand why this is the best approach, we have to take a step back. For a little over a year, I used Home Assistant and an MQTT server. In essence, Blue Iris would send the motion notification to the MQTT server, Home Assistant would be monitoring that MQTT server and the notification would be delivered to mobile phones with an image, as well as links to the live view and recorded event.
This worked well, but was slower than I would like, and was fairly complicated for what it was actually doing. It also doesn’t help that a new version of Node Red broke the workflow, so I was forced to use an older version, but overall, the process was cumbersome and more complicated than I would like.
Ntfy: The BEST Overall Solution
About a month ago, I came across Ntfy, which is a tool designed to capture notifications. I started small, configuring uptime notifications for my home lab, but knew my ultimate goal was to get Blue Iris notifications working. After a little trial and error, I was able to get them working and they’re awesome. Since the notification is sent directly from Blue Iris to Ntfy, the performance is awesome. Easily 1-3 seconds faster than it was with Blue Iris.
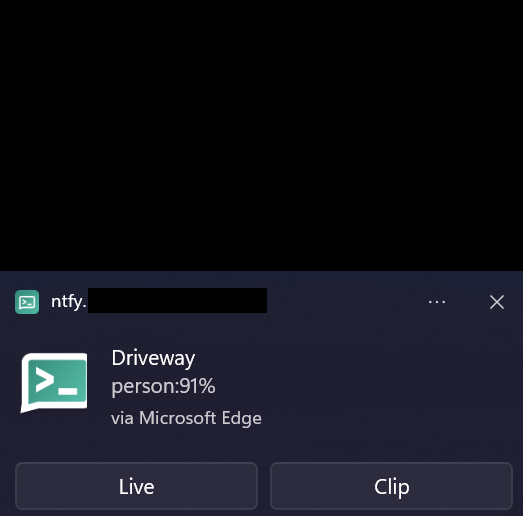
Not only is the performance better, but Ntfy allows for browser-based notifications, so when a motion notification occurs, my mobile phones are notified, but the computer I’m currently working on is notified as well (as long as Ntfy is actively open).
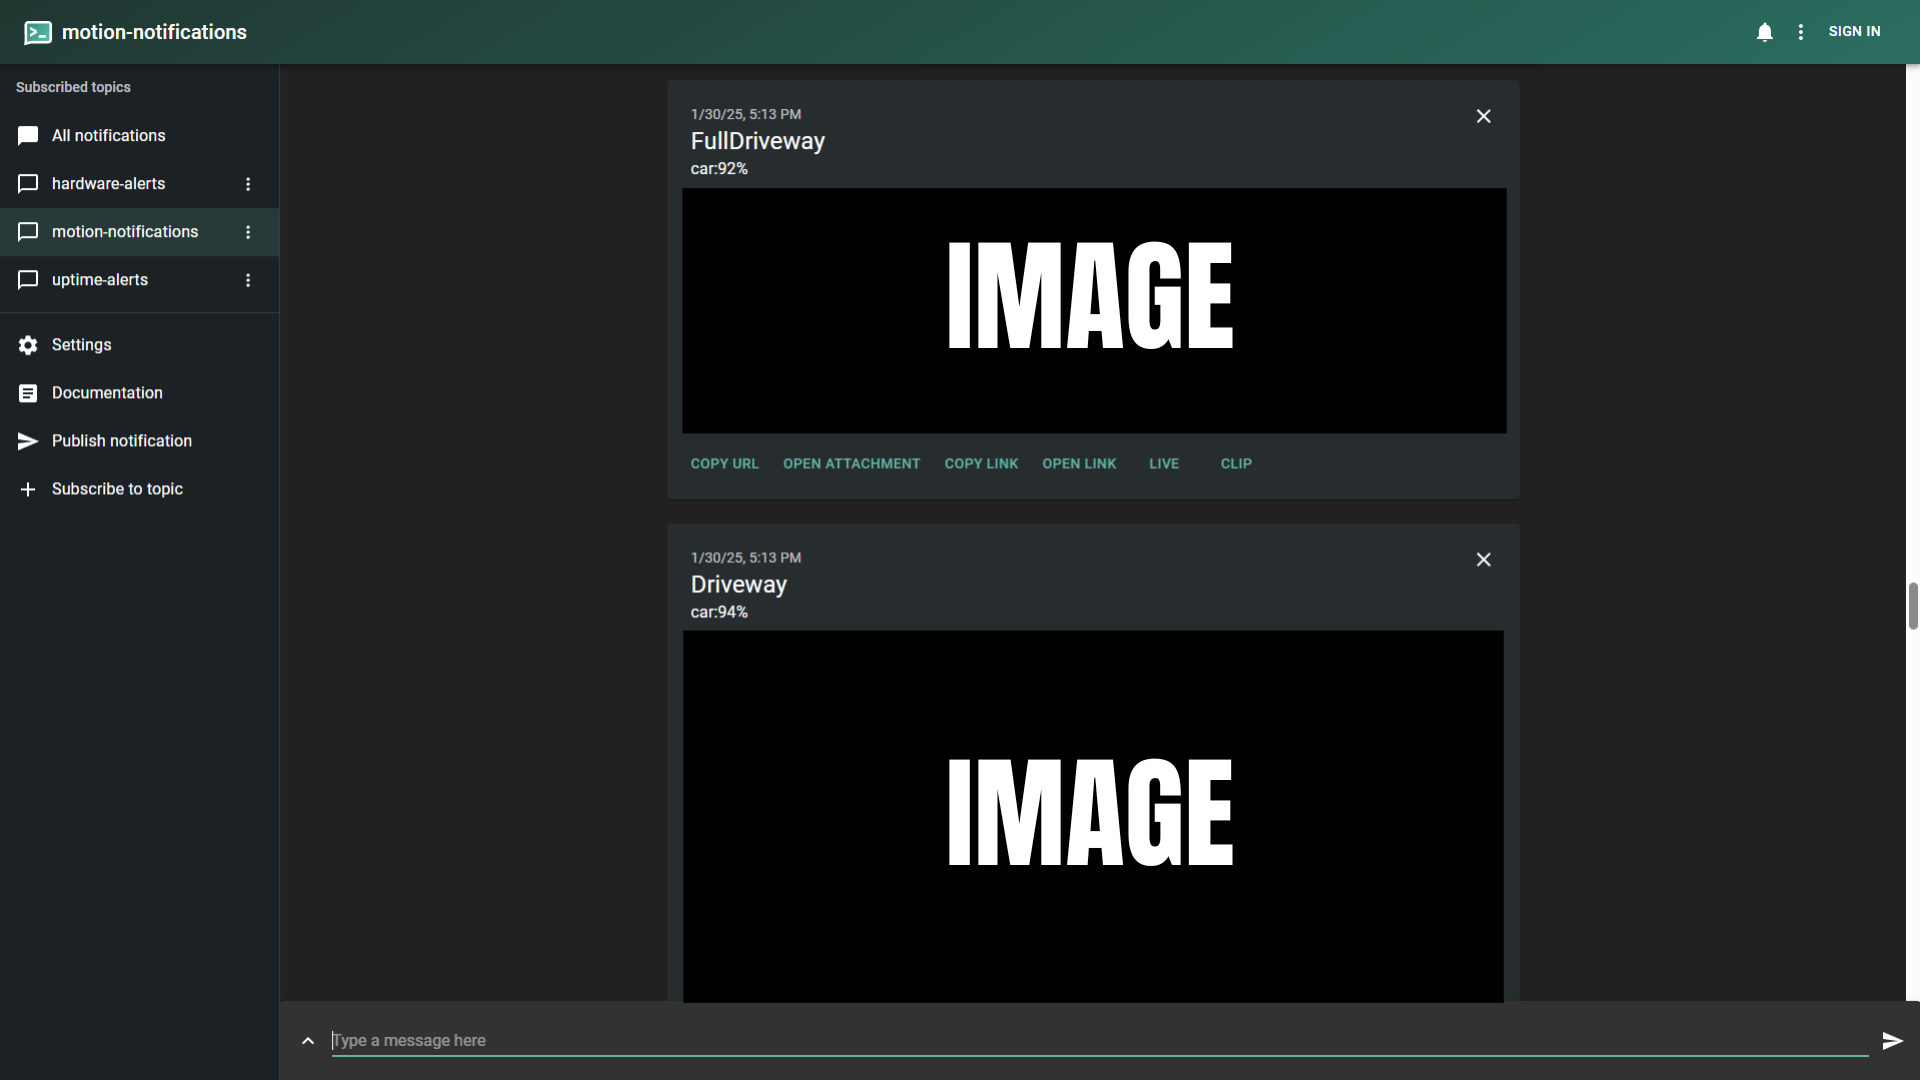
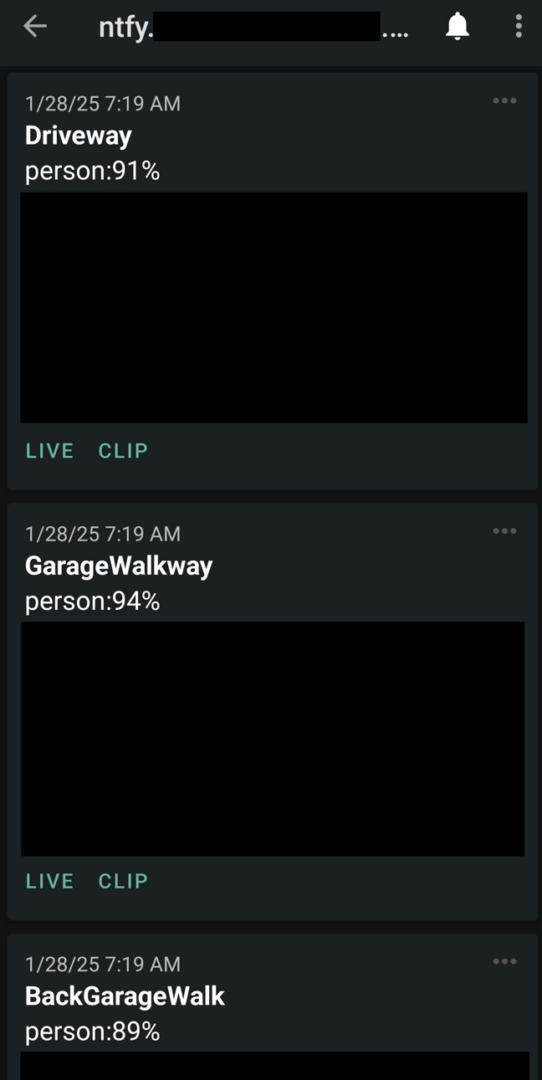
It also stores a history of notifications, so if you accidently swipe it away or just want to see what’s going on, you can monitor everything through the app.
The biggest downside, is unfortunately for iOS users. You can get motion notifications to work with iOS, but you might run into a delay. There are ways to get around it, and it’s documented fairly well, but it’s not going to be plug and play like it is for Android users. Other than that, these are the benefits Ntfy provides:
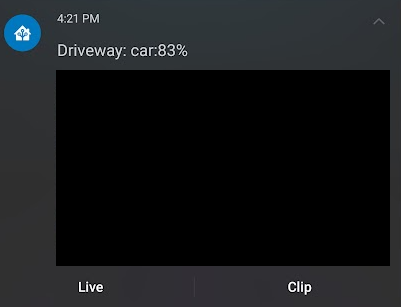
- A picture of the motion event that occurs.
- Motion details if you’re using CodeProject.AI (example: car 78%, person 80%, etc)
- A link to the motion event (recording), as well as a link to the live camera.
Overall, the process works extremely well and is very straightforward to configure with Docker.
How to Configure Motion Notifications in Blue Iris with Ntfy
There are a few steps needed to configure Motion Notifications in Blue Iris, with the first being configuring the Docker Container.
Configuring Ntfy in Docker
The very first step is configuring Docker. If you have Docker configured already, we’ll be utilizing Docker Compose to get the Ntfy container up and running. However, if you don’t, you’ll have to configure a Docker server. You can use a NAS device, Hypervisor like Proxmox, or the overall easiest solution (if you don’t own any hardware) is to just use a Raspberry Pi.
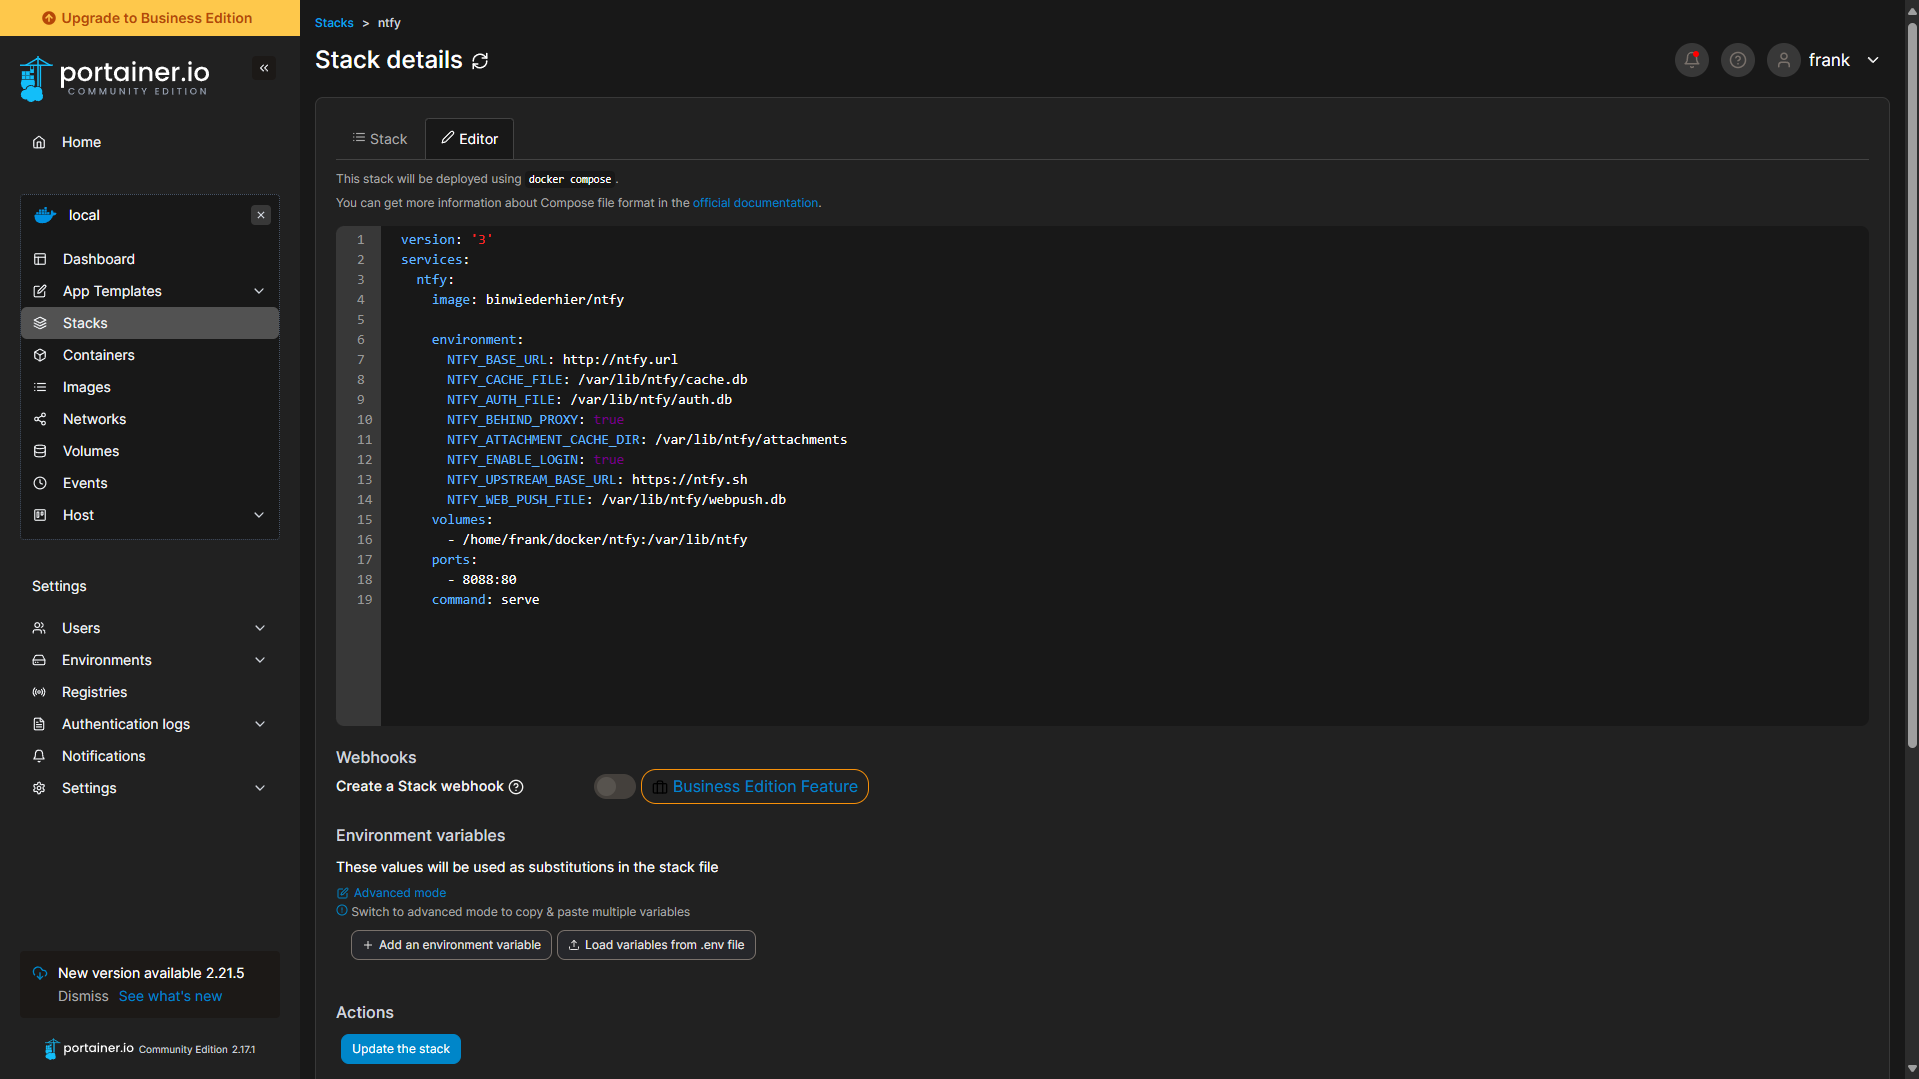
As soon as Docker is set up and configured, we have to create a Docker Container for Ntfy. This is the Docker Compose file I’m currently using:
version: '3'
services:
  ntfy:
    image: binwiederhier/ntfy
    restart: unless-stopped
    environment:
      NTFY_BASE_URL: [BASE_URL]
      NTFY_CACHE_FILE: /var/lib/ntfy/cache.db
      NTFY_AUTH_FILE: /var/lib/ntfy/auth.db
      NTFY_BEHIND_PROXY: true
      NTFY_ATTACHMENT_CACHE_DIR: /var/lib/ntfy/attachments
      NTFY_ENABLE_LOGIN: true
      NTFY_UPSTREAM_BASE_URL: https://ntfy.sh
      NTFY_WEB_PUSH_FILE: /var/lib/ntfy/webpush.db
    volumes:
      - [LOCAL_PATH]:/var/lib/ntfy
    ports:
      - 8088:80
    command: serve
The only thing you should have to modify is the [LOCAL_PATH] and [BASE_URL], which should be mapped to a local folder (for the local path), and the URL you’ll be using for Ntfy. If you don’t plan on using something like a local reverse proxy server, you can simply use the IP address and port.
If you aren’t using a local reverse proxy server, change NTFY_BEHIND_PROXY to false, and if you don’t want to log in, change NTFY_ENABLE_LOGIN to false.
Start up the container, and as soon as it’s running, you can launch Ntfy.
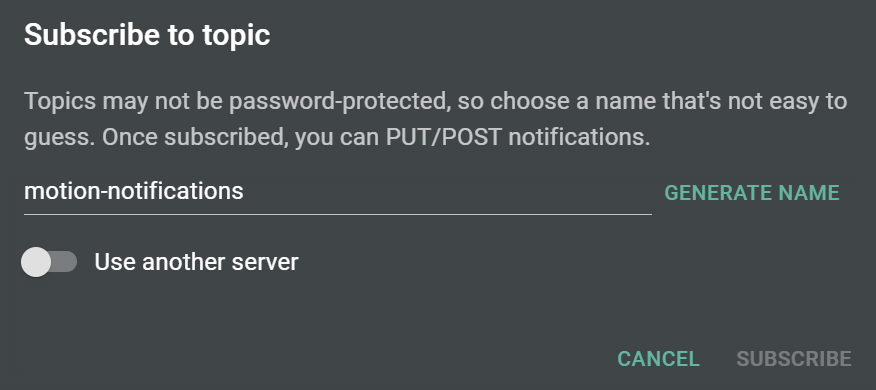
http://DOCKER_SERVER_IP:8088As soon as you’re connected to Ntfy, subscribe to the topic motion-notifications. This is where all notifications will be sent. As soon as that’s done, we can start to configure the Blue Iris server.
Configuring the Blue Iris Server
Now that Docker is configured, we can move on to configuring the Blue Iris server. The only modification we have to make outside of Blue Iris is installing curl. Ntfy works with curl commands, and we’re basically sending a curl command from Blue Iris to Ntfy any time a motion event occurs. Follow Method 1 in these instructions to install curl, as it’s a requirement to get this working.
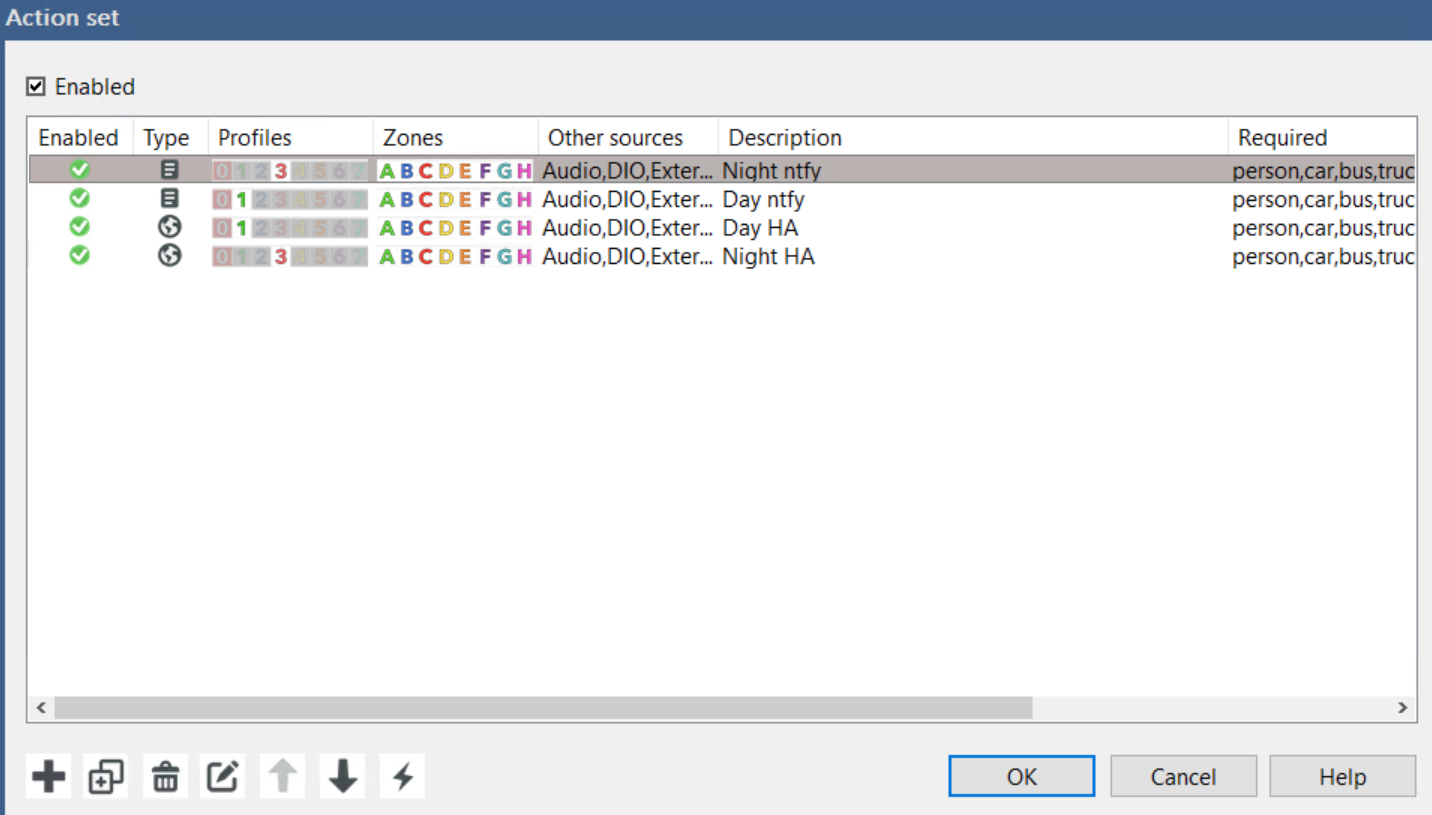
After curl has been installed, we’re going to create an alert for Blue Iris. This has to be done on each camera where you want the alert to be sent, or for your main camera (if the other cameras are inheriting their alert settings).
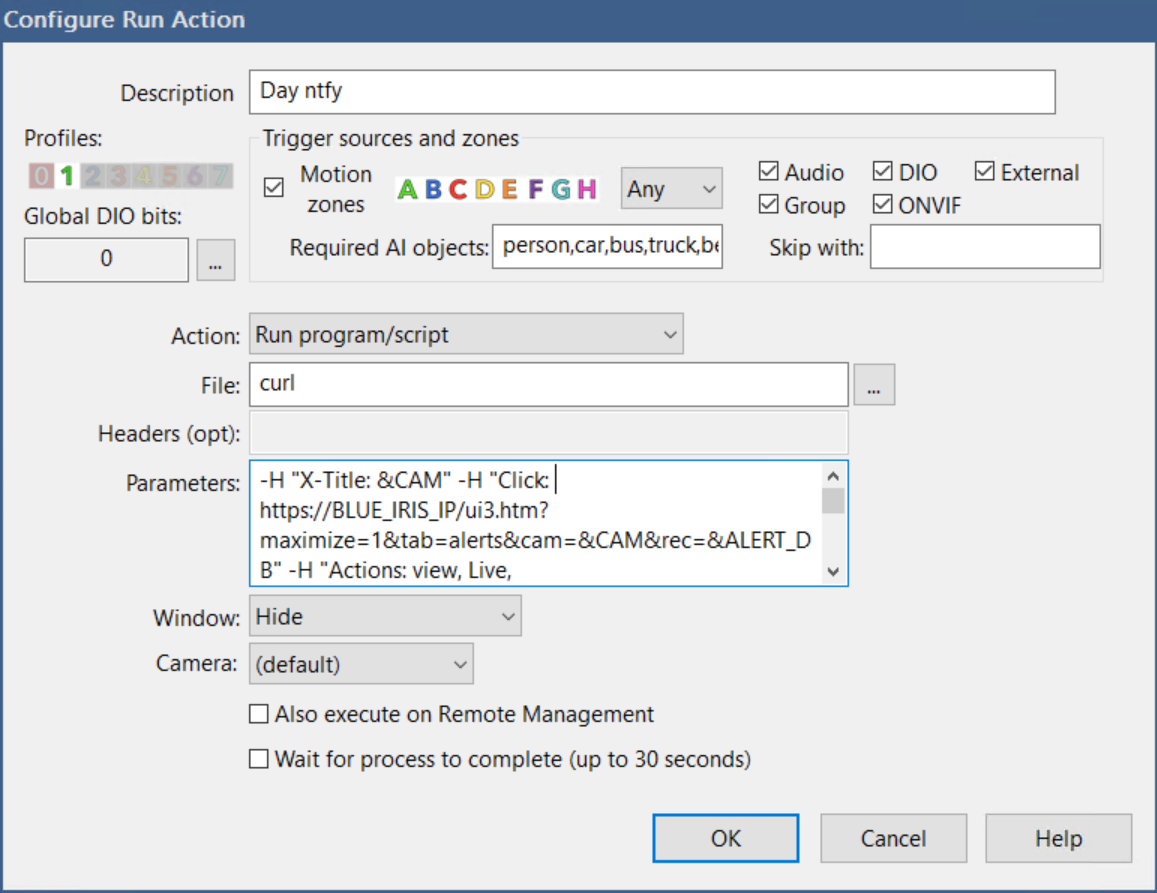
In the On Alert section, create a new alert and match the info below:
- Action: run program/script
- File: curl (you can type it in).
- Parameters: modify the code below to match your environment and paste it in there.
-H "X-Title: &CAM" -H "Click: http://[BI_URL_OR_IP(WITH PORT)]/ui3.htm?maximize=1&tab=alerts&cam=&CAM&rec=&ALERT_DB" -H "Actions: view, Live, http://[BI_URL_OR_IP(WITH PORT)]/ui3.htm?maximize=1&cam=&CAM; view, Clip, http://[BI_URL_OR_IP(WITH PORT)]/ui3.htm?maximize=1&tab=alerts&cam=&CAM&rec=&ALERT_DB" -d "&MEMO" -H "Attach: http://[BI_URL_OR_IP(WITH PORT)]/alerts/&ALERT_PATH" http://[BI_URL_OR_IP(WITH PORT)]/motion-notificationsThe code above does a few things:
- It provides an image for the actual alert.
- If you click that image, it will bring you directly to the recording of the motion event.
- It provides a Live link that will bring you to a live view of the specific camera that the motion event occurred.
- It will send the CodeProject.AI motion details (example: person 80%, car, 75%, etc), and the title of the alert will be the name of the camera in Blue Iris.
Finally, you can modify any of the other Blue Iris settings, like required AI objects (if you only want the alert for specific objects), motion zones, or profiles. Generally, I have two profiles – one for day and one for night that has different required AI objects, but that will depend on your setup.
Testing with Blue Iris + Ntfy
If everything went according to plan, you should be able to test it out by installing the Ntfy application on your mobile phone, connecting it to your Ntfy server, and subscribing to the topic motion-notifications. If everything was done properly, you should see the motion event come through on your phone, but again, if you’re using iOS, further changes may be required.
You can test either way with the Ntfy website – if it’s working there, it will work on your mobile phone as well (and Android should be as simple as installing and configuring the app).
Final Thoughts on Ntfy + Blue Iris
I waited about a month to write up this article because I wanted to test and make sure everything worked as expected. Overall, this has been a great change from my old process, is faster, less cumbersome, and simply works. I know there are a lot of steps, but most of it is configuring Ntfy. As soon as you do that, there’s really only two steps: installing curl, and adding the alert.
Once that’s done, I’d suggest testing it for a few days before disabling your other motion notifications to ensure it works, but if it’s like it was with me, you’ll be pretty confident in a day or so.
Thanks for checking out the tutorial! If you have any questions, please leave them in the comments!