Today we are going to take a look at how to set up Home Assistant on a Raspberry Pi using Docker.
My reason for using Home Assistant with Docker is because the natural progression for a lot of people is to start off using a Raspberry Pi and then migrate to some sort of a home server as they begin to utilize more services.
This approach will allow you to take your Home Assistant configuration and easily migrate it to a home server or NAS at a later time if you’re looking for a little extra processing power.
This also gives you the opportunity to use your Raspberry Pi for multiple things. I have created multiple Raspberry Pi tutorials that utilize Docker to implement different services.
Using this approach, your Raspberry Pi will be more of a “home server” as you’ll be running multiple services on it. It will also give you the flexibility of expanding in the future if you’d like.
1. How to Set Up Home Assistant on a Raspberry Pi
1. In order to set this up, I will be using Portainer as I find it significantly easier to manage my containers. If you don’t have Docker and Portainer set up on your Raspberry Pi, please follow my instructions here.
You can also use a simple Docker run command, but I find it easier to utilize Portainer for the maintenance/upkeep of containers which is why I’ll be utilizing this approach in this tutorial.
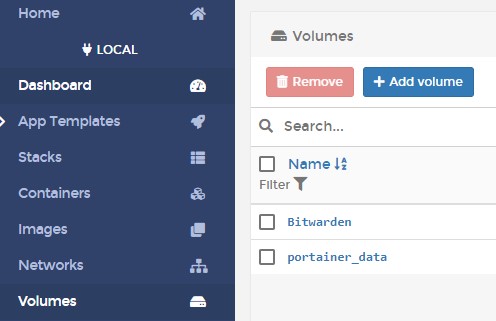
2. Launch and log in to Portainer. Select Volumes then Add Volume.

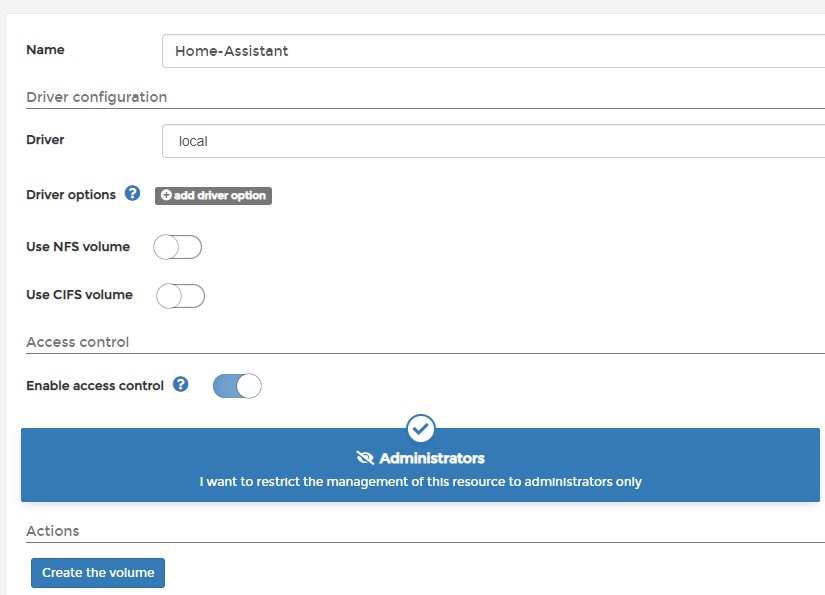
3. Give the volume the name Home-Assistant then select Create the volume.

4. Select Containers then Add Container.

5. Give the container a Name, then enter the image below. Make sure you select the Raspberry Pi 3 or 4 image depending on what Raspberry Pi device you’ll be using.
Raspberry Pi 4:
ghcr.io/home-assistant/raspberrypi4-homeassistant:stable
Raspberry Pi 3:
ghcr.io/home-assistant/raspberrypi3-homeassistant:stable
6. Select publish a new network port and map the host port 8123 to the container port 8123. If you’re using this port for something else (unlikely), please select a different host port number.

7. Select Volumes then map additional volume. Select the volume we created earlier and map it to the /config location.

8. Change the restart policy to Always.

9. In the Runtime & Resources section, enable Privileged Mode.

10. In the Environment Variables section, create an environment variable named TZ for your time zone.

11. You can now Deploy the container.
12. Give the container a few minutes to create, then navigate to the IP address of your Raspberry Pi and port 8123.
http://RASPBERRY_PI_IP:8123
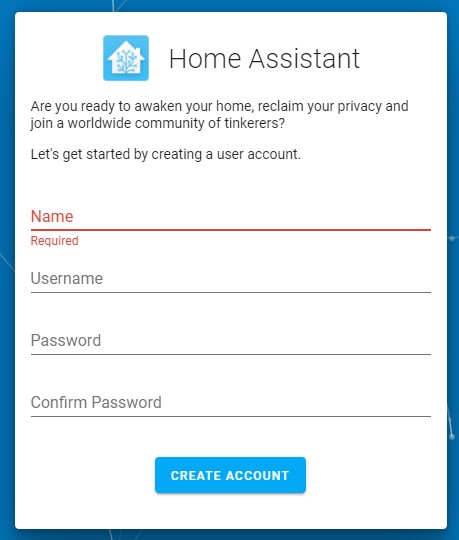
13. Create an account.

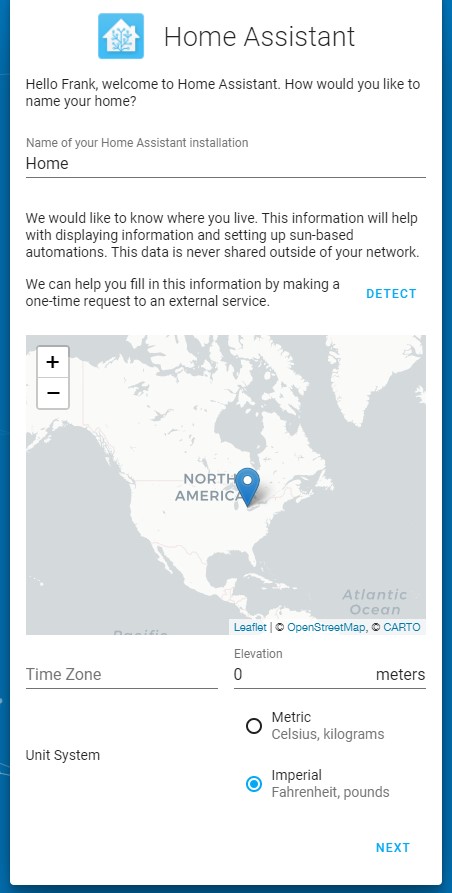
14. Select your location and the unit type you’d like to use, then select Next. If you’d like to share anonymous information, you can at the next step.

15. Home Assistant will automatically find devices on your local network. You can now set up any other integrations that you’d like!
16. Home Assistant will now be set up and configured, so you can modify it however you’d like!
2. Conclusion – How to Set Up Home Assistant on a Raspberry Pi
This tutorial showed how to set up Home Assistant on a Raspberry Pi using Docker. Home Assistant can be set up on the Raspberry Pi OS, but managing it this way is a lot better in my opinion as you’re able to run multiple services. Running Docker on a Raspberry Pi gives you the ability to run one, or multiple different containers rather than having to devote a single Raspberry Pi to certain services.
Thank you for reading the tutorial on how to set up Home Assistant on a Raspberry Pi! If you have any questions on how to set up Home Assistant on a Raspberry Pi, please leave them in the comments!


