This tutorial will focus on how to Use DuckDNS to Set Up DDNS on pfSense. There are many different DDNS providers you can use on pfSense and if you own a domain, you might want to set up DDNS on Cloudflare, but DuckDNS is an awesome alternative because it’s totally free. There are other DDNS providers that force you to click a link every 30 days or fulfill other obligations, but DuckDNS asks you to register, pick a domain name that you’ll use and that’s it. Follow the instructions below to quickly get it set up and configured!
Use DuckDNS to Set Up DDNS on pfSense
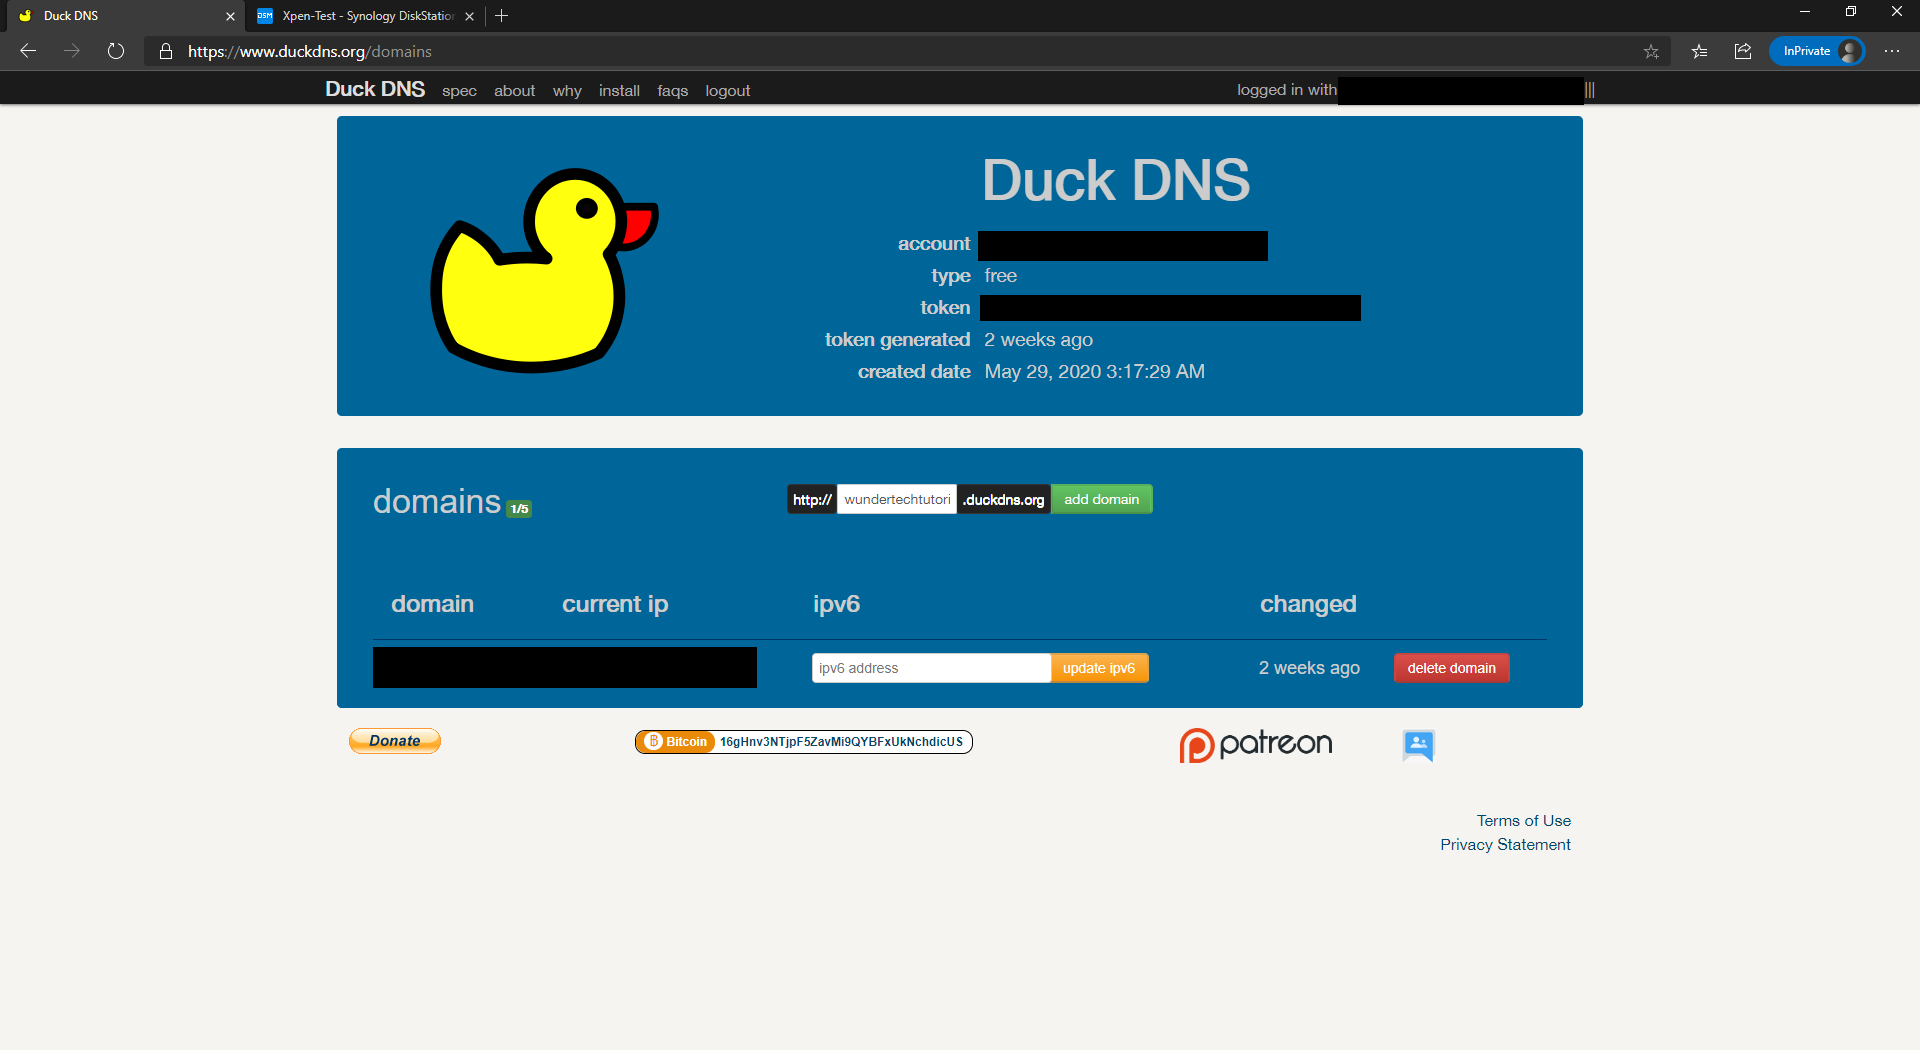
- Login to DuckDNS: https://www.duckdns.org/
- Create a subdomain and click add domain.

3. Your domain is now created and you can now connect it with pfSense.
4. Open pfSense and select Services, then Dynamic DNS. Under Dynamic DNS Clients, select Add.

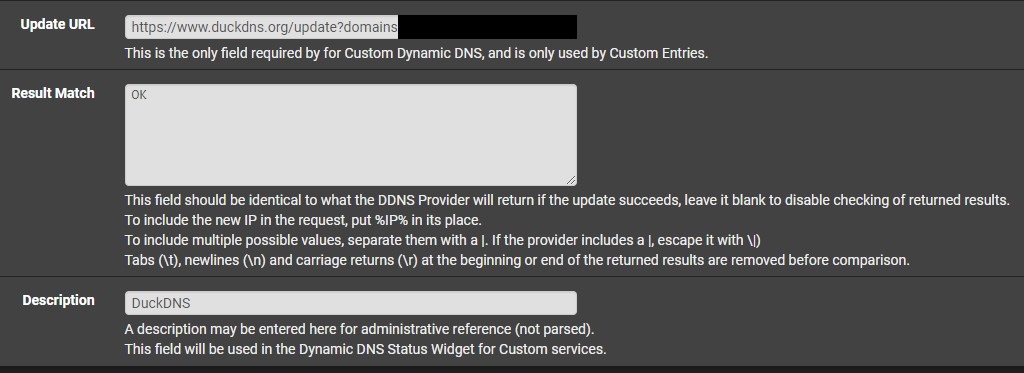
5. Under Service Type, select Custom and leave ALL settings default other than Update URL. In the Update URL, enter the string below exactly as shown, but substitute your domain and token (found on the DuckDNS website) where I have [DOMAIN] and [TOKEN] listed.
https://www.duckdns.org/update?domains=[DOMAIN]&token=[TOKEN]&ip=%IP%
6. In the Result Match field, enter OK. Give the Description DuckDNS and Save.

7. As long as the status shows a green checkmark, DDNS is set up and will update moving forward! You won’t have to monitor this at all and can utilize it for other pfSense services like OpenVPN.


