In this tutorial, we’re going to look at how to import a VM of Home Assistant on Proxmox. There are other ways of installing Home Assistant, but this is the absolute easiest way, as it takes the entire Home Assistant VM and imports it directly into Proxmox. Rather than having to run a bunch of terminal commands and install everything manually, these few steps configure the whole VM provided by the Home Assistant team.
Video Tutorial on Home Assistant on Proxmox
Watch our step-by-step video tutorial on how to import a VM of Home Assistant on Proxmox. We’ve embedded our full YouTube walkthrough below, highlighting how this was installed successfully on Proxmox using a Mini PC!
How to Install Home Assistant on Proxmox
The steps below will walk you through the process of configuring Home Assistant on Proxmox using a VM and the default qcow2 image.
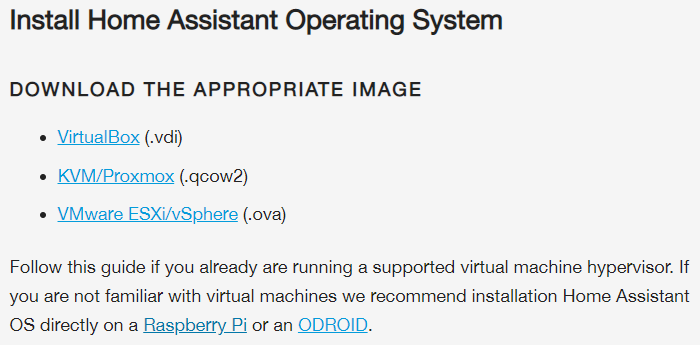
1. Make sure you have Proxmox installed and configured, then navigate to the Home Assistant downloads page and download the KVM/Proxmox (.qcow2) file.
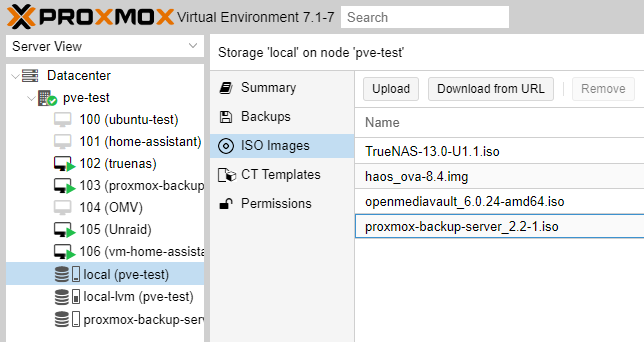
2. Extract the file, then rename it from .qcow2 to .img on your Mac/PC. This step is important because our goal is to upload it to our ISO images library in Proxmox, then import it into our virtual machine. Since the ISOs directory doesn’t traditionally store .qcow2 images, this is the best way to accomplish that.

3. After you rename the file, upload it to your ISO Images location.
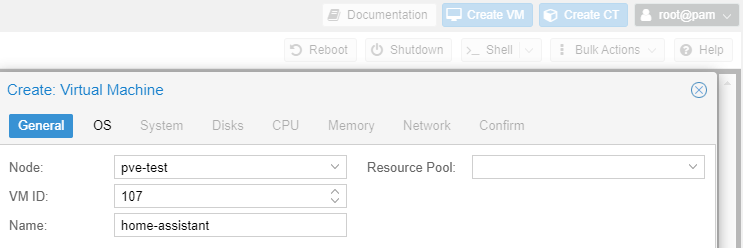
4. Select Create VM and then enter a name for the VM.
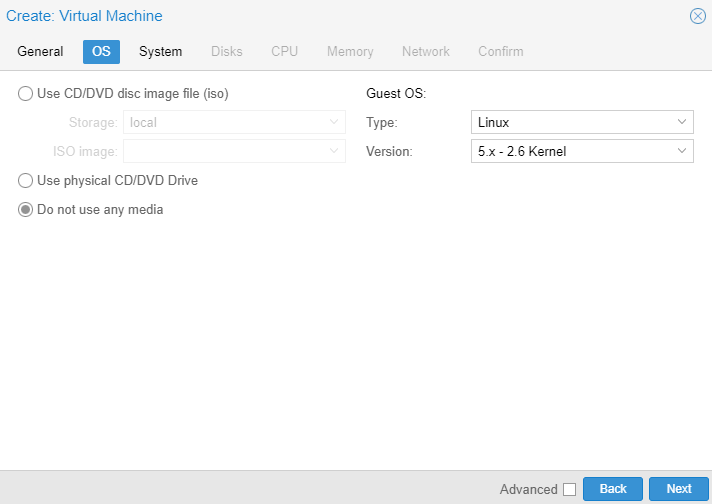
5. In the OS tab, select do not use any media.
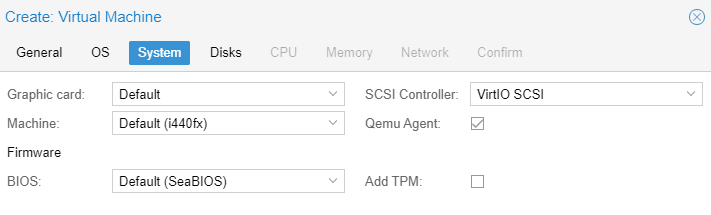
6. In the System tab, check off QEMU Agent.
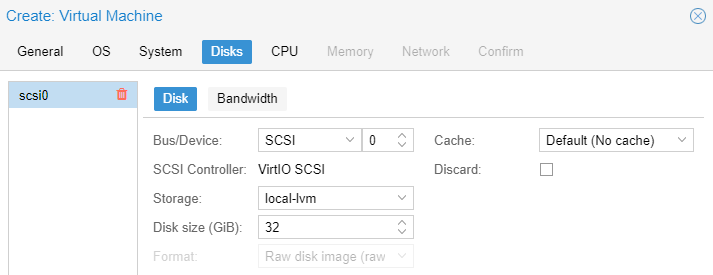
7. In the Disks tab, delete (red trash can) the scsi0 disk. You shouldn’t have any disks listed after doing this.
7. Set the CPU tab to use two cores.

8. Set the Memory to use 4 GB.

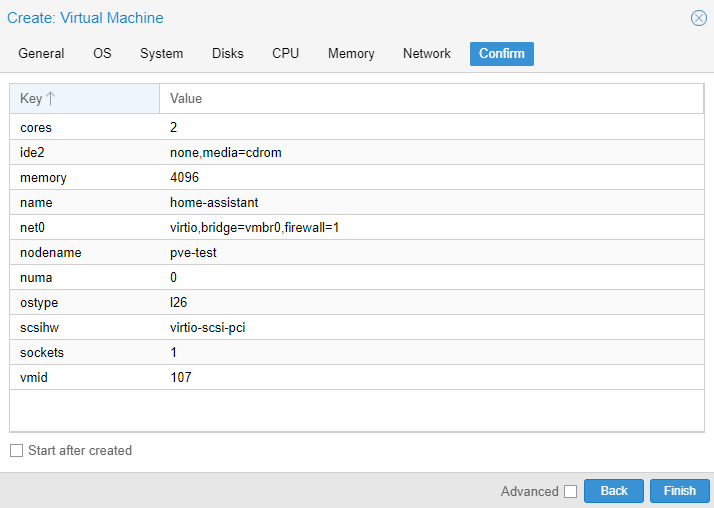
9. Navigate to the Confirm tab and ensure that Start After Created is NOT selected. Then select finish to create the virtual machine.
10. Run the command below, substituting the current version, VM ID, and Storage Location. This is how the Home Assistant OS is imported into our Proxmox VM.
NOTE: If you’re using a separate location for your ISOs, like a Synology NAS, you’ll have to navigate to that storage location. Once again, you might have to update the version below to match what you downloaded.
qm importdisk <VMID> /var/lib/vz/template/iso/haos_ova-8.4.img <STORAGE_LOCATION>
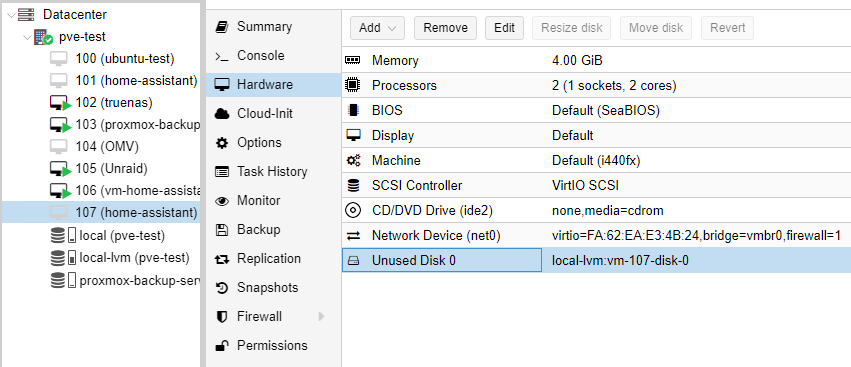
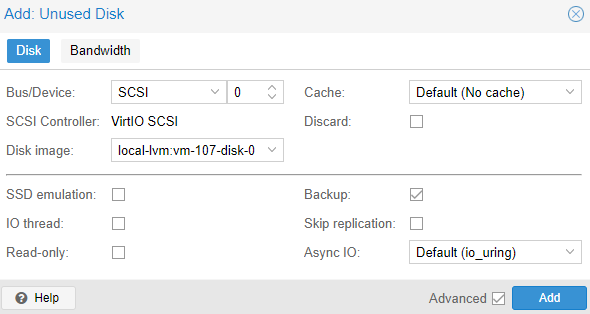
11. Select the virtual machine and edit the unused disk that we just imported.
12. Select Add to add the disk to the VM.
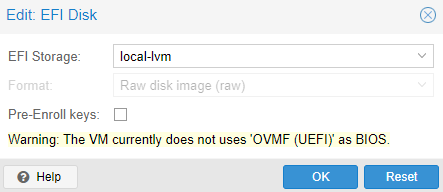
13. Next, select Add and then EFI Disk. Select your EFI Storage, uncheck pre-enroll keys, then select OK.
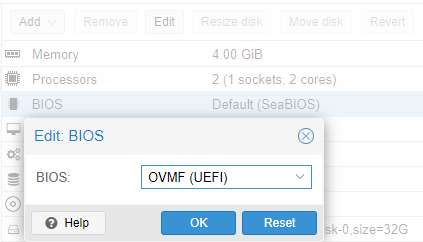
14. Finally (for the hardware changes), select Edit on the BIOS and set it as OMVF (UEFI).
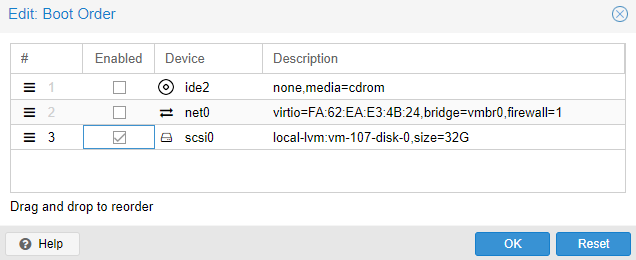
15. Select Options, then Edit the boot order.
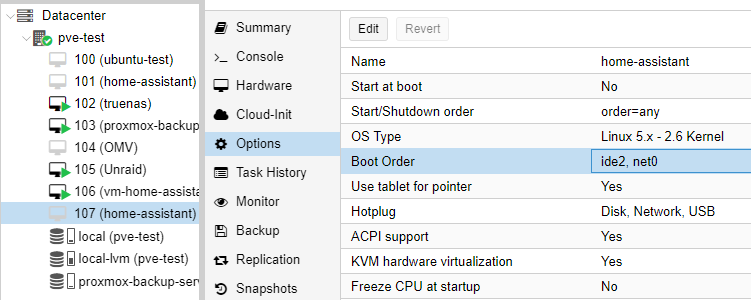
16. Uncheck ide2 and net0 and then check scsi0. Select OK to save these settings.
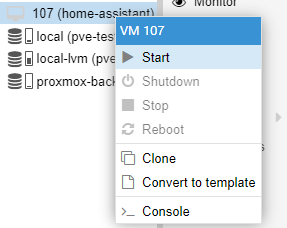
16. You can now start the virtual machine! It will take a little while to boot up the first time.
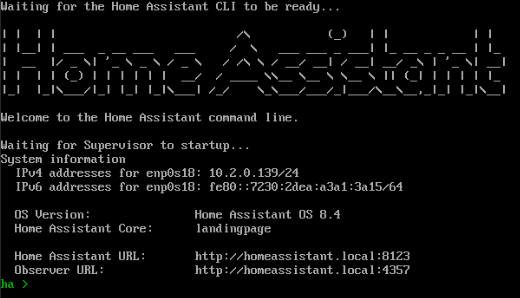
17. Once it finishes booting, you can open the console window for the VM and view the IP address that was assigned or access Home Assistant by the Home Assistant URL. After connecting to the URL, you’ll have to finish setting up Home Assistant, but it will be ready to go afterward!
There are multiple USB devices that people generally like to pass through to the Proxmox VM, and if you have one of them, follow this tutorial to add the USB device to this newly created VM.
Improving Home Assistant with Optional Add-ons
These are a few things you can do to increase the overall functionality of Home Assistant.
HACS (Home Assistant Community Store)
HACS will unleash the true power of Home Assistant so that you can install various other packages through HACS.
I would strongly urge you to follow these steps to install HACS, which will help unleash more power.
Backing Up the HAOS Virtual Machine
Now that we’ve imported Home Assistant on Proxmox in a VM, you can easily back up your entire virtual machine. This has saved me countless times, and I’d really recommend that you configure backups.
To configure backups, you can back up your HA VM to an external storage location, or you can utilize Proxmox Backup Server. Either way, you’ll be able to restore the VM if you ever need to!
Conclusion & Final Thoughts on Configuring HA on Proxmox
This is the best way to configure Home Assistant on Proxmox. It’s a direct VM image directly from the Home Assistant page, and I’ve been running it this way for many years, and it’s been great. While you can run a bunch of commands to install this, it’s a waste in my experience, and this provides a better overall result.