In this tutorial, we will look at how to set up Home Assistant on Unraid.
Home Assistant is an application that will allow you to integrate with a ton of different devices and applications (many of which are smart home devices). It’s an incredibly powerful tool, and running it on a NAS is a great option as NAS devices are generally online 24/7.
The main point that I want to highlight before proceeding is that this tutorial is not for the supervised version of Home Assistant. Overall, I find it easiest to install the supervised version of Home Assistant using a virtual machine. It is important to understand though that the supervised version of Home Assistant simply makes certain features easier, and the core version is sufficient for most.
How to Set Up Home Assistant on Unraid
We will look at the process of how to set up Home Assistant on Unraid below. This process will utilize Docker, though it is installed through the apps section.
1. Log into Unraid and select Apps.

2. Search for Home Assistant, then install the homeassistant application from the linuxserver’s repository.

3. Almost all of the settings can stay at their default values, but I want to point out a few important ones below:
Set the name as Home-Assistant (or whatever you’d like to use).

The default port is TCP 8123. If you’d like to modify that, you can in the Port section.

If you have a USB device that you’d like to pass through from the host to the Home Assistant container, you can do that in the /path/to/device section. If you do not intend on passing a device to the container, please select the remove button as you will receive errors in later steps if you don’t.

In the show more settings section, the Appdata path is the location where your configuration data will exist. This means that if you want to back up the container or move it to another server, this is the path that will hold all of the important configuration data. The default path is fine, but if you’d like to modify it, you can do so here.

4. When you’re done modifying the settings that you’d like to change, select Apply to create the container.

5. Unraid will now download the image and create the container!

6. After the container finishes installing, select Docker, then turn autostart on so that the container starts automatically.

Home Assistant Configuration
Now that the container is installed successfully, Home Assistant must be configured.
1. Navigate to the IP address of your Unraid server and port 8123.
http://UNRAID_IP:8123
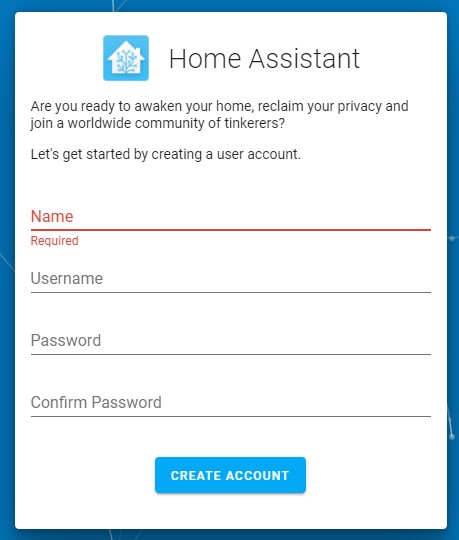
2. Create an account. This is the account that you’ll use to access Home Assistant.

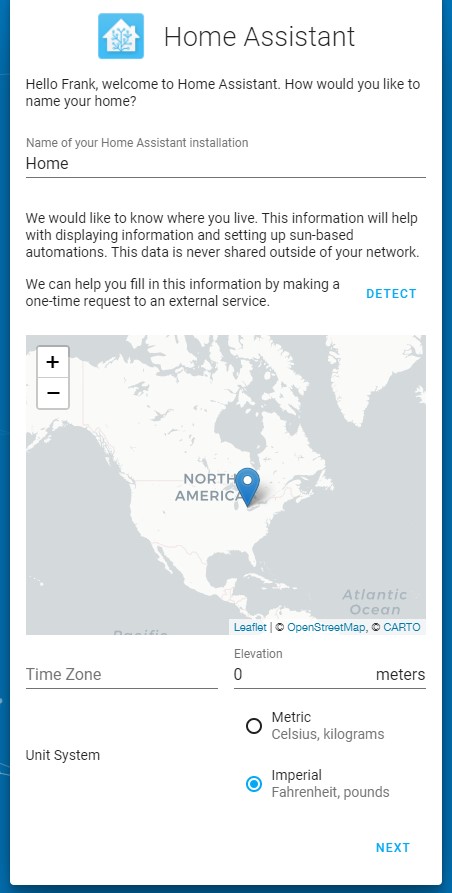
3. Select your location and the unit type you’d like to use, then select Next.

4. If you’d like to share anonymous information, you can, or you can skip to the next step.

5. Home Assistant will automatically find devices on your local network. At this point, Home Assistant is fully configured and you can now set up any other integrations that you’d like!

Conclusion: How to Set Up Home Assistant on Unraid
This tutorial looked at how to set up Home Assistant on Unraid. As mentioned above, if you’re interested in installing the Home Assistant Supervisor, it’s best (in my opinion) to run it on a virtual machine. The method in this tutorial is to run it in Docker which is beneficial in the sense that it will be portable, meaning that you can move it to another server if you’d like to. However, the Supervised version of Home Assistant has benefits as well, so it’s something everyone will have to determine on their own.
Thanks for checking out the tutorial on how to set up Home Assistant on Unraid. If you have any questions on how to set up Home Assistant on Unraid, please leave them in the comments!


