In this tutorial, we are going to look at how to set up Jellyfin on a Synology NAS.
Jellyfin is an open-source media service that’s installed in Docker. The biggest benefit that Jellyfin offers is the ability to stream data remotely for free. Overall, it’s tough to crown a specific winner for the best media streaming service as everyone will have different needs, but it’s a great platform to check out.
We will look at how to set up Jellyfin below, but the process will be slightly different for everyone as the media they have stored on their NAS will differ by location. Therefore, make sure that you enter the correct location when configuring the container!
Before looking at how to set up Jellyfin on a Synology NAS, you need to ensure that you have your media (Movies, TV Shows, Music, etc.) on your NAS in a Shared Folder. The folder structure isn’t important, but the files must live on your NAS.
How to Set Up Jellyfin on a Synology NAS (DSM 7.2 or Newer)
If you’re looking to set up Jellyfin on Synology DSM 7.2 or later, you can follow these instructions.
1. Ensure that Container Manager is installed, then open File Station and create a subfolder named jellyfin inside of the docker folder, then two folders inside of the jellyfin folder named config and cache.

2. Open Container Manager, select Project, then add a new project. Make the project name jellyfin, then select create docker-compose.yml and paste the information below.
NOTE: You will have to modify the volume (potentially) if the data is not on volume 1, and you’ll have to point to your media folders (Movies, TV shows, Music, etc.). You can also modify the timezone.
version: '3.5'
services:
  jellyfin:
    image: jellyfin/jellyfin
    container_name: jellyfin
    network_mode: 'host'
    volumes:
      - /volume1/docker/jellyfin/config:/config
      - /volume1/docker/jellyfin/cache:/cache
      - /volume1/Media:/Media
    restart: 'unless-stopped'
    environment:
      - TZ='America/Detroit'
3. Select Next, create the container, then skip down to the Jellyfin configuration (under the DSM 7.1 section).
Hardware Acceleration
If you’re using a Synology NAS that supports Intel QuickSync, you can add Hardware Acceleration by modifying the Docker Compose file.
You’ll have to search the CPU to confirm if it does support QuickSync, but most newer Synology NAS devices do not support QuickSync (outside of the DS423+ and DS224+), while most older NAS models do. In summary, if you have an Intel processor, it will support QuickSync, while AMD processors will not.
The main benefit of hardware acceleration is that the transcoding of the video, if required, will be handled by the integrated GPU as opposed to the CPU. This is generally a significantly more efficient process and you’ll be offloading this work to the GPU rather than needing the CPU. For the most part, if you can use hardware acceleration, do it.
To add hardware acceleration, you need to add the entire devices section below, while following the same instructions above for modifying the volume data.
version: '3.5'
services:
  jellyfin:
    image: jellyfin/jellyfin
    container_name: jellyfin
    network_mode: 'host'
    volumes:
      - /volume1/docker/jellyfin/config:/config
      - /volume1/docker/jellyfin/cache:/cache
      - /volume1/Media:/Media
    restart: 'unless-stopped'
    environment:
      - TZ='America/Detroit'
    devices:
      - /dev/dri/renderD128:/dev/dri/renderD128
      - /dev/dri/card0:/dev/dri/card0
Skip down to the Jellyfin configuration section when you’re done adding hardware acceleration.
Setting up Jellyfin on Synology (DSM 7.1 and Under)
1. Install Docker from Synology’s Package Center.
2. Open Docker, then download the jellyfin/jellyfin container from the registry using the latest image.

3. When the download is complete, double-click the image to launch the installer.

4. Select Use the same network as Docker Host, then select Next.

5. Give the container a name, enable auto-restart, then select Next.

6. At the Volume Settings section, select Add Folder.

7. Select Create Folder under Docker, then create a folder named Jellyfin. Create two subfolders under the Jellyfin folder named config and cache.

8. Select the newly created folders and set the Mount Paths as /config for the config folder, then /cache for the cache folder.
NOTE: This is where the important information for this container will exist, so make sure you back up the Jellyfin folder!

9. This is the trickiest part of the setup process because it will be different for everyone outside of the config and cache folder mapping. The folders that you map here will be based on the media structure that you have set up.
Examples
If you have one Media folder created with sub-folders for TV Shows and Movies, you only need to mount the top-level folder (Media). Your folder structure and Docker Volume section would look like this:


NOTE: If you have separate shared folders created for your media (one for TV Shows, one for Movies, etc.), you must create different mount paths for each. Your folder structure and Docker Volume section would contain a folder for each media type (Movies, TV Shows, etc), then a separate mount path for each (/movies, /tv_shows, etc).
It’s important to set everything up this way because when you are in Jellyfin later and adding your media folders, you need to be able to access them from Jellyfin. If you don’t map the media folders in this section, you won’t be able to access your media in Jellyfin.
10. Confirm the settings, then select Done to create the container! If you’re using Synology’s Firewall, create an Allow rule for port 8096 (which is the default Jellyfin port).

Jellyfin Configuration: How to Set Up Jellyfin on a Synology NAS
1. Open a web browser and navigate to the IP address below. Port 8096 is the default port for all Jellyfin installations.
http://[NAS_IP]:8096
2. You will be brought to the default Jellyfin page. Pick your language, then select Next.

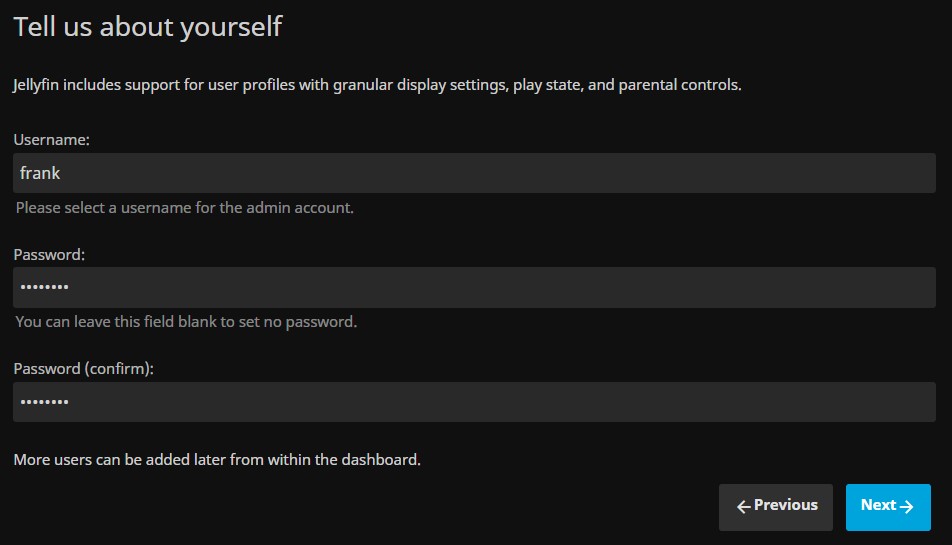
3. Enter a username and password, then select Next.
4. You will now need to enter your media libraries. Select Add Media Library, enter the content type, and then add a new folder.
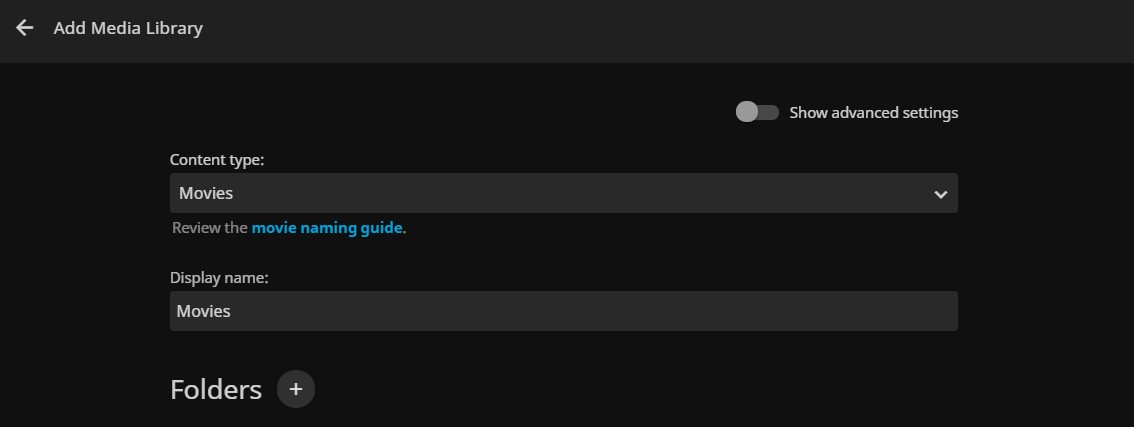
5. In this section, you will need to select the folder that you added earlier. This will be completely user-specific, but you need to map the content type to the top-level folder.
This means that the Movies content type should be mapped to the Movies folder. Edit any additional settings that you’d like and select Ok.
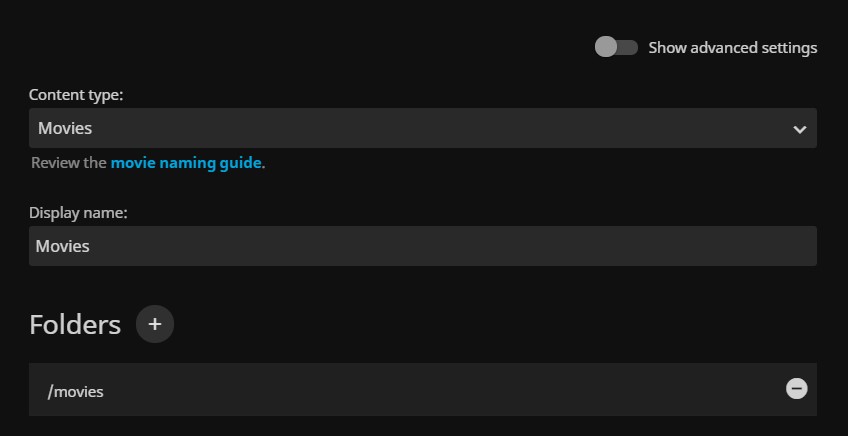
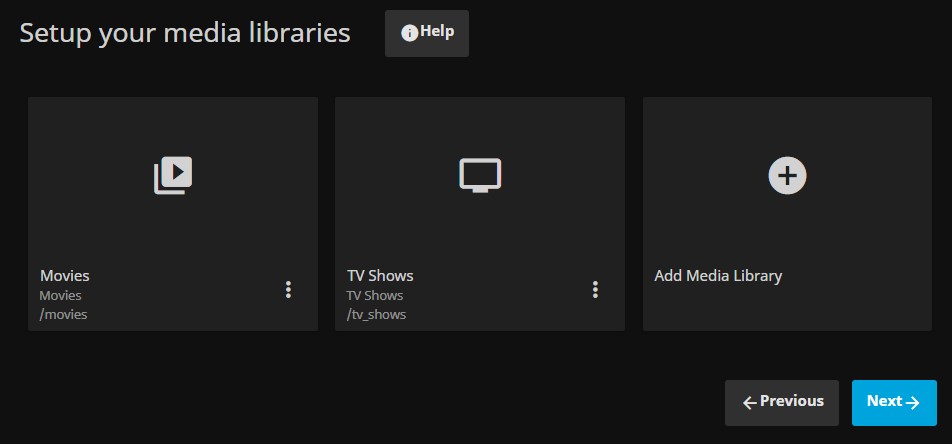
6. Complete steps 14 and 15 for all media types that you have, then select Next.
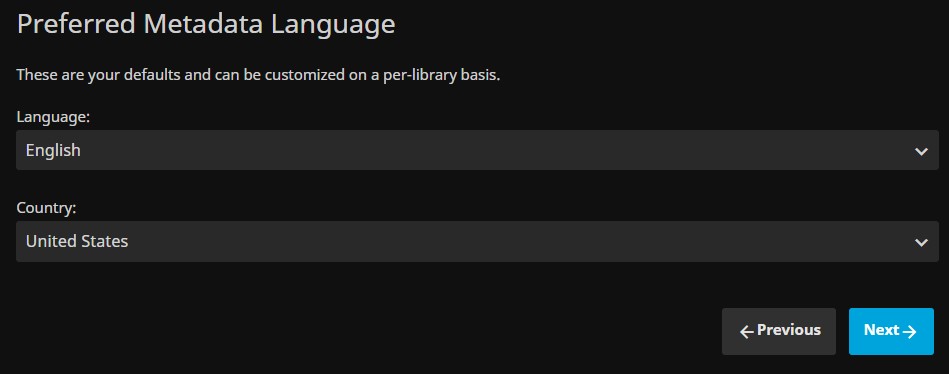
7. Select your preferred metadata settings, then select Next.
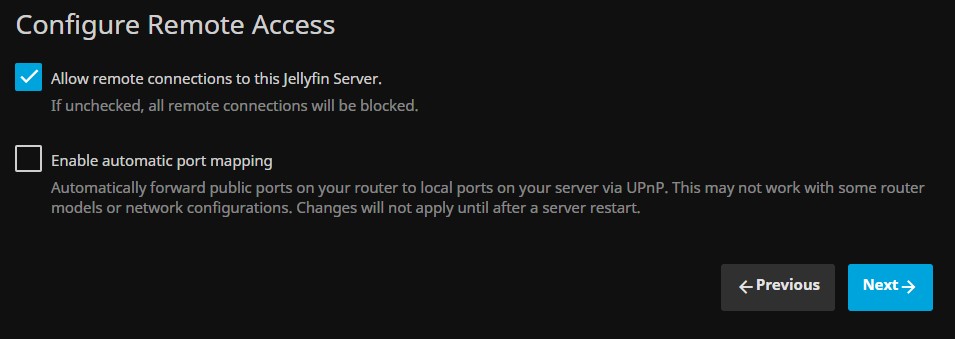
8. Configure your remote access settings. I highly suggest that you keep the second UPnP option deselected, as UPnP is an overall security risk.
If you’d like to access your data remotely, I suggest that you use a VPN like OpenVPN or Tailscale, and port forwarding (potentially with a reverse proxy) if that’s not possible.
9. Select Finish. The setup process is now complete!

The media that you have will now sync. This process took a long time for me. The best thing you can do is leave it overnight and check back in the morning, especially if you have a lot of data.
If you’d like to modify some of the admin settings, select Settings and then Dashboard under the admin section. There are a bunch of settings that can be changed here.
Conclusion: How to Set Up Jellyfin on a Synology NAS
This tutorial looked at how to set up Jellyfin on a Synology NAS! Jellyfin is awesome and it also has the benefit of being open-source with a lot of the “premium” features that other services charge for. That’s not to say it’s an overall better platform or that you should switch from the application you’re currently using, but it’s a great alternative.
Thanks for checking out the tutorial on how to set up Jellyfin on a Synology NAS. If you have any questions on how to set up Jellyfin on a Synology NAS, please leave them in the comments!


