Today we are going to take a look at how to set up Tailscale on a Synology NAS. Tailscale is a zero-configuration VPN. What this means is that without port forwarding, you’re able to access ALL of the devices on your local network. Since Synology devices are almost always online, your Synology NAS is a great device to run Tailscale on.
The best part of Tailscale is that NO port forwarding is required, which means that you don’t have to be a network expert to implement this, and if you’re behind something like a CGNAT, Tailscale will still work.
Tailscale uses the WireGuard protocol, so if you want WireGuard on your Synology NAS, this is the only current option that you have, though it’s not “true” WireGuard.
1. How to Set Up Tailscale on a Synology NAS
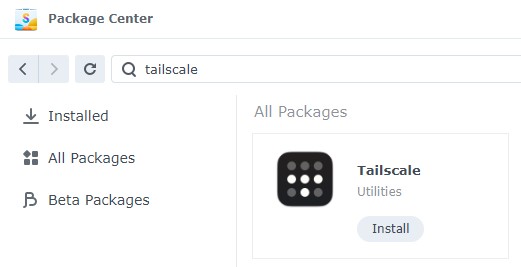
1. On your Synology NAS, open the Package Center and search for Tailscale, then, Install the package.
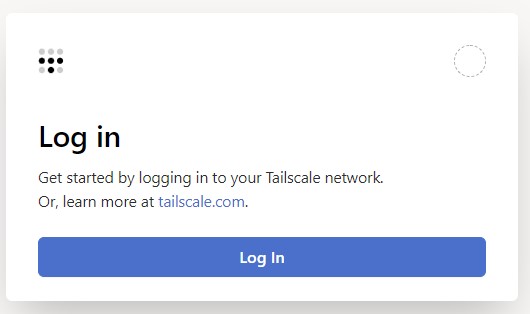
2. When it’s done installing, select Open and a new page will open asking you to log in. Log In (or create an account if you don’t have one).
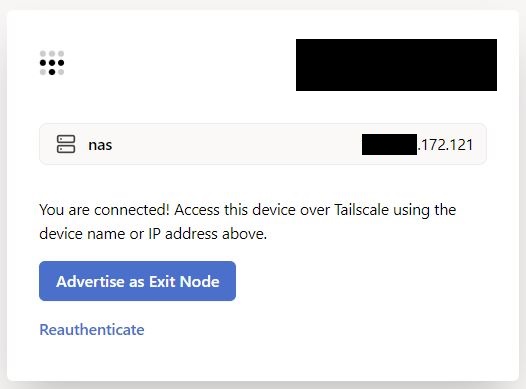
3. After you log in, you can go back to your Synology NAS and open the Tailscale application. You will see that your NAS was assigned an IP address. Move on to the next step to learn what you can do when connected to Tailscale.
2. Connecting to Devices using Tailscale
In the last step, we set up our Synology NAS and it was automatically assigned an IP address. Use a different device (a mobile device is great) and download the Tailscale app. Sign in using the same account you initially signed into, and you’ll see your device listed.
Connect to the Tailscale VPN and use the IP address listed (with the DSM port) to automatically connect to your NAS. You should be brought to the DSM login page. Please keep in mind that if you aren’t connected to the Tailscale VPN, you will not be able to get to the Tailscale IP address for your NAS.
http(s)://TAILSCALE_NAS_IP:[DSM_PORT]
3. Connecting to Other Devices on your Local Network
While using the process above is great for connecting to the NAS only, you can actually use your NAS to connect to the other devices on your local network. To set this up, you’ll need to SSH into your Synology NAS as it’s the only way to advertise a route as of the writing of this article.
1. SSH into your Synology NAS.
2. Run the command below, substituting your internal IP subnet where the 192.168.1.0/24 is listed below. To be clear, you should only be changing the 192.168.1 portion so that you’re able to connect to all devices on your local network.
sudo tailscale up --advertise-routes 192.168.1.0/24 --advertise-exit-node --reset

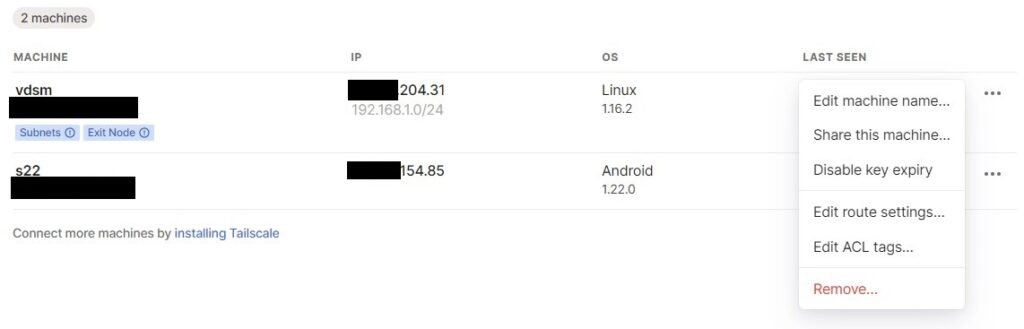
4. After you run the command above, log in to the Tailscale admin portal. Under Machines, you should see the two machines that you set up (DSM and your mobile device).
5. Under DSM, you’ll see that the subnet we defined is set, but we need to confirm that we actually want to use it here. Under the three dots next to our DSM instance, select Edit Route Settings.
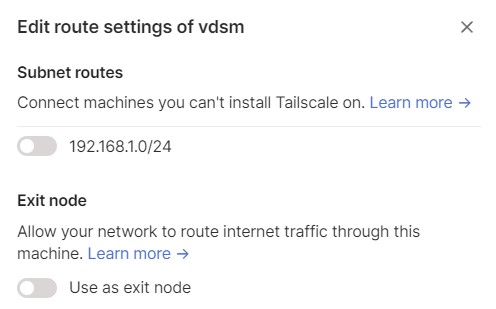
6. Enable both options (subnet routes and exit node). After you enable both options, you’ll be able to connect to devices on your local network by their local IP address. At this point, you should be able to connect to DSM using the local IP address that you normally use at home.
4. Exit Node
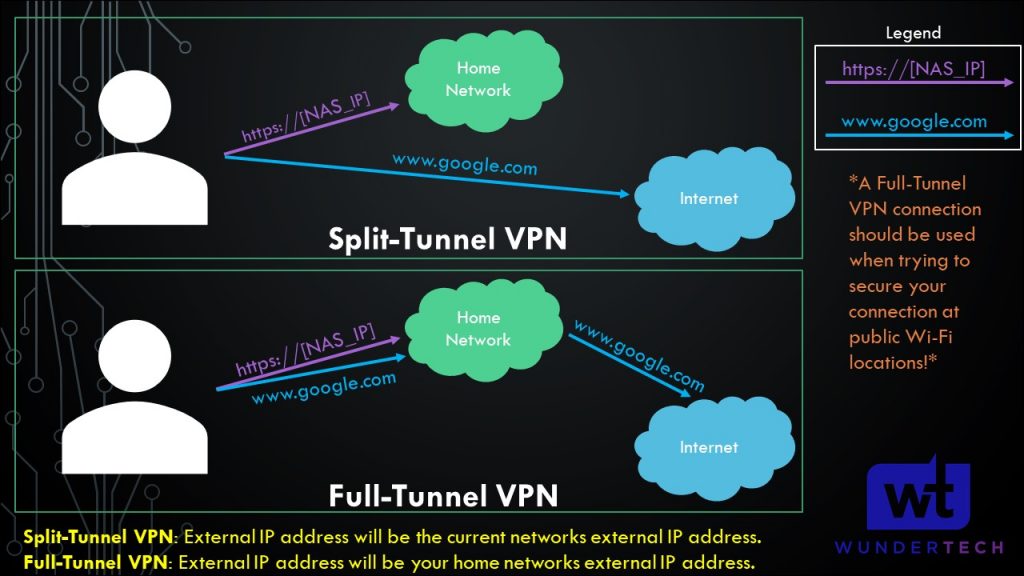
Using Tailscale as an exit node is using it as a full-tunnel VPN. The image below highlights what a full-tunnel vs split-tunnel VPN is, but the important takeaway is that ALL of your traffic will be routed through Tailscale. Therefore, if you’re on public Wi-Fi, it’s probably a good idea to use this feature as you’re tunneling all traffic.
On whatever application you’re using, select Use Exit Node and change the exit node to be your Synology NAS. If you do not want to use the exit node, select None, but ensure that Allow LAN Access is enabled so that you’re able to connect to your local devices.
5. Enabling Outbound Connections
By default, devices can access a Synology NAS running Tailscale, but the Synology NAS will not be able to access devices on Tailscale due to the permission structure in DSM 7. For this reason, we have to set up a startup script that runs every time DSM is rebooted. This is directly in the Tailscale documentation and the code exists there if you’d like to audit exactly what is happening when this script runs.
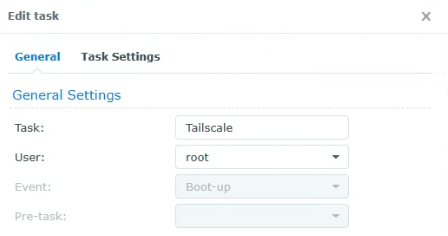
Open the Control Panel, select Task Scheduler, then create a new User-defined Script Triggered Task.
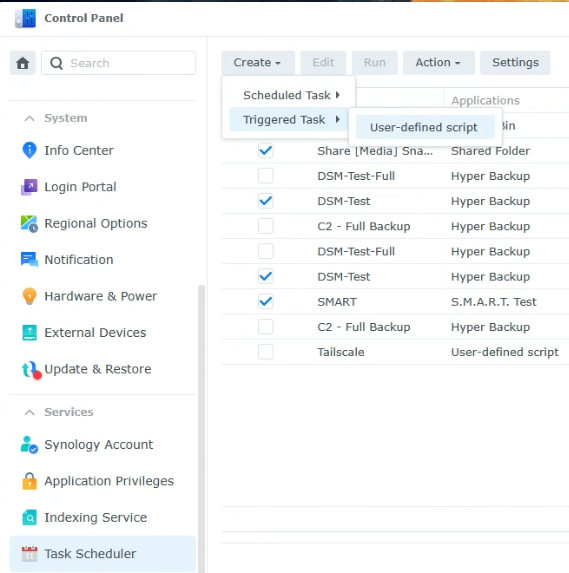
2. Set the task to run as the root user and give it a name.
3. In the Task Settings, paste in this command, save, then reboot the Synology NAS. The script will run and outbound connections will work properly.
/var/packages/Tailscale/target/bin/tailscale configure-host; synosystemctl restart pkgctl-Tailscale.service
6. Conclusion & Final Thoughts: Should You Use Tailscale?
This tutorial looked at how to set up Tailscale on a Synology NAS. Even if you have a VPN working, the simplicity of Tailscale is truly remarkable. Out of all the VPN solutions I’ve tried, it took me less than 10 minutes to set up a fully functional split-tunnel and full-tunnel VPN that allows me to connect to my local network quickly and easily. The performance has been solid, and it works as designed.
Thanks so much for checking out the tutorial on how to set up Tailscale on a Synology NAS. If you have any questions, feel free to leave them in the comments!