Today we are going to look at how to setup DuckDNS on a Raspberry Pi.
DDNS is a way to automatically update a name server (in this case, DuckDNS) in real-time with your external IP address. There are many reasons why you might need a DDNS hostname, with one of the most common being creating a VPN Server. In this tutorial, we will run through the commands to setup DDNS on a Raspberry Pi.
Instructions – DuckDNS Raspberry Pi
Before you start the setup tutorial, ensure that you have navigated to https://www.duckdns.org and setup a user account. We will be using the domain and token that exist on that page
1. SSH into your Raspberry Pi. If you aren’t sure how, you can find our tutorial here.
2. After you SSH in, we need to make a directory and then create a file in that directory that will run at a scheduled time (created in later steps).
mkdir duckdns
cd duckdns
nano duck.sh

3. We’re now going to place a script in this file that will run at a scheduled interval. The script needs to have the domains you are using (from DuckDNS) added to it.
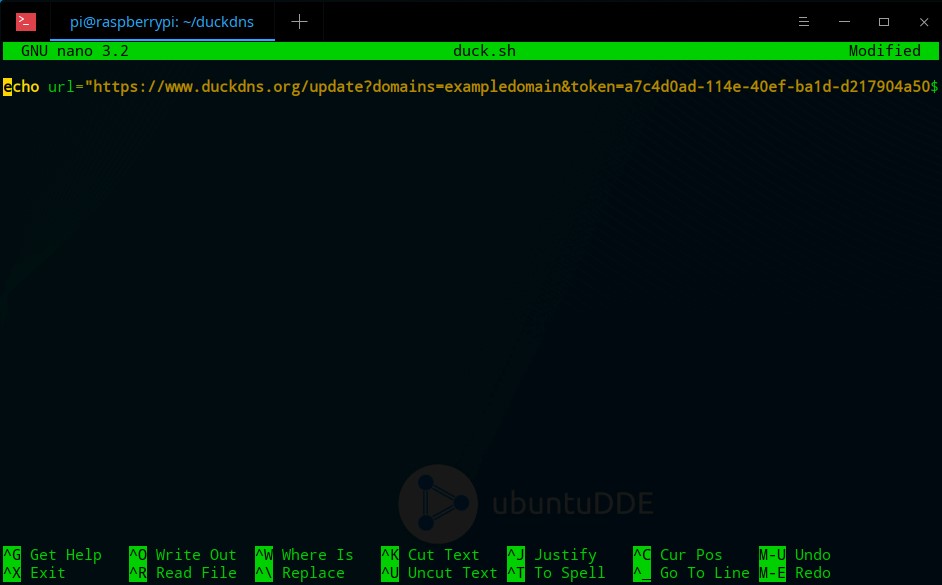
echo url="https://www.duckdns.org/update?domains=[YOUR_DOMAIN]&token=[YOUR_TOKEN]&ip=" | curl -k -o ~/duckdns/duck.log -K -
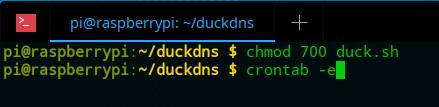
4. We now need to change the permissions of these files and access crontab to schedule this script to run every five minutes. Crontab is a task schedular that automates certain commands.
chmod 700 duck.sh
crontab -e
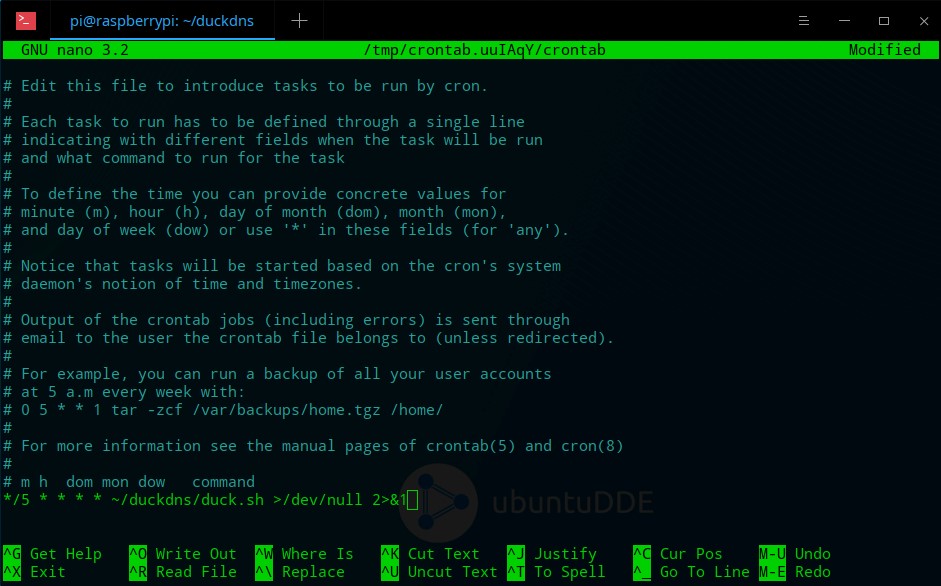
5. Paste the contents of the file below in the crontab file.
*/5 * * * * ~/duckdns/duck.sh >/dev/null 2>&1
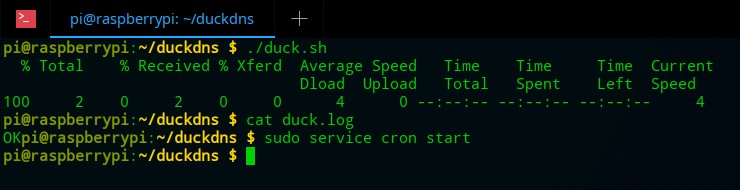
8. The job will now run every five minutes. We will test it, and assuming it works, start the cron service. If you receive OK after running this command, the process worked properly. If you receive KO, you have an error somewhere in your script file or you did not give the file the proper permissions.
./duck.sh
cat duck.log
sudo service cron start
Conclusion
This is a very simple and straight forward process, but we will be building on top of this in future tutorials. Ensuring that you are connecting to your external IP address is very important when you use services that require your external IP address.
If you’re interested in using your new DDNS to setup a WireGuard VPN, check out our tutorial here!