This tutorial will show how to SSH into a Synology NAS. Accessing the terminal is very important as it allows you to do various things not easily accessible through the Synology DSM GUI. The setup process is extremely simple and you’ll be able to connect in and SSH in no time.
1. Enable SSH on your Synology NAS
Please follow these instructions to learn how to SSH into a Synology NAS. Following these steps will help enable SSH on a Synology NAS.
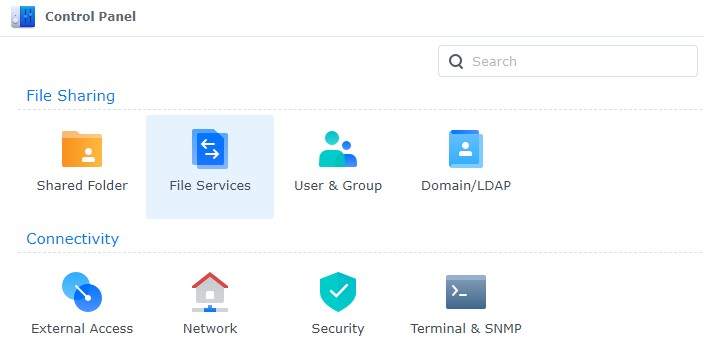
- Open the Control Panel inside of Synology DSM and select Terminal & SNMP.

2. On your Synology Enable SSH service. The default Synology SSH port is 22. You can change this to something else if you’d like, then Apply.

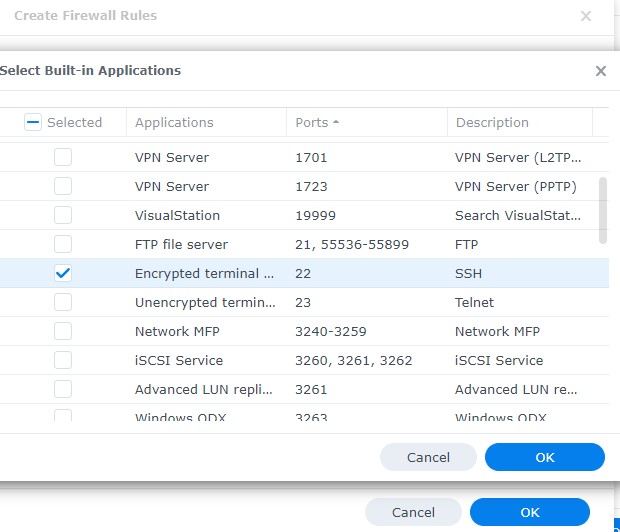
3. If you’re using Synology’s Firewall, create an Allow rule for port 22 (Security > Firewall > Edit Rules). If you aren’t sure how to use Synology’s Firewall, please watch this video as it’s an important security step.

2. How to SSH into Synology NAS Device
Now that we have enabled SSH on our Synology NAS, we need to actually connect to it.
1. SSH into your Synology NAS using your favorite SSH tool like PuTTy (shown in SSH video above) or the terminal by running the command below.
ssh username@SYNOLOGY_NAS_IP
2. You will then have to enter in your Synology DSM credentials to connect.

3. If you receive the Synology SSH Connection Refused error, ensure that SSH has been enabled and the firewall rule for the correct port has been created.
2.1 SSH Commands List
Here are a few examples of different commands you might run on your Synology NAS:
1. If you changed the SSH port from 22 to something different, you can use -p to SSH using a different port.
ssh username@SYNOLOGY_NAS_IP -p [PORT]
2. The sudo -i command below will allow you to access the root user. The Synology SSH root password will be the password to the account you’re currently connected with.
sudo -i
3. To access the superuser, run the command sudo su.
sudo su
4. The ls command will list all files in the given folder.
ls
5. The ls -a command will show all files and folders, plus any hidden files and folders.
ls -a
6. The cd command will allow you to navigate to new folders.
cd
7. The cd.. command will allow you to go one folder up.
cd..
8. To go to the last folder you were at, the command cd – can be used.
cd -
2.2 Safety and Security with SSH Protocol
There are a few things that you need to be aware of now that you’ve enabled SSH on your Synology NAS. First off, if you’re utilizing two-factor authentication to access your NAS through DSM, enabling SSH will bypass two-factor authentication and a password ONLY will be required.
Not only does SSH open your Synology to tons of possibilities, but it’s important that you secure it and NEVER open port 22 on your router. In my opinion, it’s also a good practice to enable SSH only when you need it. Following this best practice will ensure that the SSH port is open when you’re actually doing something, rather than always.
A security change that you can make to toughen the security if you leave SSH enabled is to enable autoblock. This will force any IP address to be banned after a certain number of failed logins.
While we like to think that attacks only happen from outside of our local network, it’s not out of the realm of possibility that a local device can get compromised and be used as an entry point in tryibrute-force force attack your NAS. Following security best practices is always in your best interest.
The second thing that’s incredibly important to understand is that you’re accessing everything on your NAS, meaning that you have access to the entire filesystem. Changes that you make can be incredibly detrimental if you’re not being careful and you run the risk of causing major issues if you aren’t entirely positive that the change you’re making is the right one.
Accessing a Synology NAS via SSH is very powerful and can unlock tons of things from your NAS that you never imagined.
However, you also need to be aware that those changes come with a risk. It’s always important to ensure that you have proper backups, but ensuring that you’re being very careful when you are making changes through SSH is just as important.
3. Conclusion & Final Thoughts: SSH + Synology
This tutorial looked at how to SSH into a Synology NAS. As mentioned above, there are tons of things that you can do inside of the terminal, but be careful. As of DSM 7, Synology warns that you can indirectly break things inside of DSM if you decide to SSH into it, so understand exactly what you’re doing before running any commands!
Thank you for checking out the tutorial – if you have any questions, feel free to leave them in the comments of the YouTube video!


