In this tutorial, we will look at how to update Proxmox.
When you first set up and configure Proxmox VE, the repositories that you’re automatically set to use are the Enterprise repositories which require a license. To be entirely clear before we move any further, it is recommended that you use the enterprise repositories with an enterprise license if you intend on using Proxmox in a production environment. While we can set Proxmox to use a no-subscription repository (and install updates), it is not guaranteed that the updates you install will be stable.
For this reason, the process below should be used for situations where close to 100% uptime is not necessary, as updates can potentially cause issues. With that said, I’ve never personally run into an issue with any of the updates installed – however, that doesn’t mean that it’ll never happen.
How to Update Proxmox without Subscription
We will look at how to update Proxmox VE below. As mentioned above, the enterprise repository (which you need a license for) is enabled by default. Instead, we will be switching to a no-subscription repository, but as mentioned above do not change repositories if you require stable updates (as close to 100% uptime as possible).
If you have an enterprise license, skip to the next step which will show how to update Proxmox VE.
1. This is a new installation of Proxmox VE, and it’s currently running v7.3-3. In the Repositories section, you’ll notice that the enterprise repository is enabled.

2. We will quickly modify this by accessing the Repositories section and selecting Add.

3. Select No-Subscription, then select Add. The no-subscription repository will now be added to Proxmox!

4. The final step is to disable the enterprise list by accessing the Repositories section, highlighting the enterprise file, then selecting the Disable button to disable it.

5. After it’s disabled, the enabled checkbox should not be selected.

Updating Proxmox
Now that the repositories have been updated, you can either run updates through the GUI or by using the Shell.
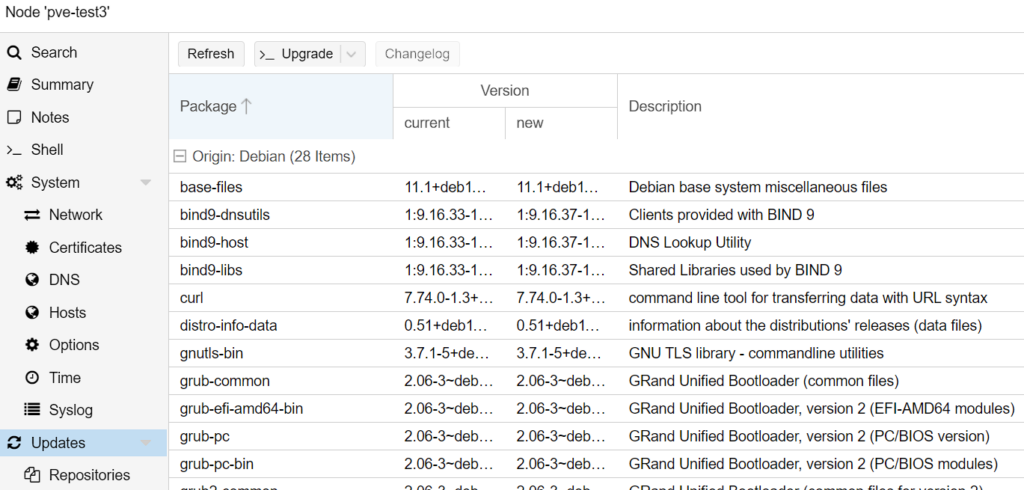
1. If you’d like to use the GUI, select Updates, then Refresh. Assuming that the repositories are configured properly, a bunch of updates will be displayed (a pop-up window will appear first showing the output).

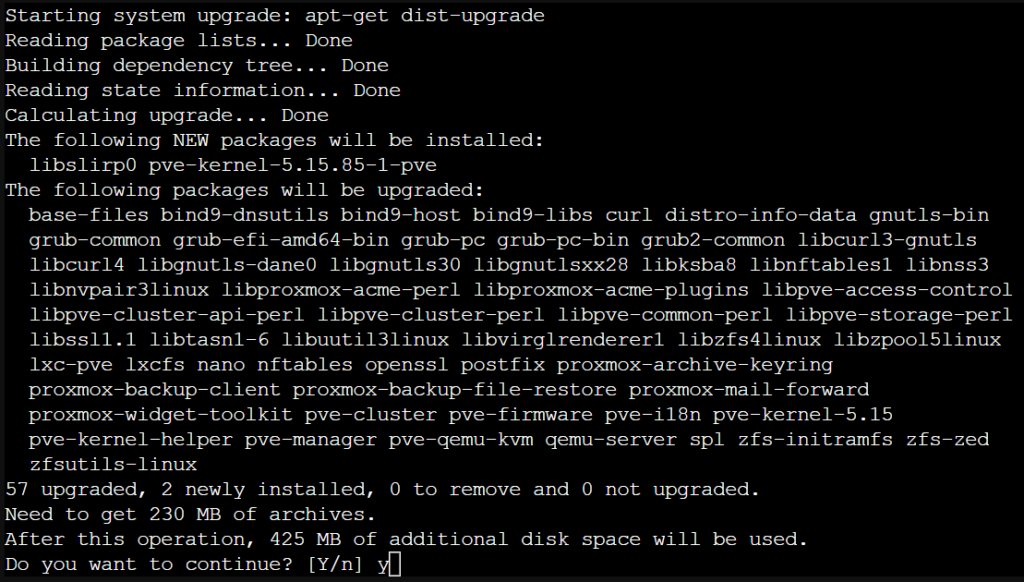
2. To update, select Upgrade which will launch a new window with the packages that will be upgraded. enter Y and then press enter to install the updates.

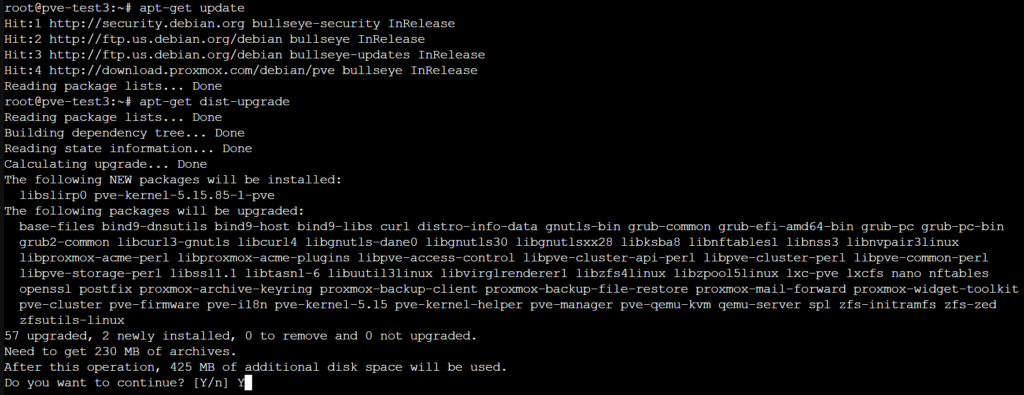
3. Alternatively, you can run the two commands below from the Shell to find and install updates (you will have to enter Y to install the updates).
apt-get update
apt-get dist-upgrade
4. Proxmox will then update and you will be on the latest version! The initial version of Proxmox VE that I installed was v7.3-3, but after updating, I am currently on v7.3-6.

Conclusion & Final Thoughts
This tutorial looked at how to update Proxmox! In general, the key thing you must keep in mind is that the no-subscription repository is advertised as unstable, meaning that you should purchase an enterprise license if stable updates are important. For home users or development environments, using the no-subscription repository is a great option. Overall, I haven’t really run into any issues using this, but that doesn’t mean that you should trust it in production environments.
Another thing to keep in mind is that if you do have an enterprise license, you can simply skip to the Updating Proxmox section and run and install the updates! This will allow you to install updates using the stable repository where the vendor has tested and validated them before release.
Thanks for checking out the tutorial on how to update Proxmox. If you have any questions, please leave them in the comments!


