In this article, we’re going to look at an overview of LXC Proxmox Containers as well as a comparison between Proxmox Container vs. VM (Virtual Machines).
Proxmox Containers (LXC) vs. Virtual Machines (VMs)
We will look at a full overview below of what an LXC Proxmox container is, as well as why you might want to use them as opposed to full virtual machines (VMs).
Why Use Proxmox LXC Containers?
Proxmox Containers, also known as LXC (Linux Containers), offer a lightweight virtualization method that runs processes with isolation and without the need to emulate hardware or fully install a guest operating system.
Advantages of Using Containers in Proxmox
Proxmox Containers are more resource-efficient than traditional VMs because they share the host system’s kernel and do not require a full OS for each container. This leads to lower system overhead, faster startup times, and higher density (you can run more containers on a given hardware).
Proxmox Container vs. VM (Virtual Machine)
While virtual machines (VMs) offer a high isolation level (each VM runs a completely separate OS), they also introduce significant overhead. Each VM requires a full copy of an OS, along with a virtual emulation of all the hardware that the OS needs to run.
Proxmox Containers share the host’s kernel, which means that it handles resources extremely well, making it a great option for saving system resources in comparison to a Proxmox VM.
Setting Up a Proxmox Container
Now that we looked at how Proxmox Containers are beneficial, we’ll look at how to set up a Proxmox Container.
How to Set Up an LXC Container in Proxmox
We will look at how to set up an LXC Container in Proxmox using Debian Linux below.
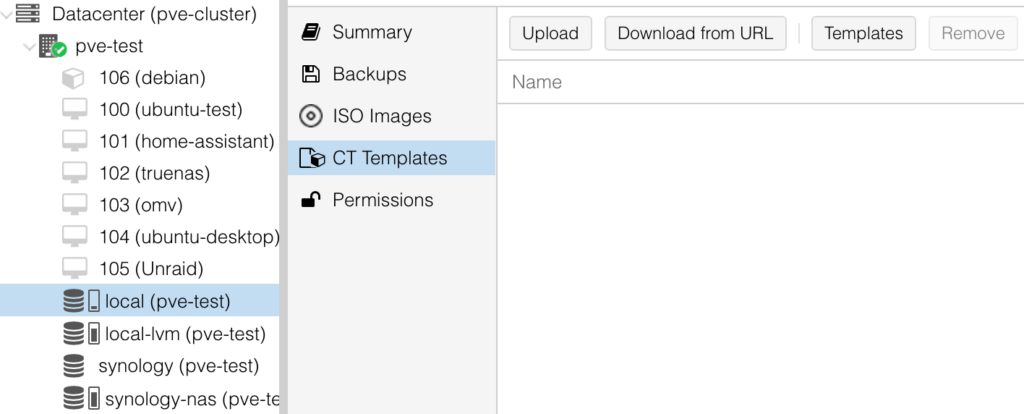
1. Log in to Proxmox, select the storage location where you’d like to store the container template, select CT Templates, then select Templates.
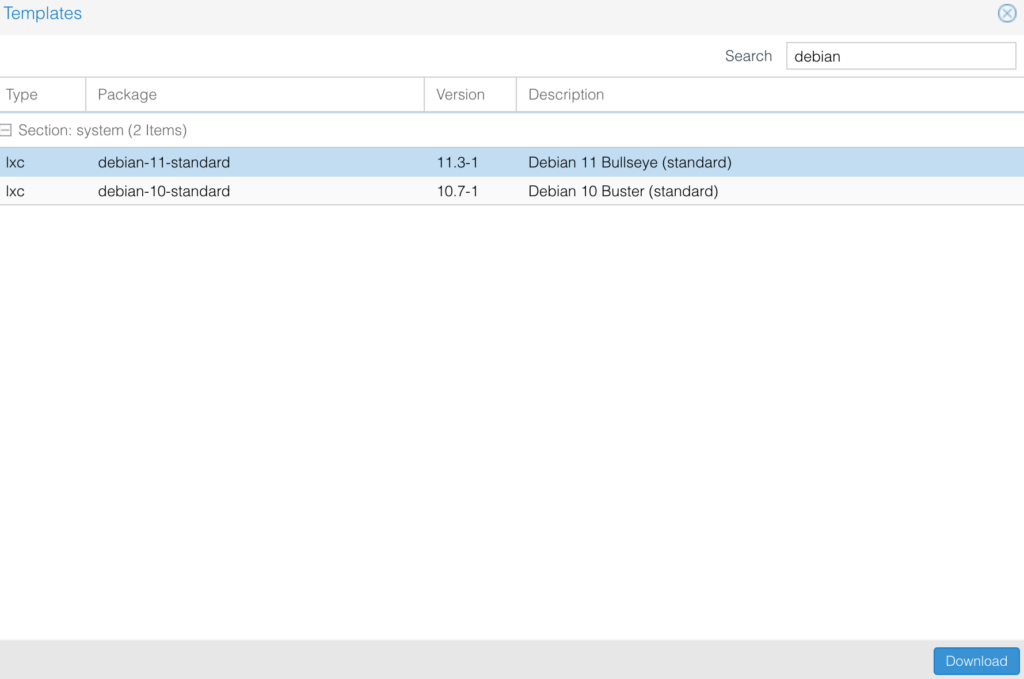
2. Search for Debian, then select debian-11-standard and Download.
3. After the template finishes downloading, select Create CT to create a new container.

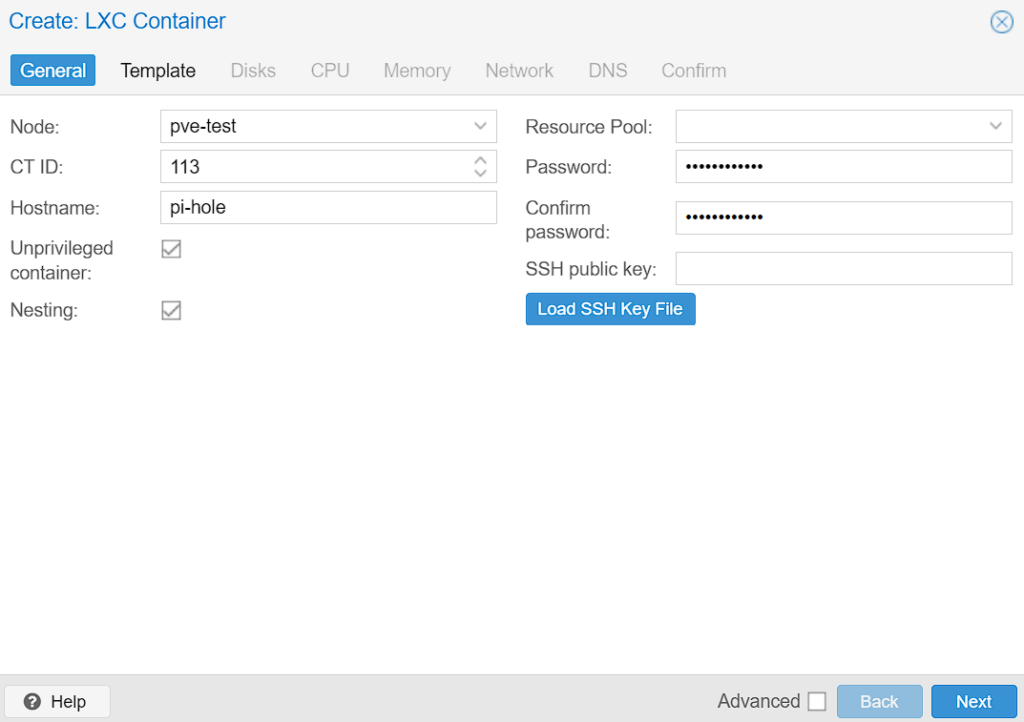
4. Enter a Hostname, then enter the Password you’d like to use. This password will be used to log in to the root user account. After all the settings have been specified, select Next.
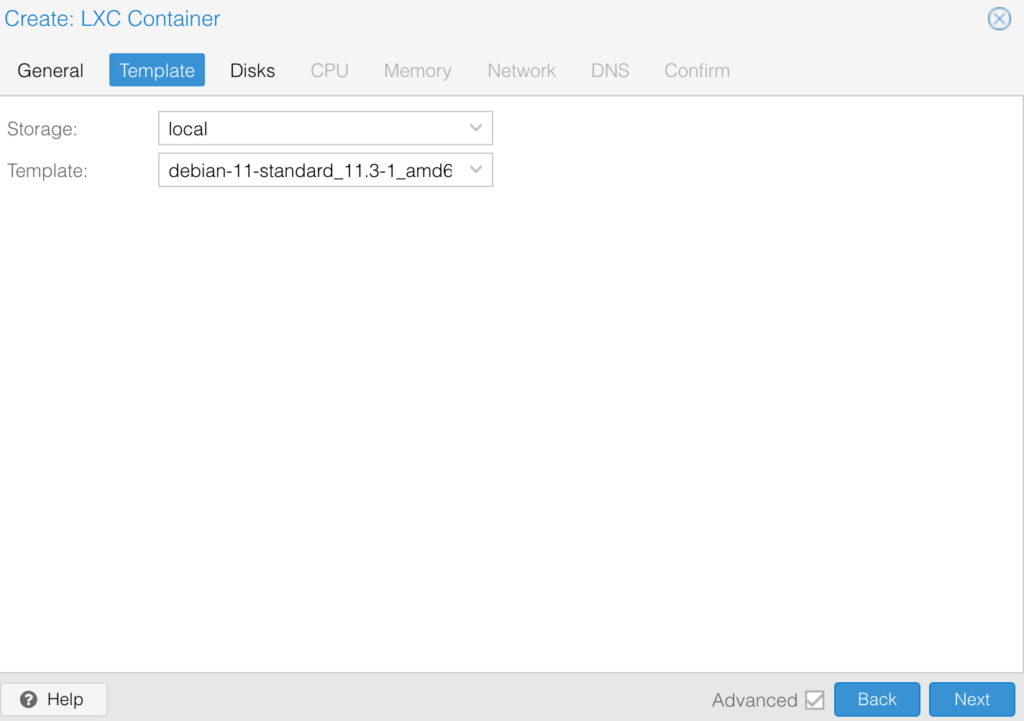
5. Select the Template, then select Next to proceed.
6. Select the Disk Size for this container, then select Next.
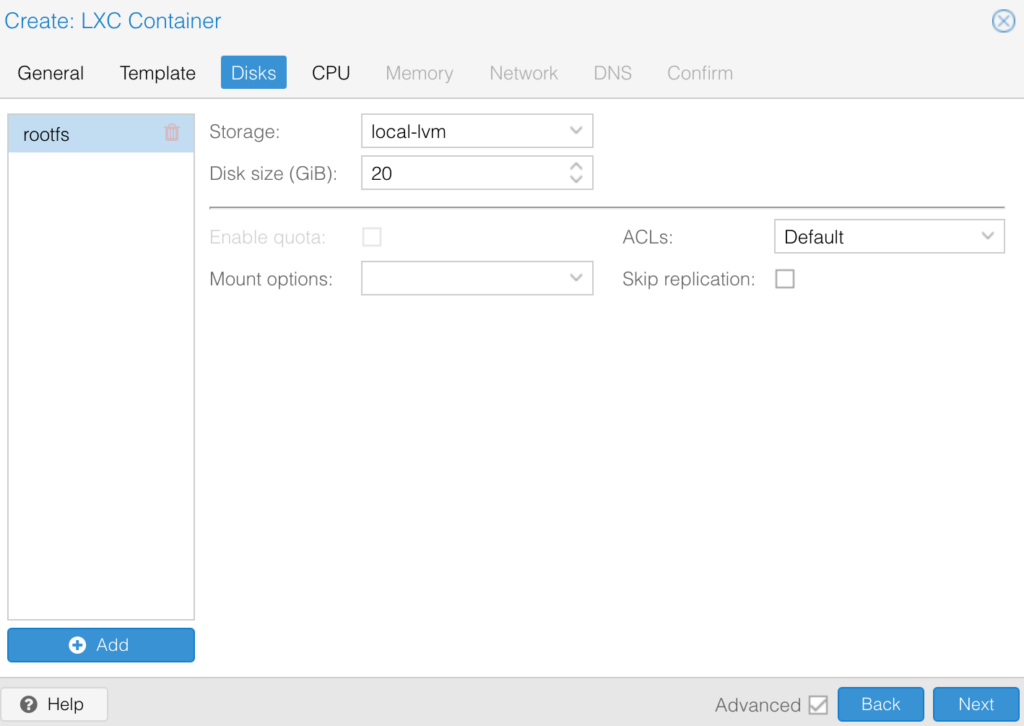
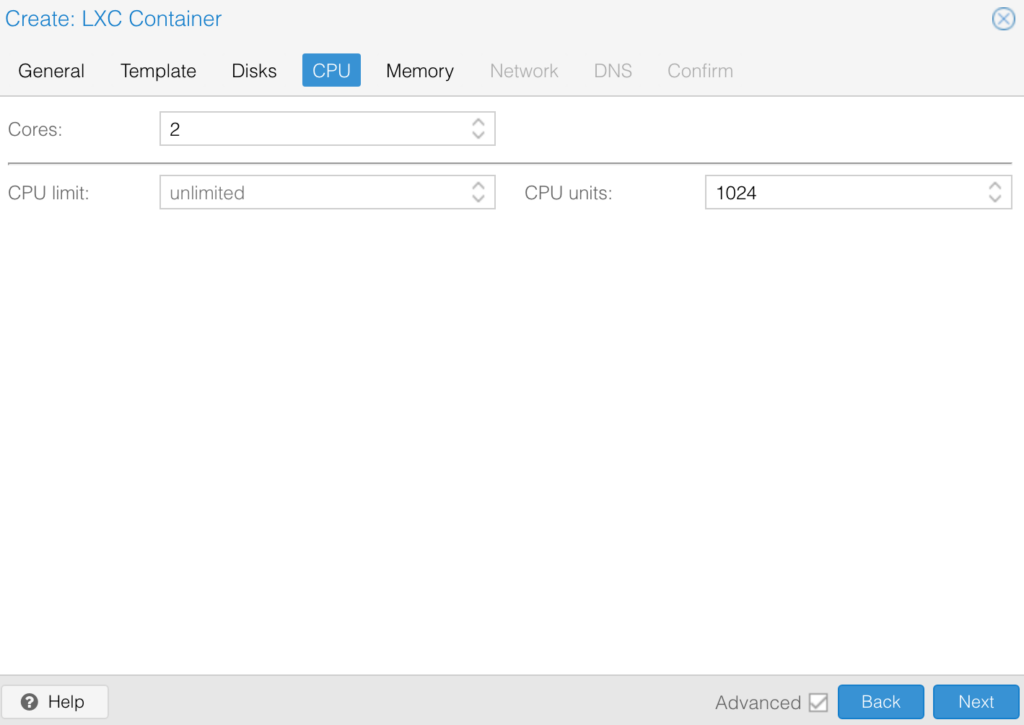
7. Select the total Cores for the CPU, then select Next.
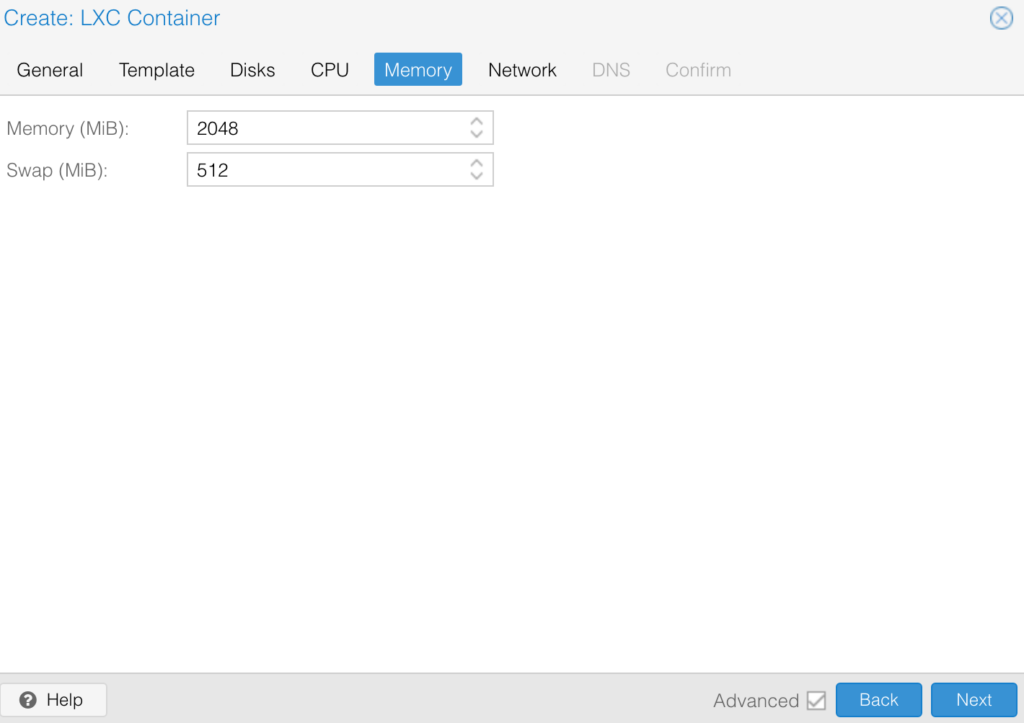
8. Set the total Memory, then select Next.
NOTE: Please keep in mind that this is the limit that this container can use.
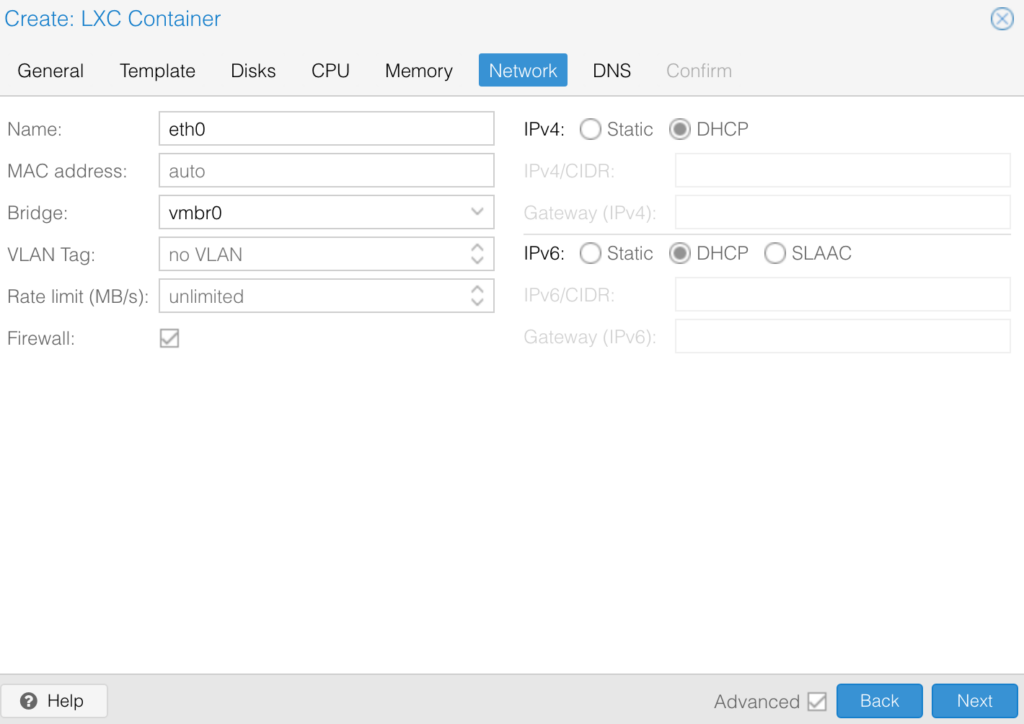
9. Change the Network to use DHCP for IPv4 and/or IPv6 (unless you want to specify them manually OR are not using IPv6), then select Next until you get to Confirm.
NOTE: We are skipping the DNS section, but you can change these settings if you’d like to use a DNS server different than the Proxmox host.
10. Confirm the settings, then select Finish to create the container!
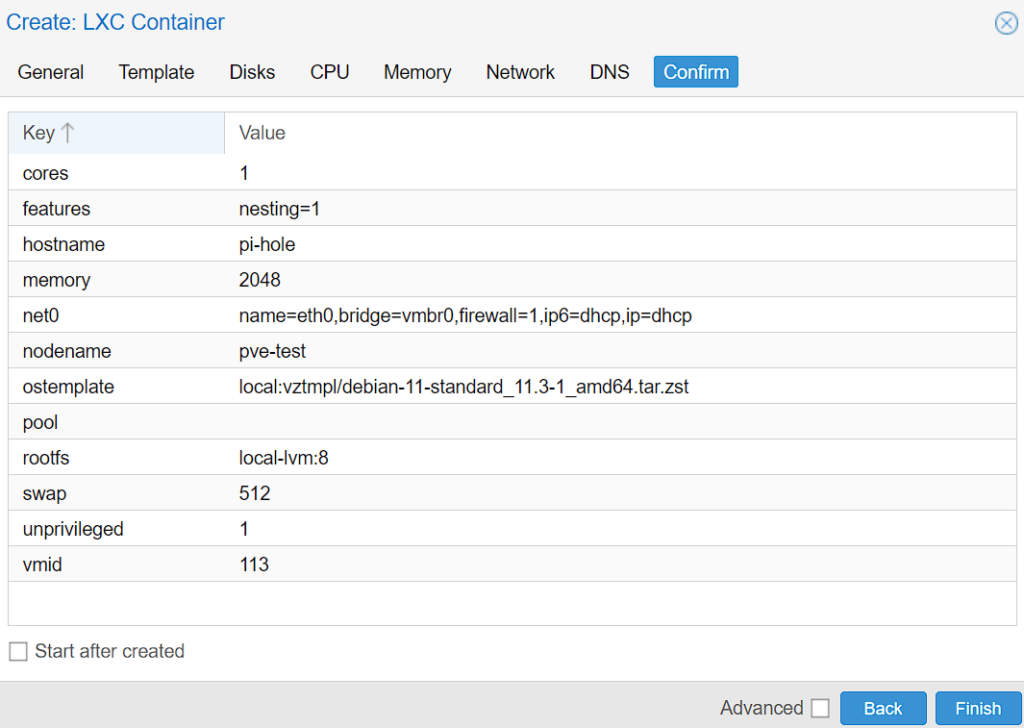
11. After the container starts, log in with the username root and password set in step four. Run the command below to update the system.
apt update && apt upgrade -y
12. Now that the system is created, you can install whatever you’d like on top of this! One of my favorite options is installing Pi-hole!
Container Resource Settings
When setting up a Proxmox Container, keep in mind that the resources you allocate (CPU, memory, disk space) will directly impact the container’s performance. Make sure to balance your needs with the available resources on your Proxmox host to avoid potential performance issues.
Managing LXC Proxmox Containers
Once you’ve set up an LXC Container, managing it is straightforward and is no different than managing virtual machines. Everything is done in Proxmox VE, but we’ll take a look at some of it below.
How to Start, Stop, and Restart Proxmox Containers
Starting, stopping, and restarting LXC Containers can all be done from the Proxmox VE interface. Right-click on the container and select the desired action.
If you have a Proxmox Cluster configured, you can also migrate the container to a different PVE host.

Proxmox Container Backup and Restoration
Proxmox provides a simple, but powerful backup tool for Proxmox Containers. You can schedule automatic backups or initiate them manually using an NFS Share on a Synology NAS, or go one step further and use Proxmox Backup Server.
If anything goes wrong, you can quickly restore your Proxmox Container to a previous state using these backups.
Examples of Proxmox Containers
Proxmox Containers can be utilized in many scenarios. As an example, LXC containers are perfect for running isolated instances of applications or services.
You could theoretically have one Proxmox Container running a web server, another running a database, and another running a mail server. Each container runs independently, ensuring that issues in one do not affect the others.
If you’re in a situation where you’re currently running a VM and would rather it be a Proxmox Container, configure the LXC container, then delete the VM in Promxmox!
Conclusion: Proxmox Containers
While we looked at a complete guide on how to set up and configure Proxmox Containers, it’s more important to understand the scenario in which they should be used.
In general, if you’re running an application and simply want a lightweight alternative to a full VM, LXC containers are a great option.
With that said, it’s important to remember that containers do have limitations. They share the host system’s kernel and are not as fully isolated as VMs. So, if you need to run applications that require kernel modifications or different kernel versions, a traditional VM might be a better choice.
It’s a good idea to understand what you are implementing and then determine if a full VM or LXC container is a better option. It doesn’t hurt to have an LXC container configured that you use for testing purposes, due to how lightweight they are!


