Today we are going to look at how you can setup a static IP address for OpenVPN on a Synology NAS.
When you setup a VPN server on your Synology device, the IP addresses are dynamic when a user connects. What this means is that every user will have a different IP address when they connect and the order in which they connect determines what the address will be. In other words, it’s totally random. There are many cases where using a static IP address is necessary, and today we are going to go through the process of configuring this.
If you have not configured your VPN Server, you must do it before proceeding. I have instructions on how to do it here.
Setup a Static IP Address for OpenVPN on a Synology NAS – Instructions
- First off, you need to be able to SSH into your Synology device. If you aren’t sure how to do that, you can watch this quick 90 second video that shows you how.
- SSH into your Synology NAS and navigate to the VPNCenter folder by running this command:
cd /
cd /usr/syno/etc/packages/VPNCenter/
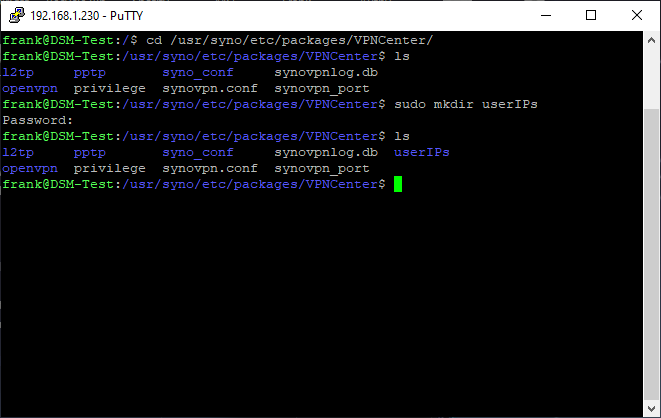
3. At this point, we need to create a directory which is where we will store our users and their predetermined IP addresses. Run this command to create a folder.
sudo mkdir userIPs
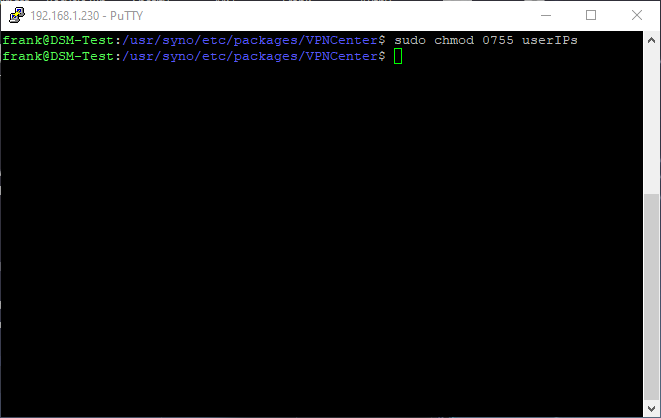
4. Now that this directory is created, we need to give users the rights to execute items in this folder by running the command below. If you’d like to read more about what permissions this command grants, you can do so here.
sudo chmod 0755 userIPs
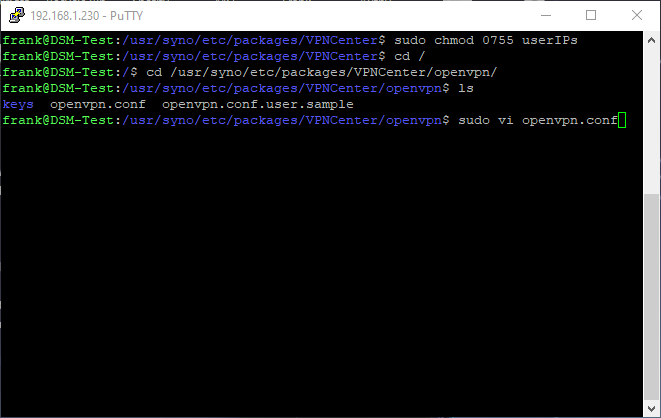
5. The next step involves reconfiguring the OpenVPN configuration file to check our newly added folder for files. Run these commands to navigate to the folder and edit the configuration file.
cd /
cd /usr/syno/etc/packages/VPNCenter/openvpn/
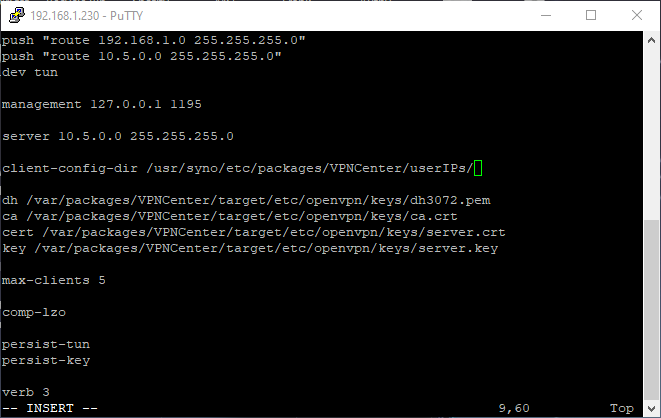
6. When you have the configuration file open, add the line below inside of the file. NOTE: you will need to use vi to edit this file. If you aren’t sure how to use the vi editor, check out this tutorial. In its simplest form, press “i” to insert and when the line is entered/changed, press “Escape” to stop editing, then type “:wq” to quit.
sudo vi openvpn.conf
client-config-dir /usr/syno/etc/packages/VPNCenter/userIPs/
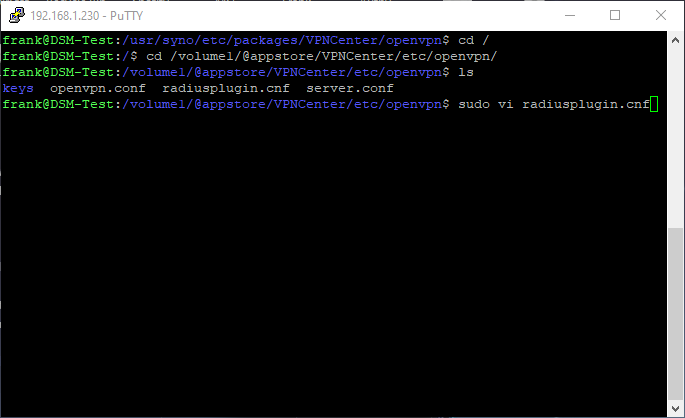
7. After the file has been saved, navigate to the radiusplugin.cnf folder by typing this command:
cd /
cd /volume1/@appstore/VPNCenter/etc/openvpn/
8. Edit the radiusplugin.cnf file by typing this command. See instructions above on how to use the vi editor.
sudo vi radiusplugin.cnf
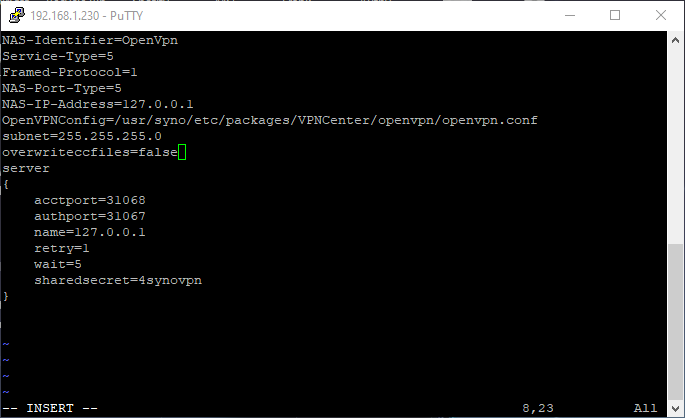
9. Change the “true” flag to “false” for “overwriteccfiles”.
overwriteccfiles=false
10. The server configuration is now complete. The final step is to determine which VPN users should have static IP’s and create a file letting the system know what IP address should be assigned to that user account. The file name must be the EXACT username that will be connecting to the VPN (in my case, vpnUser1 and vpnUser2). Another important note is that when you configured your VPN server, you defined a dynamic IP address that is the IP address that will be given to clients that are connecting. In my example, VPN connections are given an IP address of 10.5.0.X.
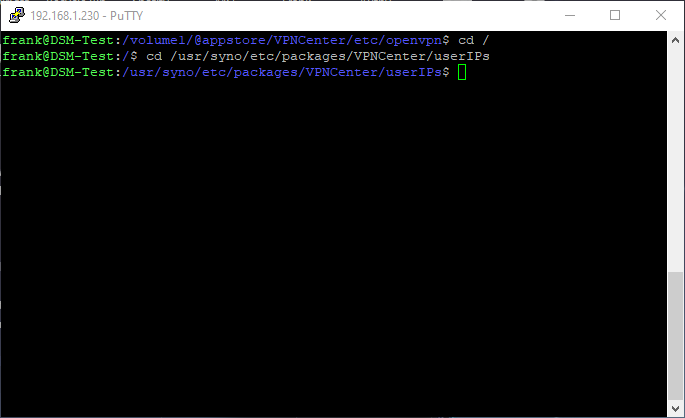
11. Navigate back to the userIPs directory
cd /
cd /usr/syno/etc/packages/VPNCenter/userIPs
12. To show how the configuration is setup, I have created two user accounts (vpnUser1, vpnUser2). When they connect, I want vpnUser1 to connect to the 10.5.0.10 IP address and vpnUser2 to connect to the 10.5.0.14 IP address. By default, the first IP address given is 10.5.0.6. For this reason, I don’t recommend using the .6 IP address, so it’s best to start at .10 and increase that number by four for every additional user. Follow the instructions below to configure this.
13. Create a file with the username where you would like to setup the static IP (in my case, vpnUser1 and vpnUser2).
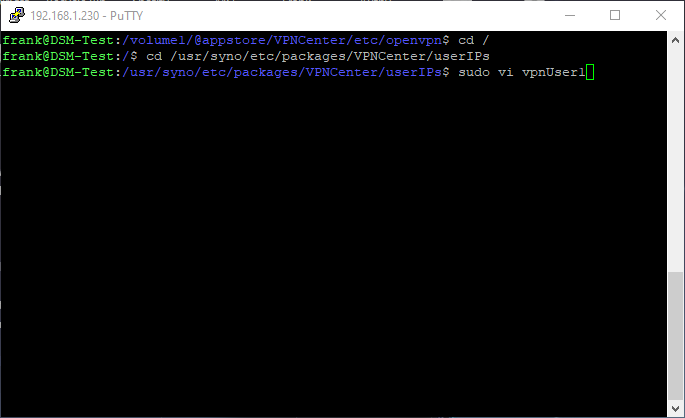
sudo vi vpnUser1
14. Enter the line below in the newly created file. NOTE: the IP address should always increment by 4 and the second IP address in the string should always be one less than the first.
ifconfig-push 10.5.0.10 10.5.0.9
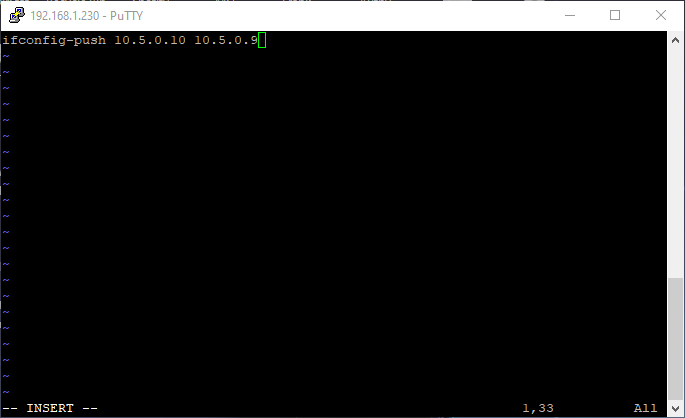
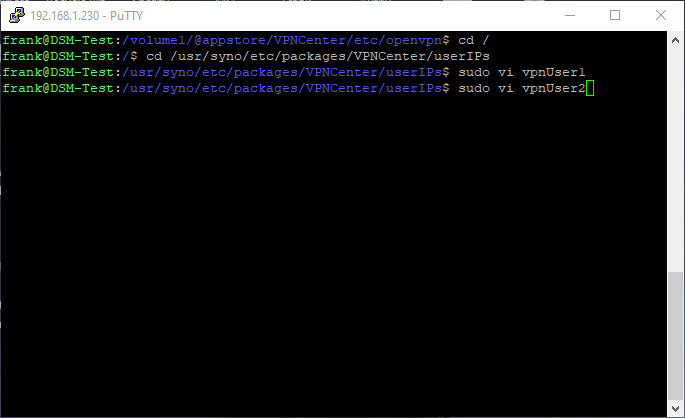
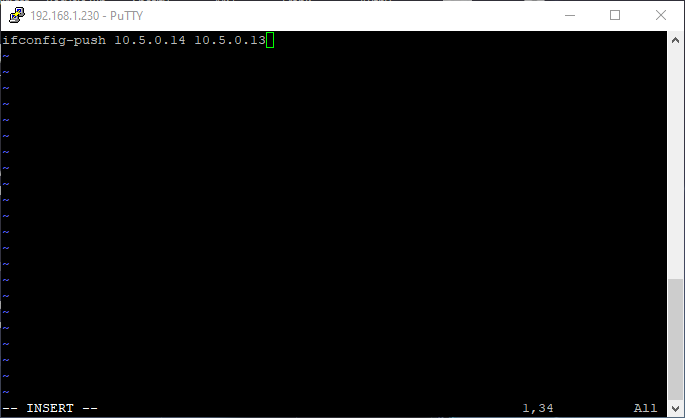
15. I will do the same for vpnUser2.
sudo vi vpnUser2
ifconfig-push 10.5.0.14 10.5.0.13
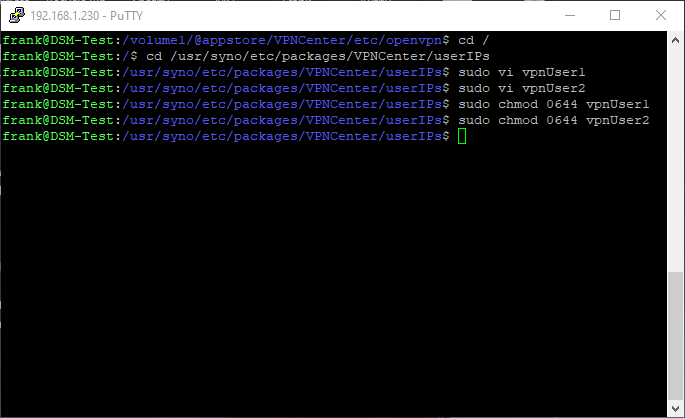
16. We now need to change the permissions on these files. To do that, run the commands below. If you’re interested in seeing what these permissions are, you can view the information here.
sudo chmod 0644 vpnUser1
sudo chmod 0644 vpnUser2
17. Reboot your Synology device and try and connect to your VPN. I suggest using your mobile phone and mobile network (as you cannot be on the same network). You should see that each VPN user that connects has the IP address that we configured above.
Conclusion
In general, dynamic IP addresses are fine and the majority of people won’t need to know what IP address is assigned to each device. However, in very specific situations, there may be a requirement where an administrator needs to know that a specific device will be assigned to a specific IP address. This easy tutorial gives you the exact steps that you need to conduct to accomplish that. After setting this up, you can take this one step further and backup your Synology NAS to a Raspberry Pi off-site using Hyper Backup!
Thanks for reading, and leave any questions you have in the comments!
Thank you for this helpful guide! I’ve successfully set the static IP to .253 to ensure it doesn’t interfere with the dynamic IP range. This setup works perfectly for connecting to my backup NAS and keeps everything running smoothly.
Thank you for this, it’s incredibly useful! I dont expect it to be reliable but I combined this with 4 4TB usb hdd’s in raid 10 with mdadm. Works well so far.
I noticed my pi doesnt seem be mapped to a hostname anymore, is it possible to assign a hostname that devices that my regular subnet will recognize? thanks!
Do you mean through the OpenVPN connection? If so, you can, but you have to implement a DNS server and pass that DNS server to the device through the config file. It should then be resolvable through domain name!
Hmm strangely enough it seems to work now with static ip. Not sure anymore what I changed, but I enabled the client config dir yesterday and restarted the VPNCenter package and after that the client got the assigned static ip…
Not sure which log(s) to look at, the VPNCenter logs at the vpn server dont show anything (useful). BUt if you have suggestions, they’re welcome 🙂 Maybe at the client side or something…
The logs are buried in the terminal, unfortunately. I have used them, but I’m not exactly sure where they are off the top of my head. If I get some time, I will check and let you know. If you want to explore, they’re in there!
I have implemented this configuration and my client is unable to connect with the VPN Server when I have the client config dir directive in my openvpn.conf.
All file modes have been set properly, and connecting with a dynamic ip goes perfect, but once i enable the client-config-dir is just fails. I have configured everything as user root.
Has anyone else experienced this problem? And solved it?
I unfortunately haven’t seen that error before, so it might be a little harder to troubleshoot. Are you receiving any errors in Synology’s log?
Thanks for this article this really helped. I did discover a few things that will make this easier.
With the ifconfig-push command I believe the second IP should be the gateway.
So instead of: ifconfig-push 10.5.0.10 10.5.0.9
This would be: ifconfig-push 10.5.0.10 10.5.0.1
It’s also not necessary to restart your Synology, you can actually just restart the vpn service with the command
synoservice –restart pkgctl-VPNCenter
I actually just setup a scheduled task that is disabled,so I can restart this from the web interface.
This is very helpful, thanks so much for sharing it!
Hello,
According to this page :
https://linuxfr.org/forums/linux-debian-ubuntu/posts/tuto-howto-fixer-ip-des-clients-sur-openvpn
it should be the network mask : ifconfig-push 10.5.0.10 255.255.255.0
according to the official website :
https://openvpn.net/community-resources/configuring-client-specific-rules-and-access-policies/
it whould be like written in the tutorial
A second thing, the “synoservice” command is not working under DSM 7. I think one can stop and launch again the vpnserver in the application portal.
I used version of this tutorial and my method for application portal and it connected with the good ip.
on my nas under DSM 7.0 $ openvpn –version
OpenVPN 2.4.9
according to the official doc of 2.4
https://openvpn.net/community-resources/reference-manual-for-openvpn-2-4/
the second argument should be the remote-netmask so
ifconfig-push 10.5.0.10 255.255.255.0
I will have to look and see if anything changed with DSM 7. I created this tutorial for DSM 6, but have no doubt that there could be some changes with DSM 7. Thanks for letting me know!
It worked with my DSM. Thank you.
Glad to hear it worked, thanks for checking out the tutorial!
Many thanks for this! I have my main Diskstation at home and a remote smaller Diskstation on a University network which I use for backups.
I can’t connect to the remote one directly, but I can tell it to connect to my home VPN and, using this, I can give it a predictable IP address there, which means I can set up snapshot replication to it. Splendid!
Glad to hear it worked, thanks for reading the tutorial!
Is there a possibility to set a static IP when connected with DSM as an OpenVPN Client (to any other server)?
Thanks
Can you explain this a little further? When you say set a static IP when connected with DSM, what exactly do you mean by that?
Let me know and hopefully I can help!
Sure, There’s an OpenVPN Server somewhere on the internet (OPNSense, non DSM), my DS is connected to that server.
Usually the Server assigns an IP (lets say 10.11.12.13) to that server. Upon reconnect it would assign a new IP.
Now I want to find a way to set a static IP (lets say the same 10.11.12.13 or something in that /24 subnet) so other components can reliably access the DS with that IP.
I did some preliminary research on OPNSense as I’ve never used it, but I don’t want to point you in the wrong direction. You would know better than me, but this link looks like it might have what you’re looking for: https://forum.opnsense.org/index.php?topic=2516.0
One thought I had is if you’re trying to access DSM through the mDNS name (NASName.local)? If it doesn’t work, you might have to figure out how to get DNS to work on OPNSense.
I apologize for not having a better answer. I just haven’t used OPNSense and for that reason, can only try and give a few suggestions. If you have any other questions that you think I can help with, please let me know!
Thank you. I’ve followed your easy instructions .. and it works.
Do you have an idea how to resolve the issue with the DNS names.
It’s necessary to use the fixed IP address for setting up the backup process. Using the given Synology Server name (e.g. SynoBackup) would be fine.
brg
Wolfgang
How about static IP addresses for L2TP/IPSEC? I can do this fine with OpenVPN, but can’t find a way to do it with L2TP. Any suggestions?
I unfortunately haven’t setup L2TP/IPSEC, but if I get some time, I will see if I can come up with something. If I can, I will try and create a tutorial for it!