In this tutorial, we will look at how to set up WireGuard on a Raspberry Pi using PiVPN! WireGuard is an awesome VPN server! The gold standard for VPNs has always been OpenVPN (which is still a great option), but WireGuard is a faster alternative. The codebase is smaller as well, which improves security by limiting the attack surface.
It’s best to run PiVPN and WireGuard on a Raspberry Pi 4 or 5, but a Raspberry Pi 3 B+ should work as well (though performance may be limited).
Video Tutorial: Raspberry Pi WireGuard Setup
This is a video I created a few years ago on installing WireGuard on a Raspberry Pi, but the process hasn’t changed at all. This will walk you through the entire process, but refer to the commands below during the setup process!
How to Set Up WireGuard on a Raspberry Pi
PiVPN makes the WireGuard Raspberry Pi setup process straightforward. Ensure that you have your Raspberry Pi configured with the latest Raspberry Pi OS.
Running the PiVPN Script to Configure WireGuard
This process will set up WireGuard on a Raspberry Pi using PiVPN. PiVPN is a script that makes this process automated. This is a known and trusted script, but I still urge you to review it.
1. Open the Terminal on your Raspberry Pi and run the command below, which will execute the PiVPN script.
curl -L https://install.pivpn.io | bash
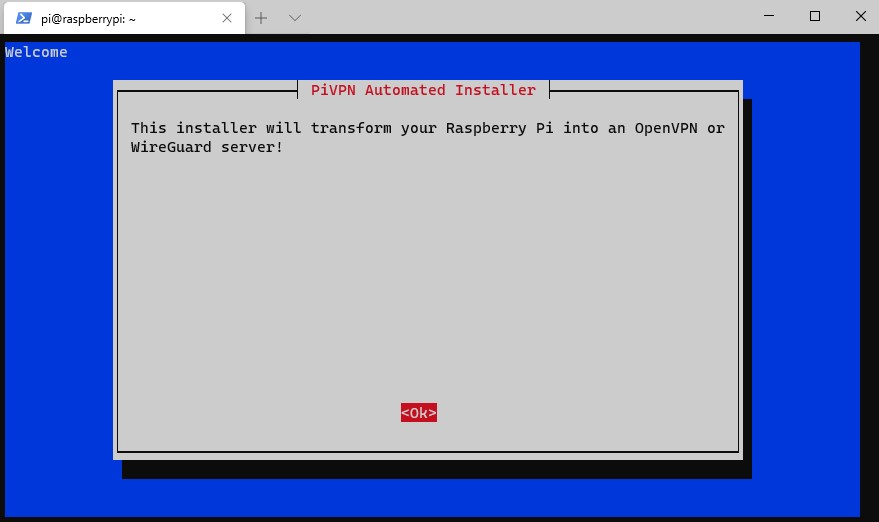
2. Wait for the process to install the necessary packages. When it’s done, you will be brought to a screen that will start the PiVPN automated installer.
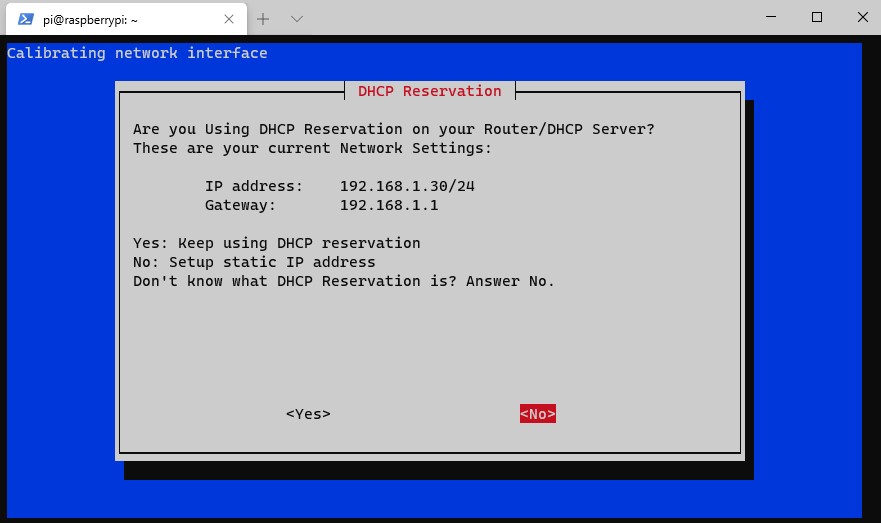
3. The next screen will inform you that you need to set a static IP address. It’s best to set a static IP address in your router’s settings using a DHCP Reservation. However, certain routers (mostly ISP-provided ones) do not allow you to complete DHCP reservations.
If you can’t set a static IP address on your router, set a static IP address on the Raspberry Pi by following the instructions.
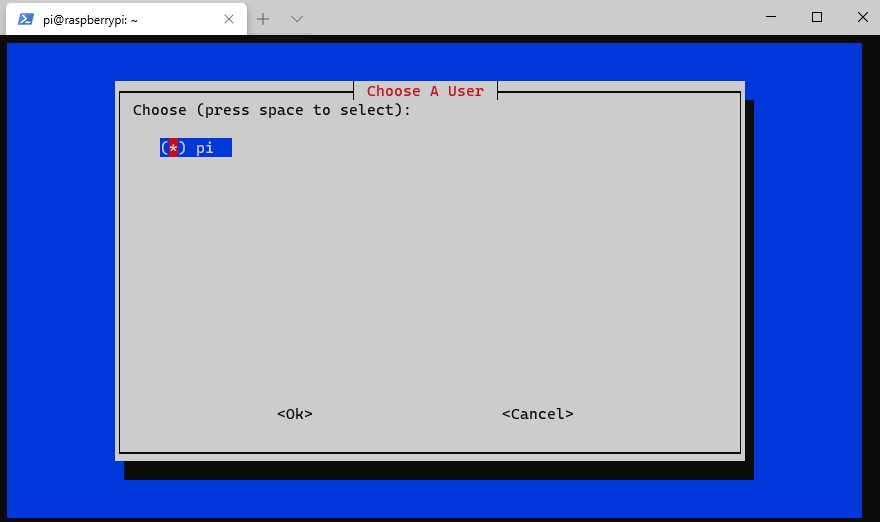
4. Select the user you’d like to use (this will be a list of users from your Raspberry Pi).
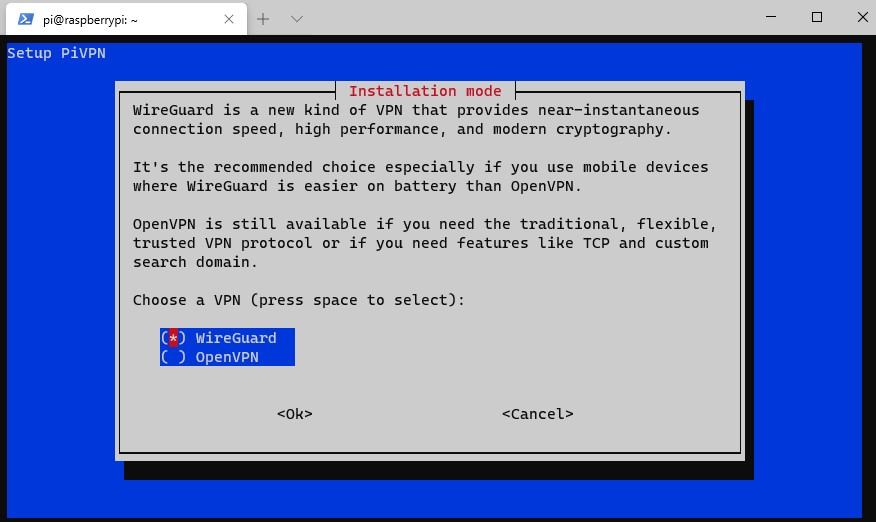
5. Select WireGuard to start the installation process.
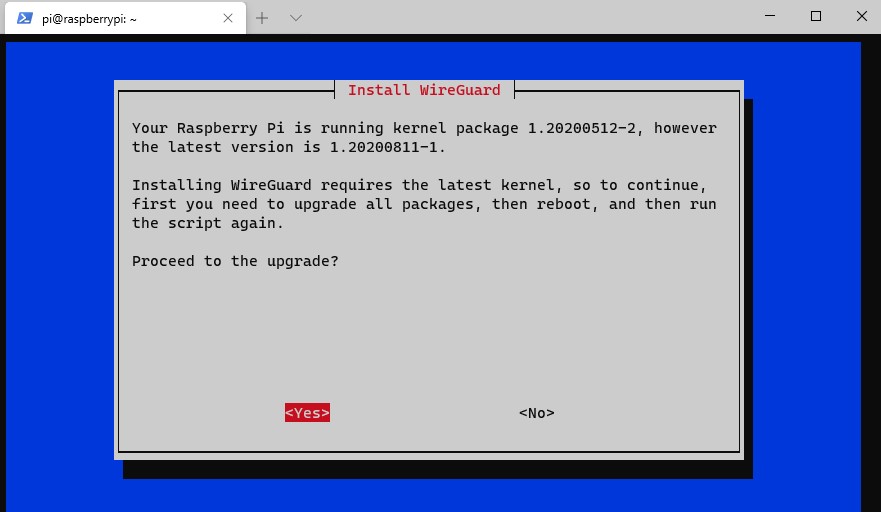
6. You might be prompted to install the latest kernel update. If you are, select Yes to proceed. If it doesn’t, skip to the next step to proceed.
NOTE: If you need to update the kernel, you will be required to restart this process after your Raspberry Pi reboots (start from step 1).
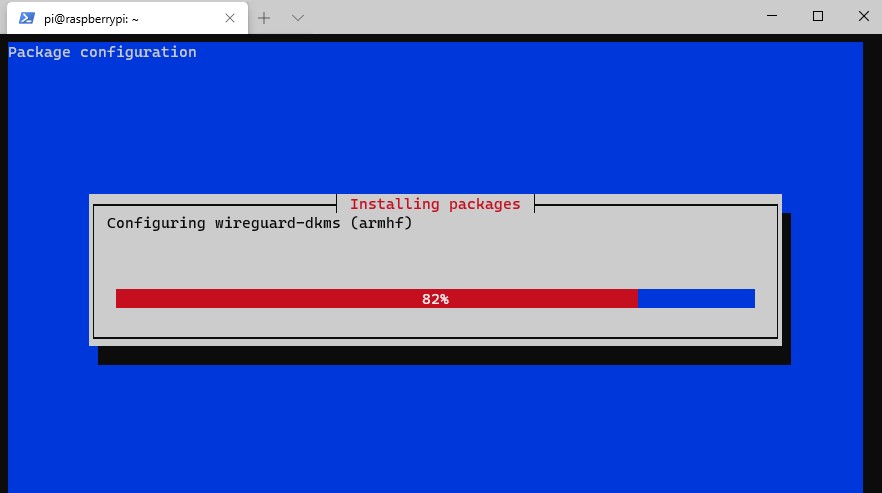
7. WireGuard will now install.
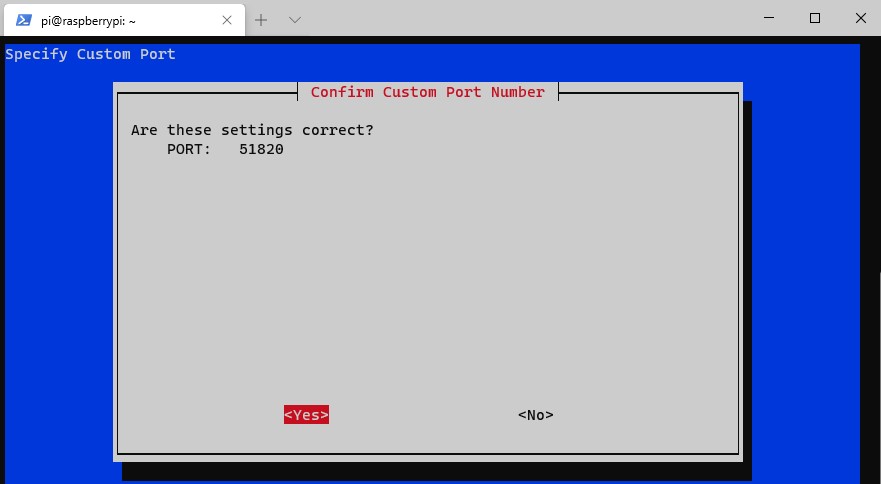
8. You will be asked to enter the port you’d like to use (default is 51820).
NOTE: This is UDP port 51820.

9. Select Yes to confirm the port.
10. The DNS provider section allows you to select a DNS server for your WireGuard peers. Select Custom if you’d like to use your own DNS server, or any of the public DNS providers if you don’t want to use a local DNS server.
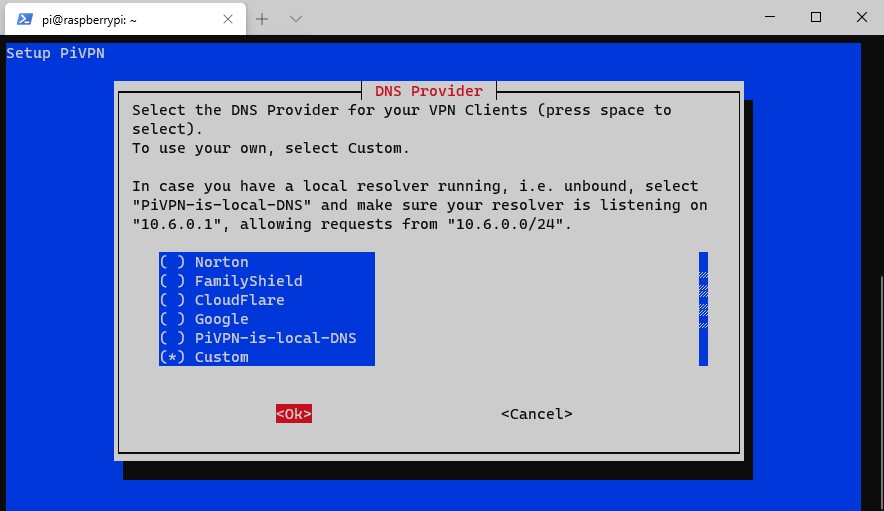
11. I am using a local Pi-hole DNS server that I already configured, so I added the IP address there. If you are using a public DNS provider, you can skip this step.
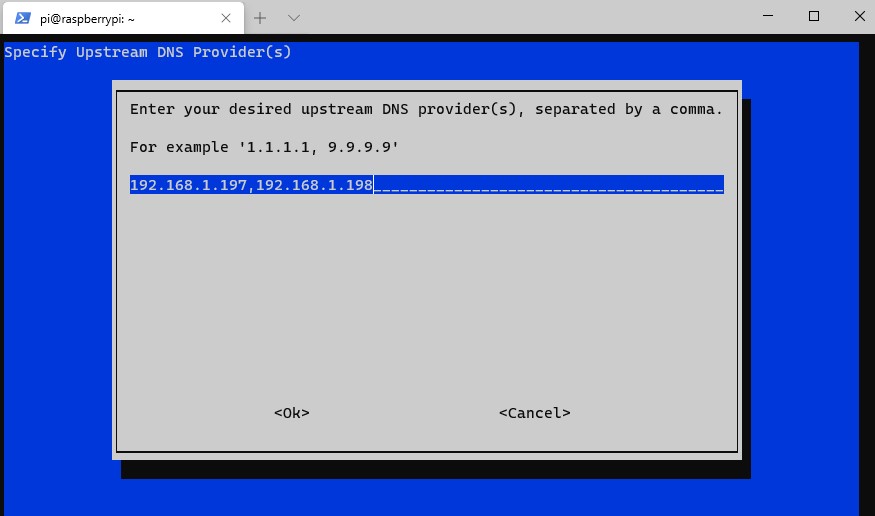
12. The DNS servers that you select will now be listed. Select Yes.

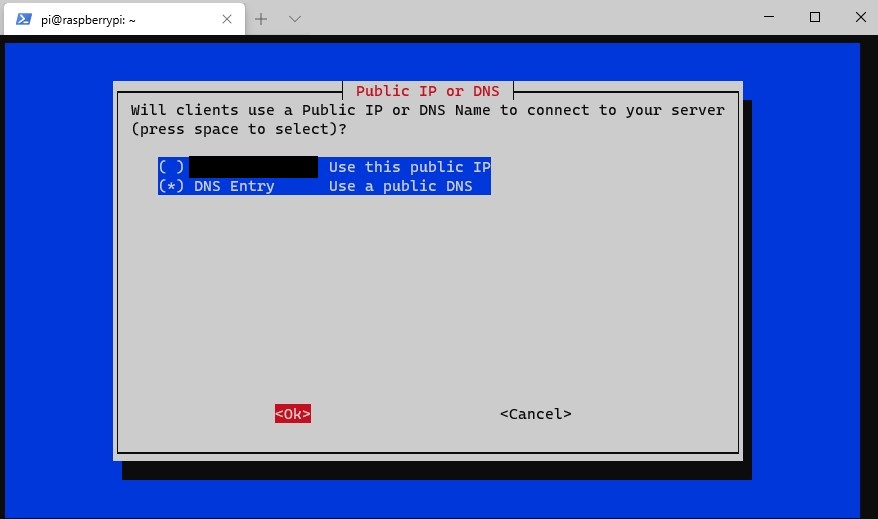
13. You will now be prompted to use your public IP address or public DNS entry. If you have a static external IP address (ISP-provided), you should use this option.
However, if you have a dynamic external IP address, you will need to set up DDNS. You can learn how to do that here.
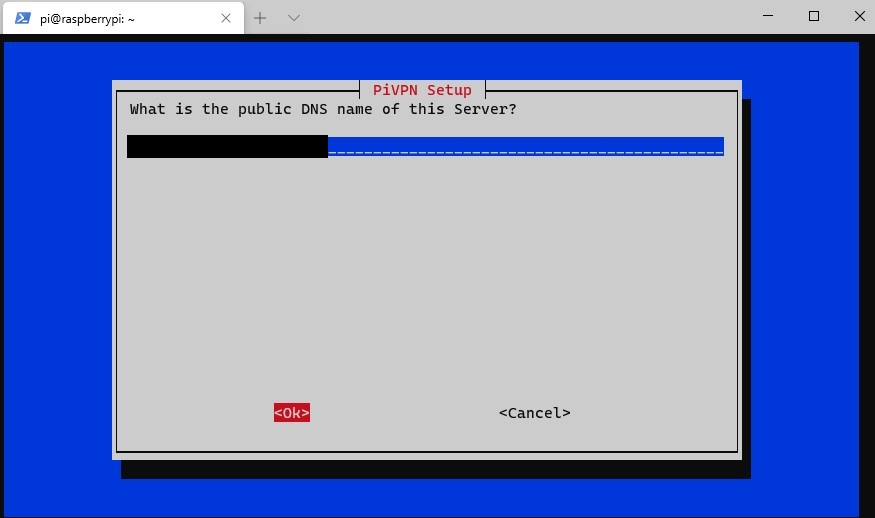
14. If you selected a dynamic DNS address, you can enter that information here. At the next screen, select Yes to confirm that it is correct.
15. You will now be prompted that the server keys will be generated. Select OK. The next step will tell you that the VPN Server will check for unattended-upgrades, and a periodic reboot will be required.
This is a great option. Enable unattended-upgrades (unless you have a good reason not to) and proceed. The packages will now install. This will maintain security by ensuring important updates are automatically installed.

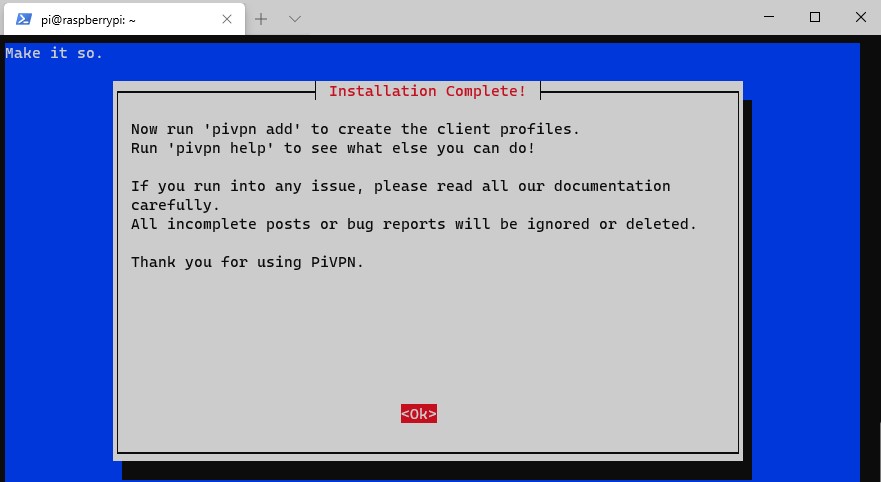
16. The installation is now complete! Reboot your system. If you’re using the Raspberry Pi Firewall, make sure you create a rule for UDP port 51820.
VPN Connection Types (Full Tunnel / Split Tunnel)
This section is important for future steps (so you know what kind of profiles you’d like to create). You can create two types of VPNs, split-tunnel and full-tunnel. These are drastically different in performance and security, so check out our article on split tunnel vs full tunnel VPNs to determine which you’d like to use (you can even use both), then proceed.
VPN Profile Creation & Modifications
This is what we’ll use to create our WireGuard Peers (clients). This is where the prior step is important, as you’ll create a split tunnel or full tunnel VPN based on how you configure your peer. You can create two profiles if you’d like to use both.
1. Run the command below to add a profile.
sudo pivpn add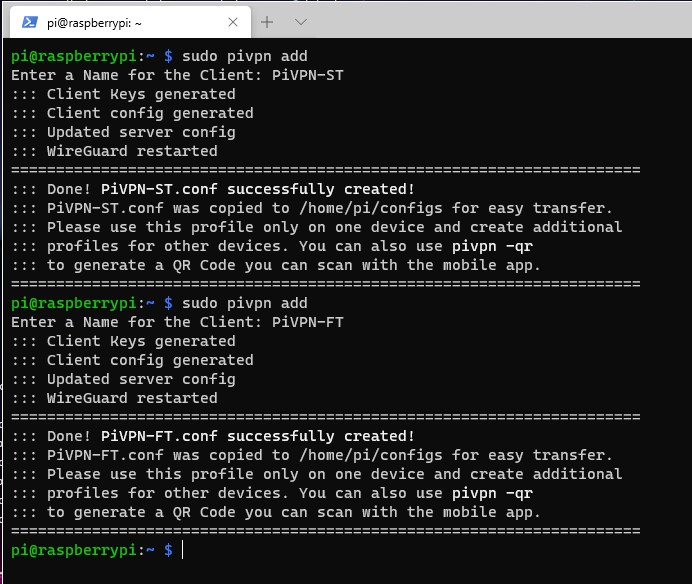
2. Navigate to the configs folder. You will see the profile you just created as a configuration file.
cd configs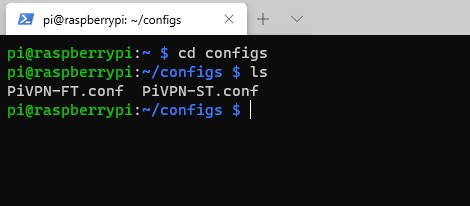
3. By default, WireGuard is configured as a full-tunnel VPN. If you want a full tunnel VPN, you can skip down to the next steps. If you want a split-tunnel VPN, make the changes below:
nano PiVPN-ST.conf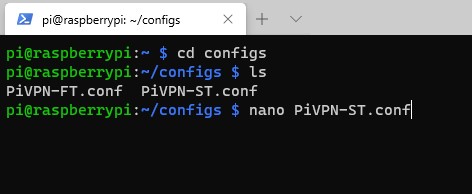
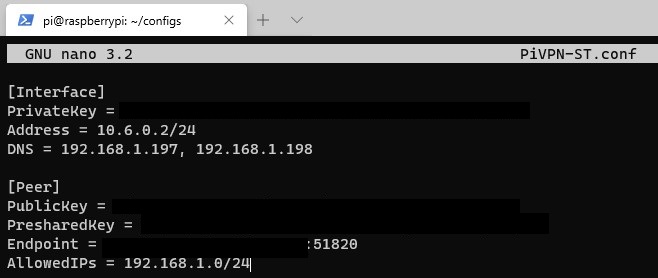
The AllowedIPs line is what we will change. By default, AllowedIPs is set as 0.0.0.0/0 which means that all traffic will go through your VPN tunnel. To change this so that only certain subnets are sent through WireGuard, we need to change this line to the local subnet or IP addresses you’d like WireGuard to pass through the tunnel.
For most, it will be 192.168.1.0/24 or 192.168.0.0/24. If you aren’t sure what your IP range is, you can look in your router’s configuration under LAN Setup.
If you’d like the VPN clients to be able to connect with each other, you need to add the VPN subnet as well (10.6.0.0/24). Change this file to your local IP range and save it (CTRL + O).
4. The configuration file setup process is now complete!
Persistent Keep-Alive
WireGuard attempts to be as quiet as possible, meaning that it only sends and receives packets when it needs to. There are scenarios where this could cause issues, and a persistent keep-alive will maintain the connection.
A scenario where this is normally required is when you have an off-site server that always needs to stay connected to your VPN server. This configuration file change will ensure the connection will not close.
1. Run these commands to open the configuration file.
sudo su
nano /etc/wireguard/wg0.conf
2. Add the line below to the profiles where you would like the connection to stay active.
PersistentKeepalive=25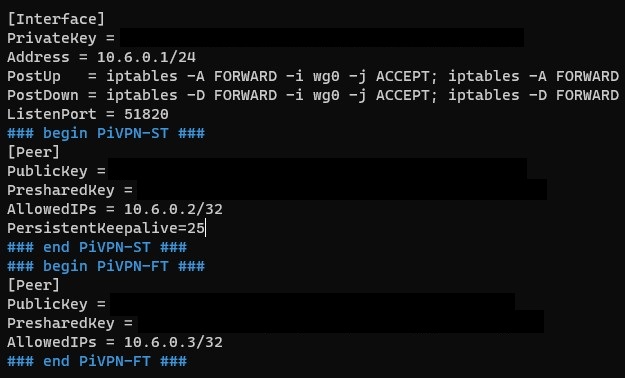
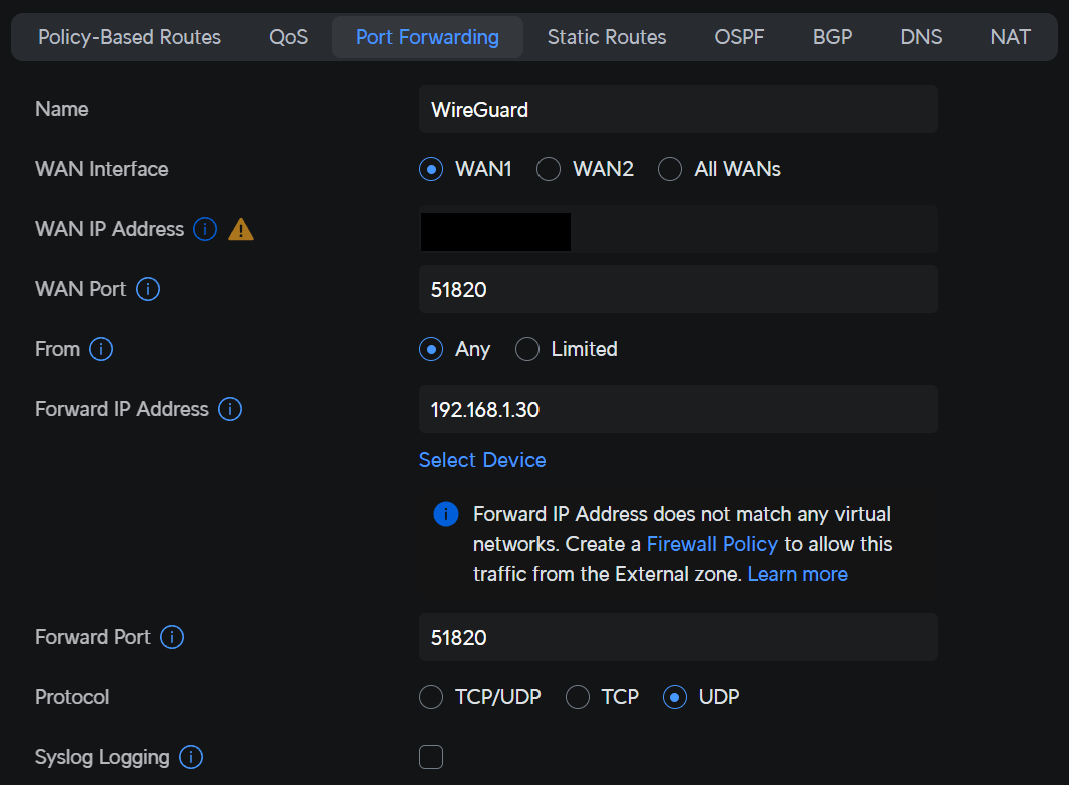
Port Forwarding & Router Changes
To connect externally to the Raspberry Pi WireGuard VPN server, you must port forward UDP port 51820. Port forwarding will be completely different on every brand’s router.
This is a great guide that shows how to port forward on a few different brands of routers, but you might have to look up specific instructions for your router.
- Create a port forwarding rule for UDP port 51820 to your Raspberry Pi’s internal IP address. In the example below, 192.168.1.30 is the IP address of my Raspberry Pi.
Testing the WireGuard VPN Connection
WireGuard offers applications for almost all devices that you can use. Select one of the options below to configure a WireGuard client.
WireGuard Mobile Application
To generate a QR code to scan (which will automatically configure the profile on your mobile device), download the WireGuard mobile application, then run the command below.
pivpn -qr [PROFILE_NAME]
2. A QR code will be generated. Scan this code with your phone, import the profile, and you’re done!
NOTE: This QR holds all the information to connect to your WireGuard Raspberry Pi VPN. Do not share this image with anyone.
3. Scan the QR code with the WireGuard smartphone application. Add the new entry and connect using an external network. Test the connection by attempting to connect to a local resource.
WireGuard PC/Mac Application
If you are setting WireGuard up on a PC, you will need to copy the config files over to your device and add them to the application. You can download the application for your device here.
NOTE: You don’t need to physically copy the file, you can simply copy the contents of the file and create your own [VPN_PROFILE].conf file if it’s easier.
Final Thoughts: WireGuard Raspberry Pi Setup Process
At this point, you should have fully configured WireGuard on a Raspberry Pi, and you’ll have secure remote access back to the location where the VPN server is hosted. Thanks for checking out the article on the WireGuard Raspberry Pi setup process!