This tutorial is going to take a look at how to set up Data Scrubbing on a Synology NAS and more importantly, why you MUST set it up.
First off, Data Scrubbing is only available if you’re using the BTRFS file system. This is also the main reason why I only recommend devices supporting BTRFS. In its simplest form, the Synology data scrubbing process will check each “copy” of the data and if it’s not matching based on the checksum stored, it will correct the data.
This process is mostly run to ensure that data that hasn’t been read in a while isn’t degrading and if it is, will fix it. For this reason, everyone who is running BTRFS must ensure that data scrubbing is periodically running.
With that said, there are downsides of data scrubbing, with the main issues being performance degradation and the overall duration of the process. For this reason, running monthly data scrubbing isn’t necessary, though it’s a good idea to run it quarterly or bi-annually at a minimum.
If you’re interested in learning more about the data and RAID scrubbing process on Synology devices, this video goes into great detail.
How Data and RAID Scrubbing Works on a Synology NAS
When you configure a Synology NAS using Btrfs, there’s a shared folder setting that determines if a checksum is stored or not called Enable Data Checksum for Advanced Data Integrity.
When this option is selected on the shared folder, a checksum is written to metadata when a file is stored. This signifies that the file is in its best state, and the checksum stored should always match this. If you don’t configure this option when the shared folder is stored, it cannot be added at a later time. A new shared folder must be created and the data must be moved in order for the checksum to be stored.
These checksums are used for the data scrubbing process. When data scrubbing runs, it will go one by one and validate the checksum for each file. If the checksum matches, it moves on to the next file.
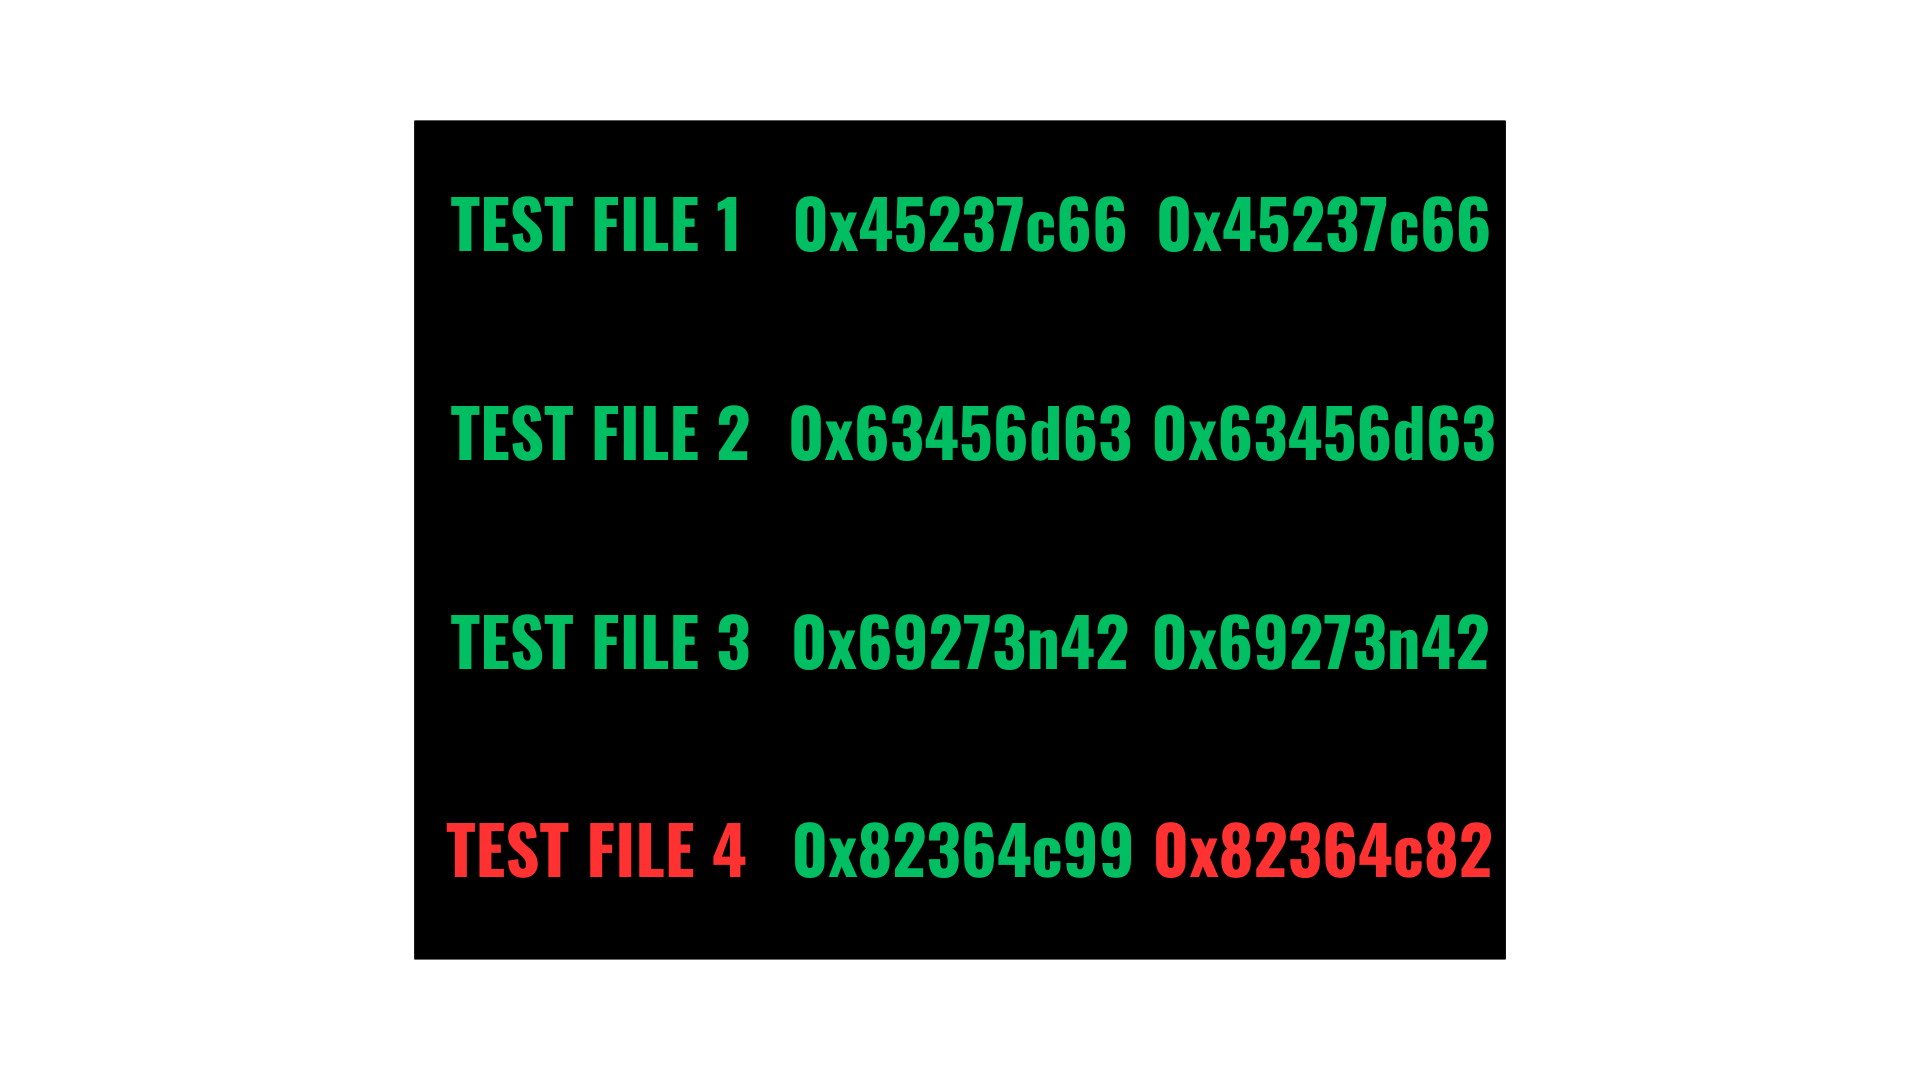
If it doesn’t match, it will attempt to repair it using RAID Scrubbing. In order for RAID scrubbing to work, you must be using SHR (with at least 3 drives), RAID 5, RAID 6, or RAID F1. If you’re not using one of these options, the data scrubbing process can run and validate that the checksum does or does not match (assuming you’re using Btrfs), but it cannot repair the file. This is the confusing part for most, as they think that running it means that it works, and it does mean that the files will be validated, but it does not mean that the files will be repaired.
How to Configure Data Scrubbing on a Synology NAS
Now that we know how this works, this is the exact order to configure data scrubbing on a Synology NAS for it to actually work (and by that, I mean fix files if needed).
When the data scrubbing process runs, it doesn’t automatically run on all shared folders. Instead, shared folders must be configured in a way that enables data checksum functionality.
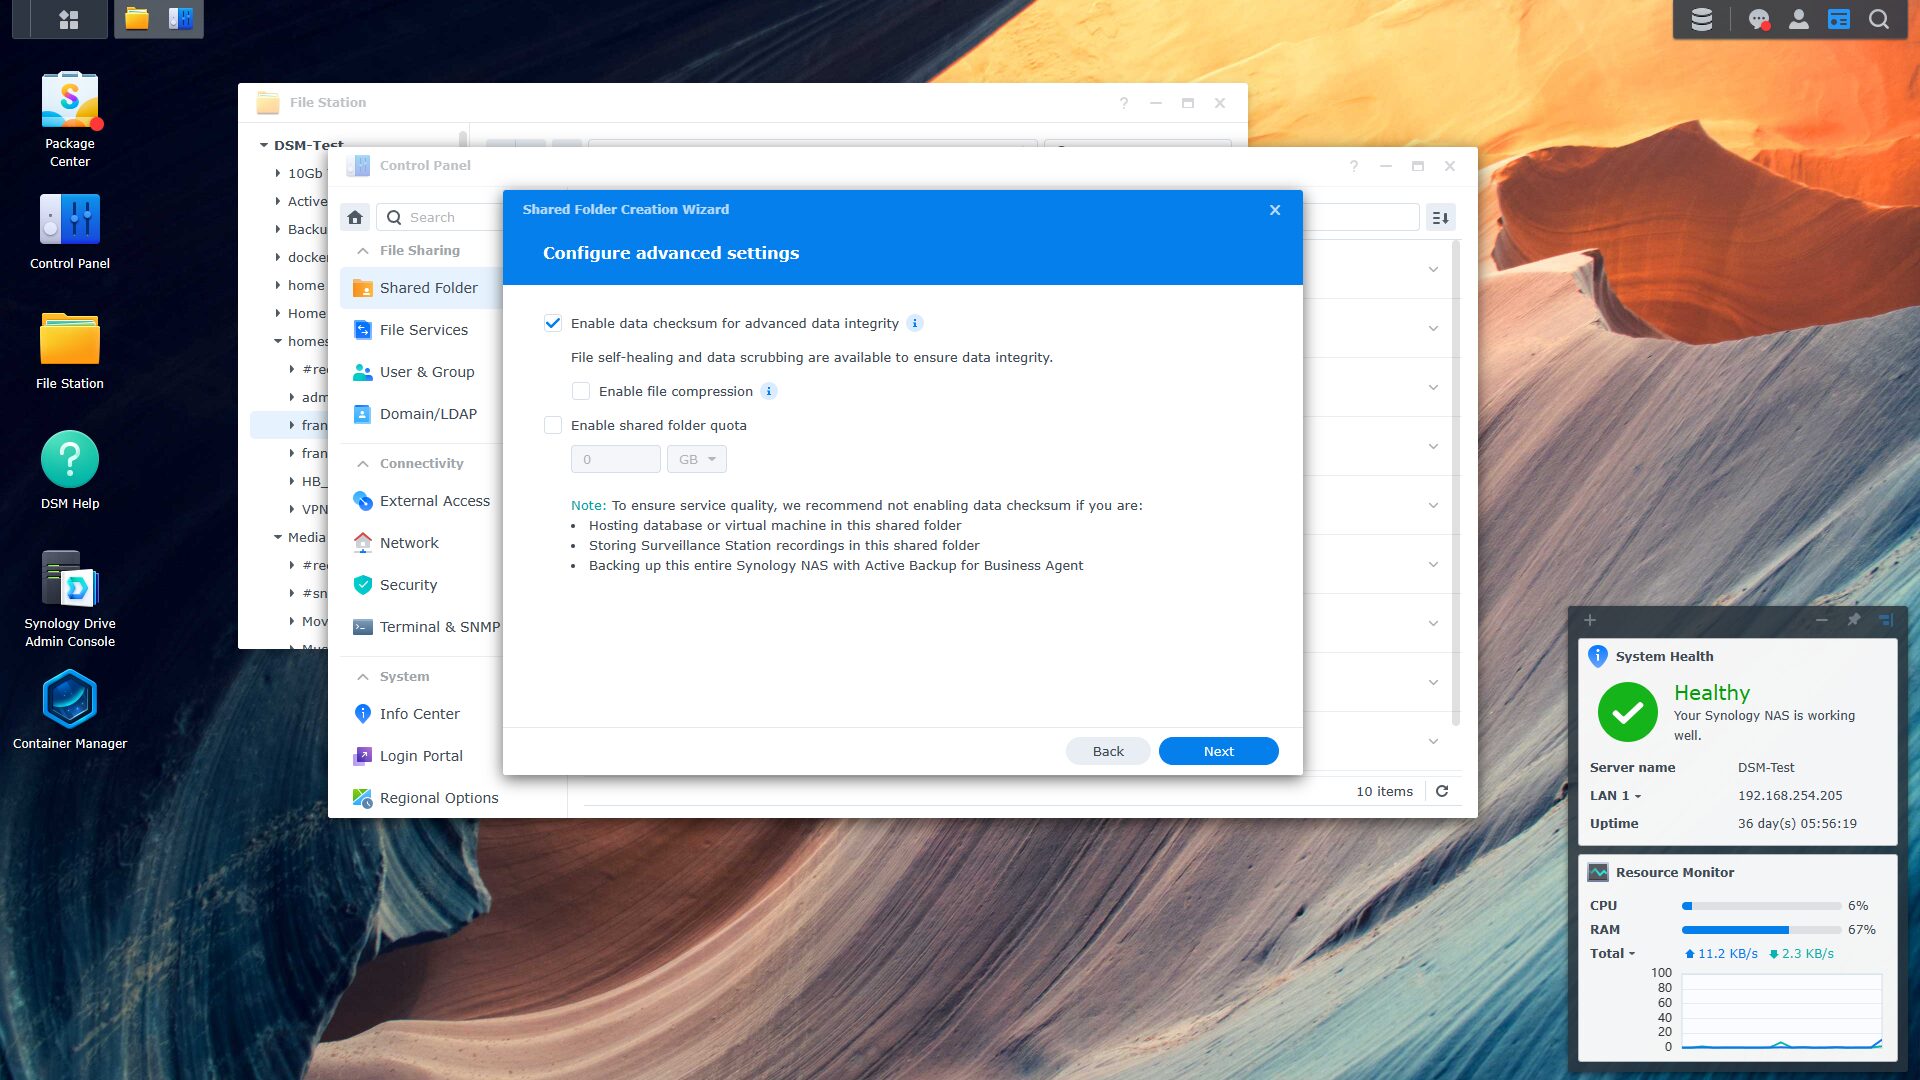
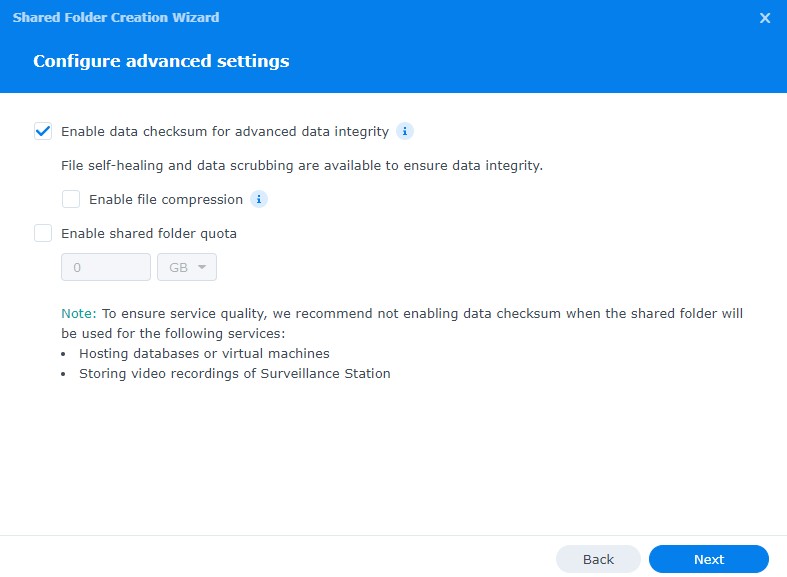
When creating a shared folder, the enable data checksum for advanced data integrity option below must be enabled. If this option isn’t enabled, the data scrubbing process will not work for the specified shared folder.
As mentioned above, if your existing Shared Folder’s don’t have the enable data checksum for advanced data integrity option enabled, the data scrubbing process will not work for that shared folder.
To confirm that the option is enabled, open the Control Panel, select Shared Folder, then expand one of the shared folders and confirm that Data Integrity Protection is Enabled.

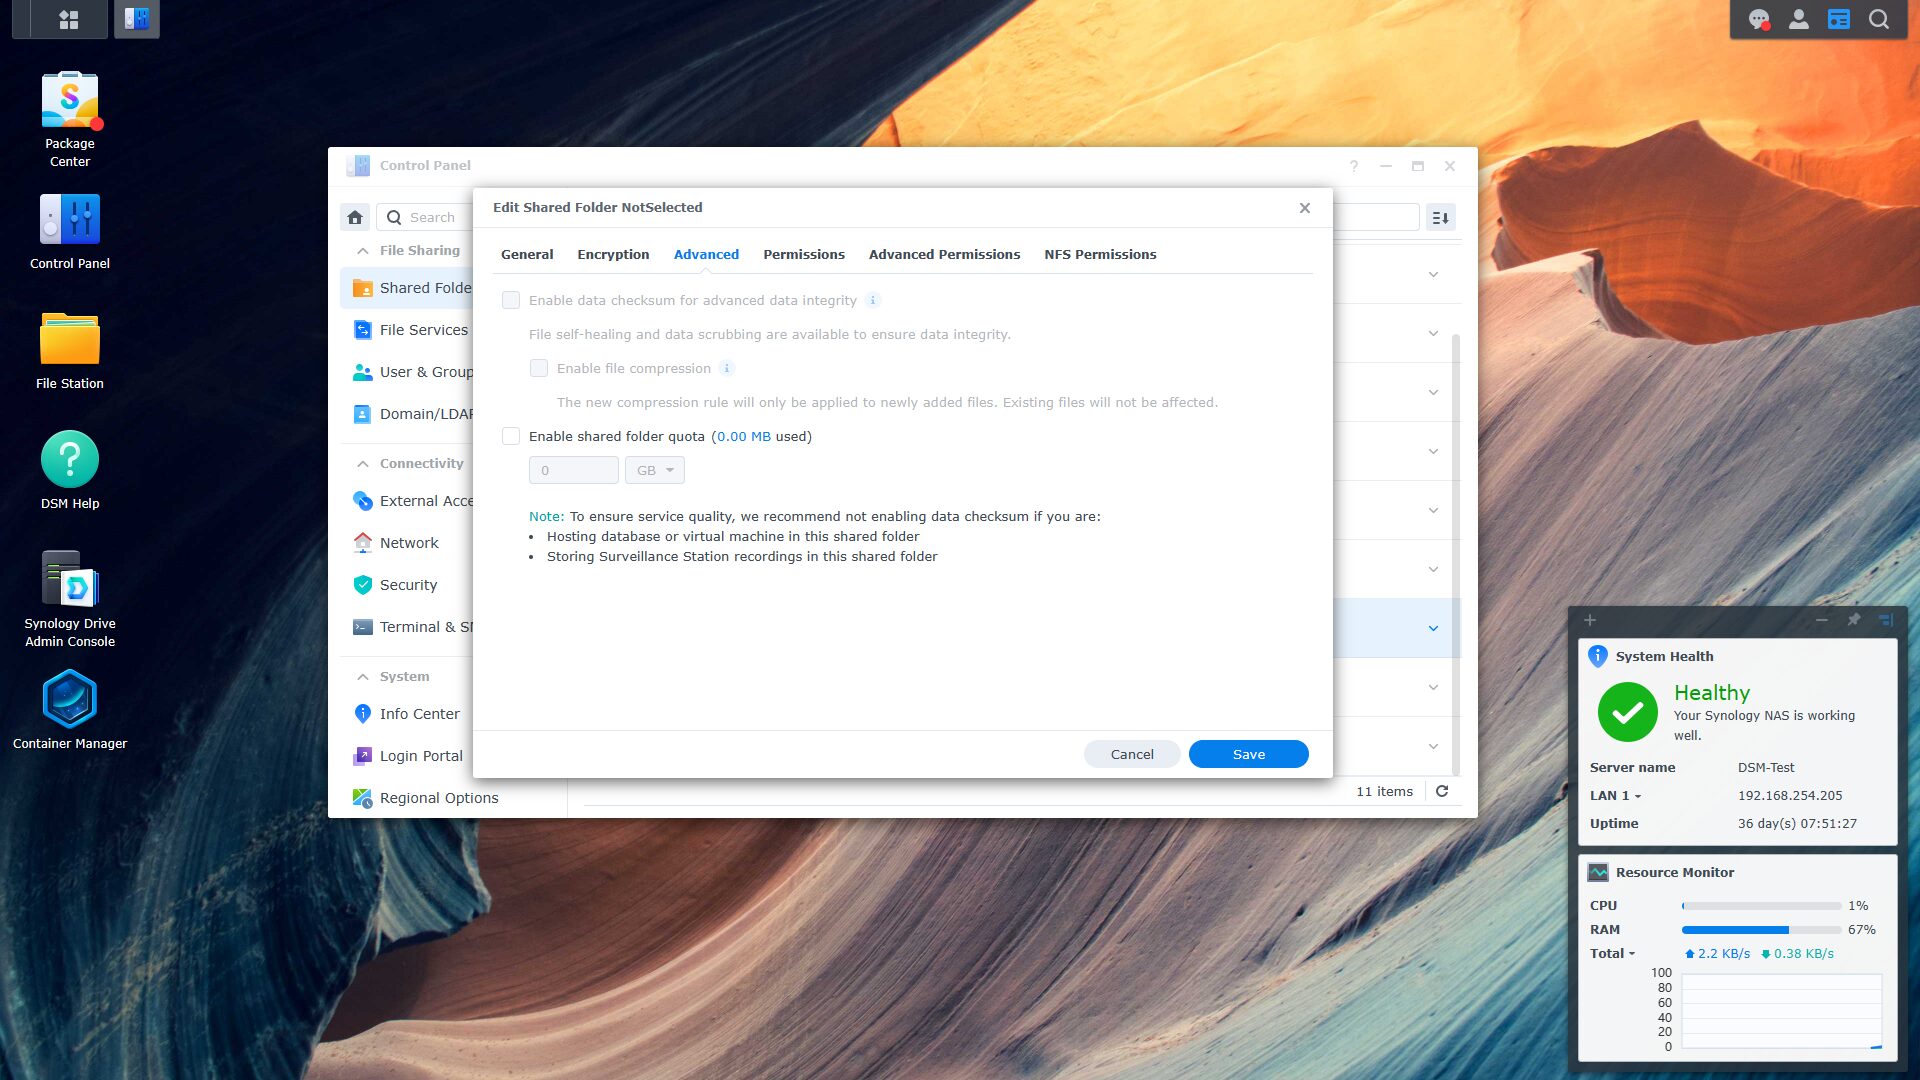
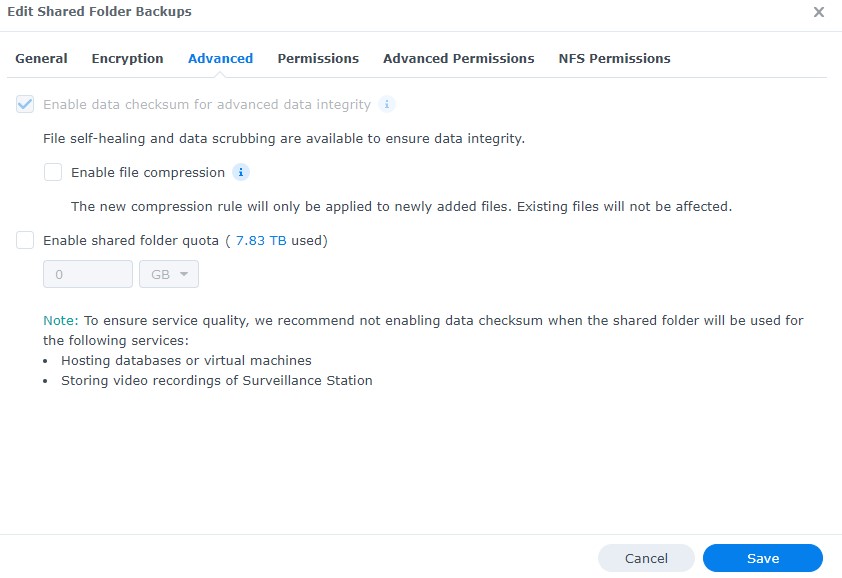
You can also Edit the Shared Folder, select Advanced, then confirm that the checkbox next to Enable data checksum for advanced data integrity is enabled.
If the option is disabled, you will not be able to enable it for the existing shared folder. Instead, create a new shared folder with the option enabled and copy the existing data to that new shared folder.
3. Configuring Data Scrubbing on a Synology NAS
Now that you’ve ensured that data scrubbing will work for your existing shared folders, you must ensure that a schedule is specified for data scrubbing to run on your Synology NAS.
1. Open the Storage Manager and select the Storage Pool that you have set up.
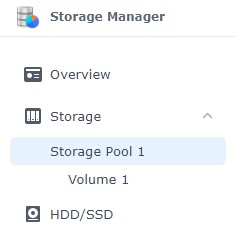
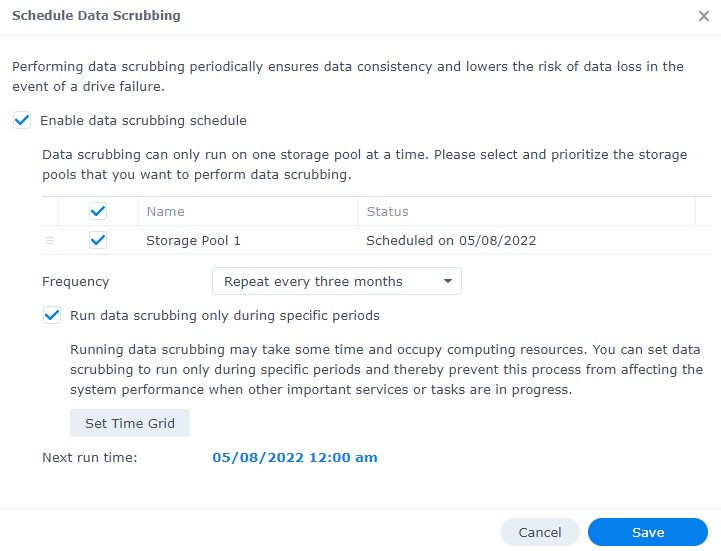
2. At the top, select Schedule Data Scrubbing and ensure that it’s enabled.

3. In the Frequency section, ensure that you’re running it at least every six months. I run mine every three months. On this page, you can also set certain times when you’d like the data scrubbing process to run.
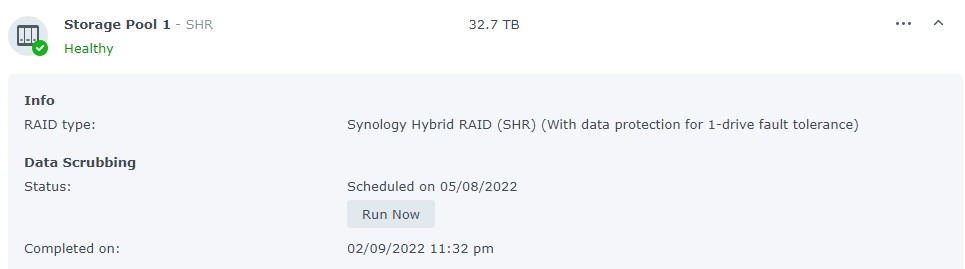
3. If you’ve never run a data scrubbing process, it wouldn’t hurt to kick one off immediately. At the Storage Manager page, select Run Now next to Data Scrubbing.
Conclusion & Final Thoughts
As mentioned earlier, the Data Scrubbing process will only work on shared folders that are properly configured. This process will protect against filesystem bit-rot and is a process that all Synology NAS owners using BTRFS should be running.
There will certainly be a performance hit while the data scrubbing process is running, and depending on the size of your RAID array, it’s not out of the realm of possibility that the process will take 24-48 hours, but it’s a necessary insurance policy.