In this tutorial, we will look at how to set up OpenVPN on a Synology NAS. OpenVPN allows you to securely access your NAS (and even your local network) while remote. In general, VPN servers are the most secure way of accessing your Synology NAS when you’re remote.
Video on the OpenVPN Setup Process on Synology DSM
Check out our step-by-step guide on how to configure OpenVPN on a Synology NAS at a deeper level.
Synology NAS OpenVPN Setup & Configuration
Follow the steps below to configure OpenVPN on a Synology NAS following best practices.
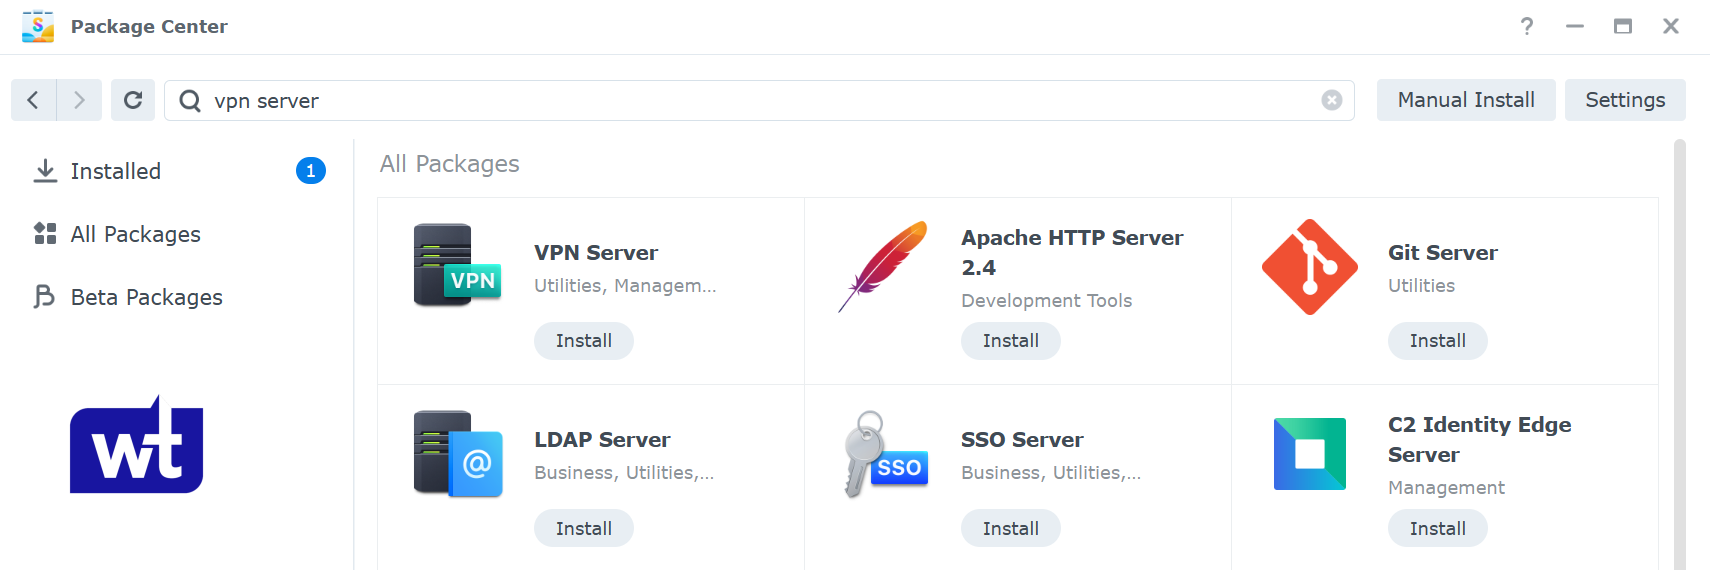
Installing the VPN Server Package
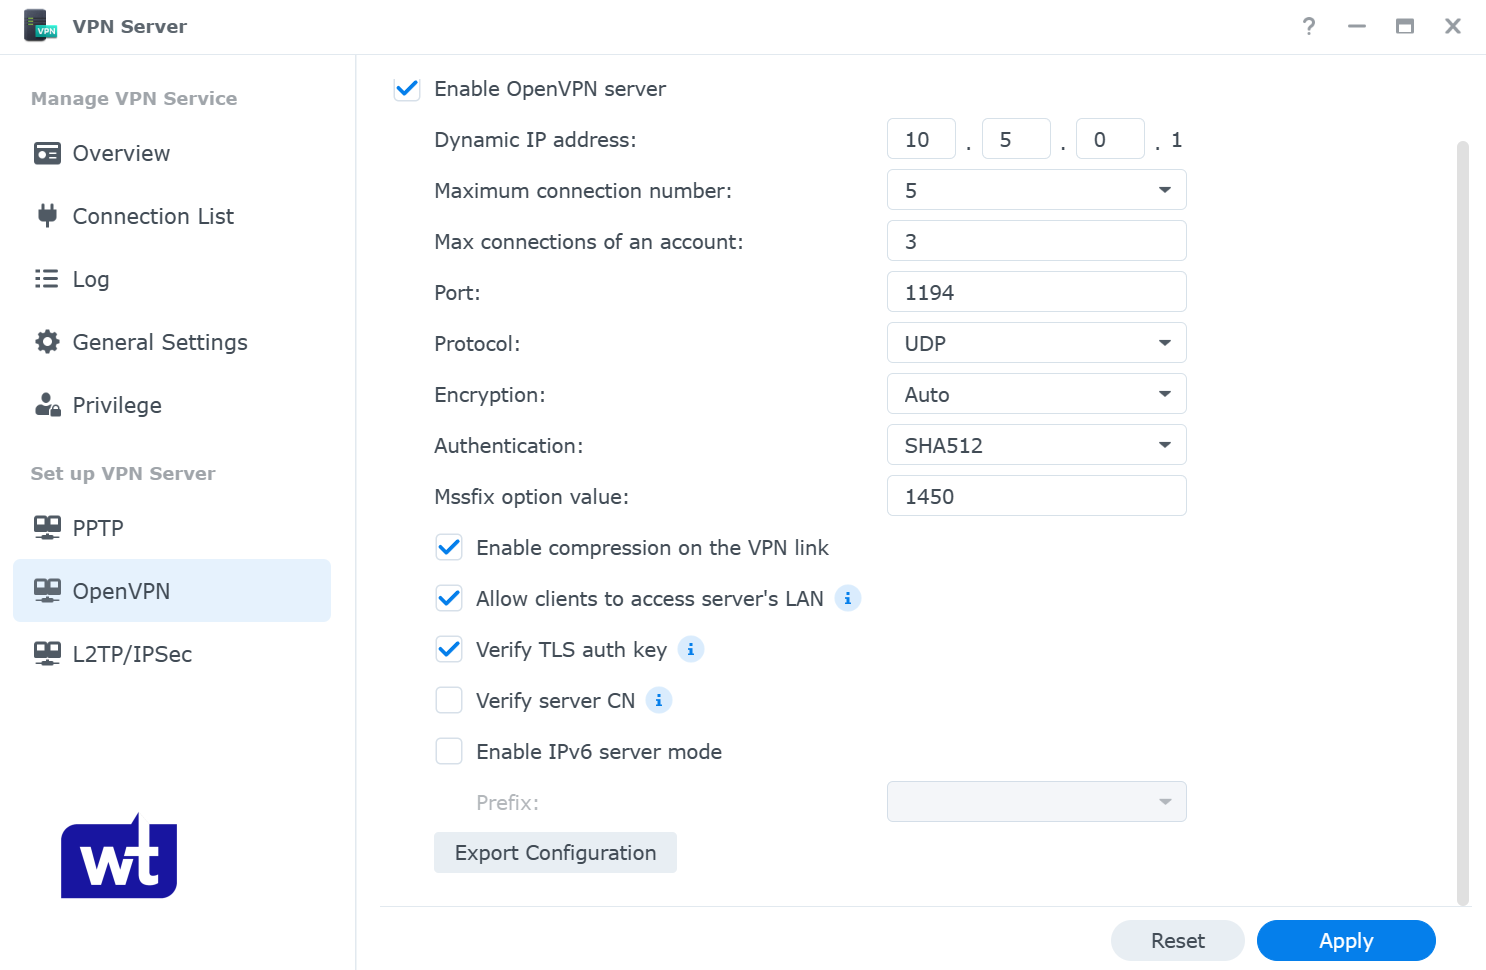
- Open the Package Center and install the VPN Server application.
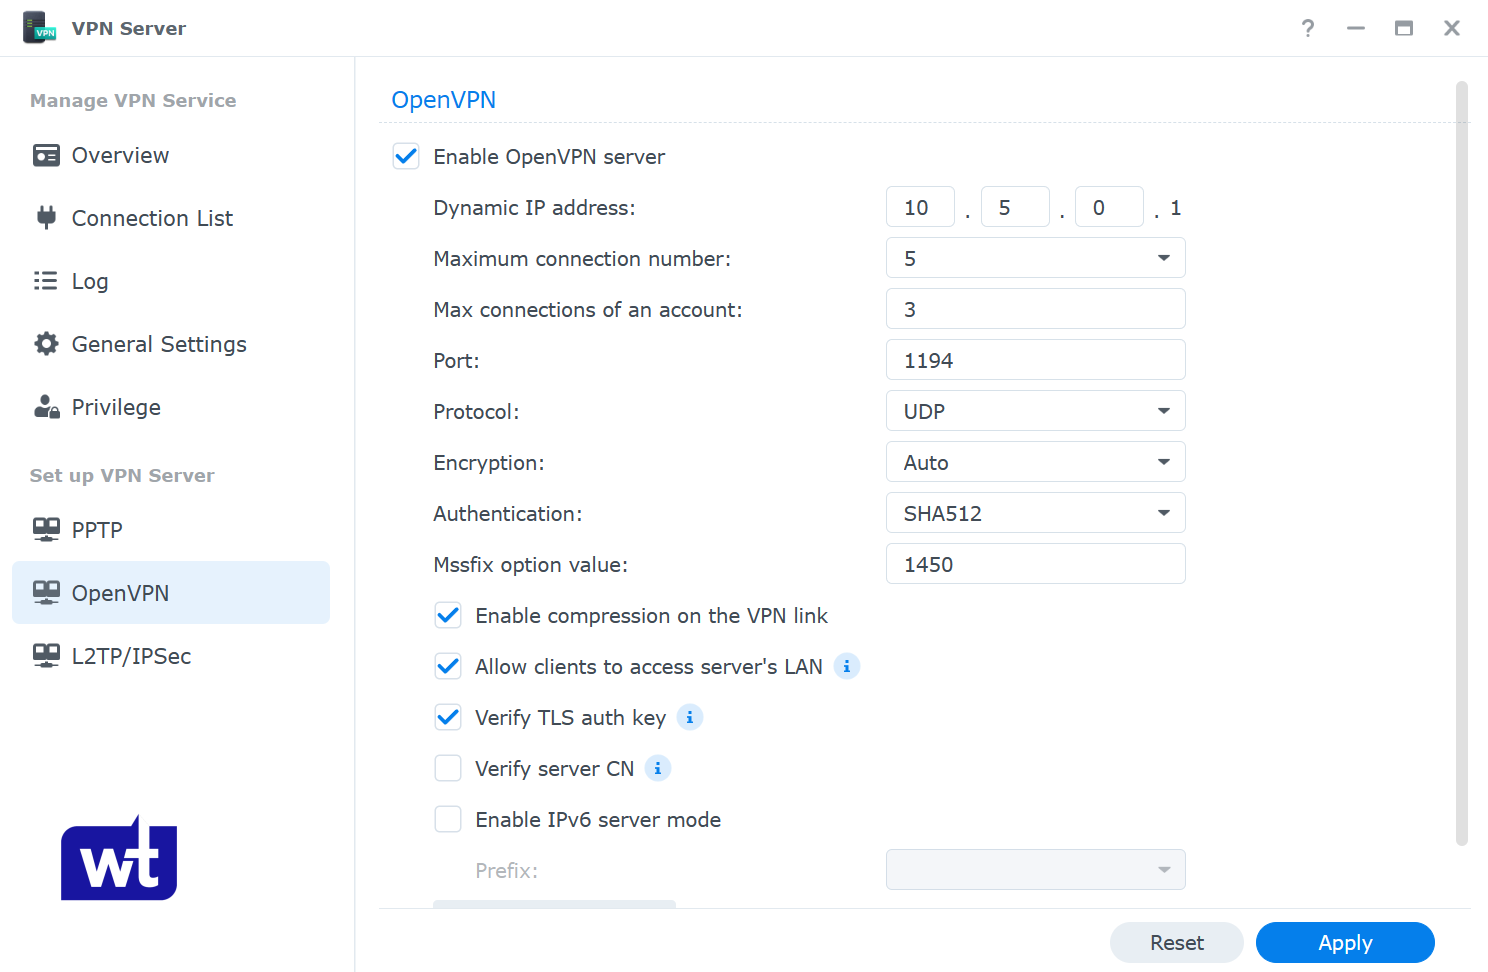
- Open the VPN Server application and navigate to the OpenVPN section.
- Enable OpenVPN Server. Change the Dynamic IP address range and maximum connection properties to your desired settings (this is the IP address the VPN clients will use and the total number of connections per account).
Since this setup allows you to access your Synology NAS remotely, you must enable allow clients to access server’s LAN, as well as verify TLS auth key.
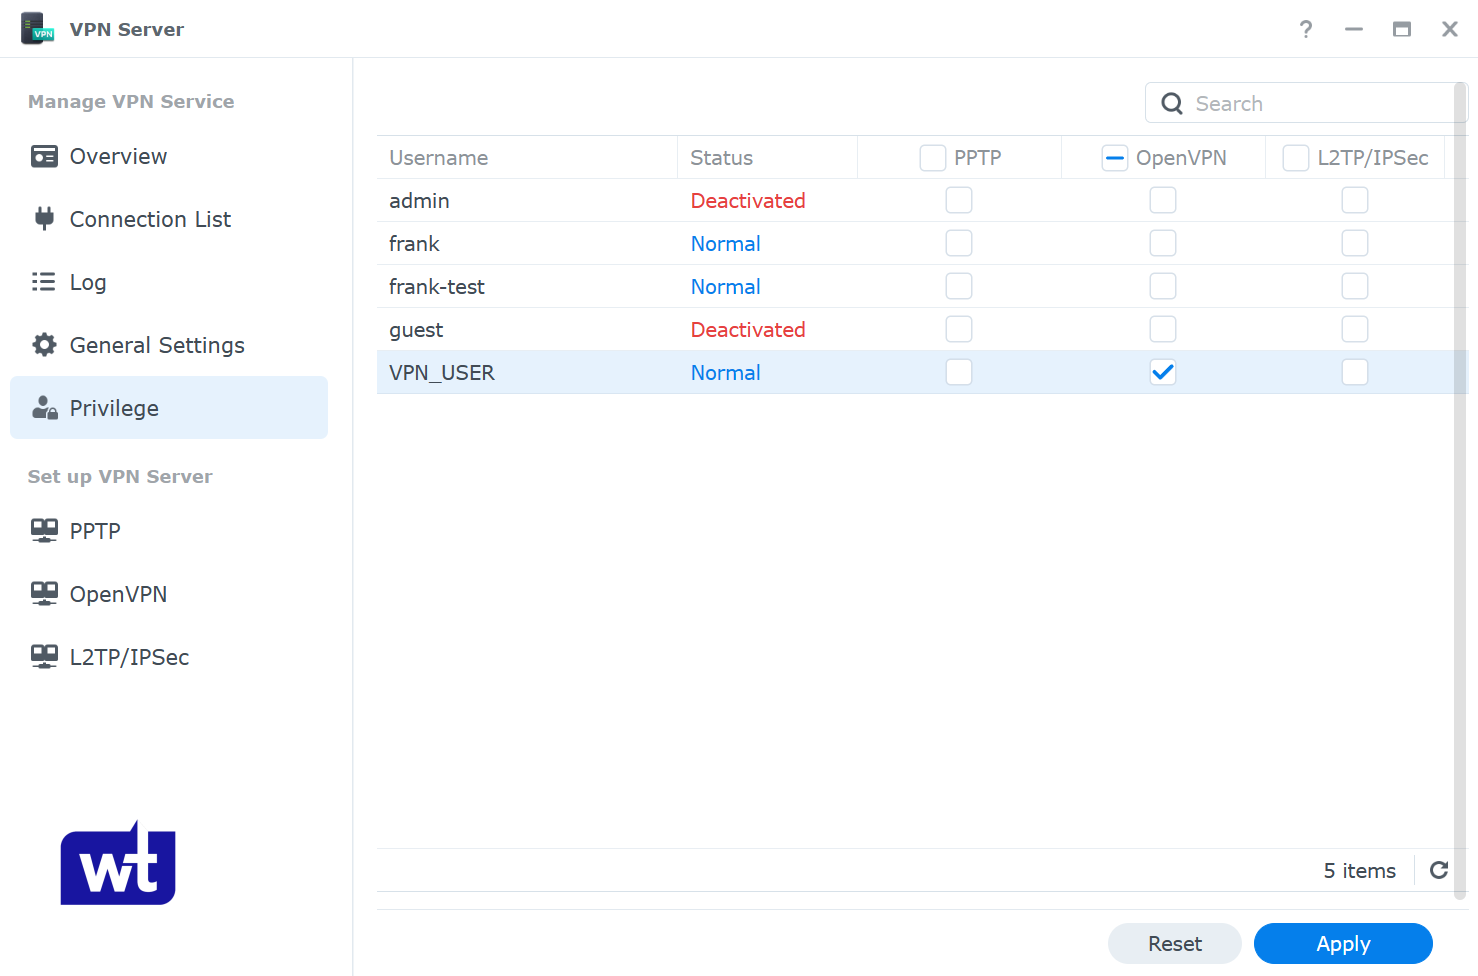
- Navigate to the privilege section and enable access for the users who will connect to OpenVPN.
NOTE: I like to configure an individual user account with permission to the VPN server ONLY. This allows the account you connect to OpenVPN with to be different (and more secure) than an account that can access your data on the NAS.
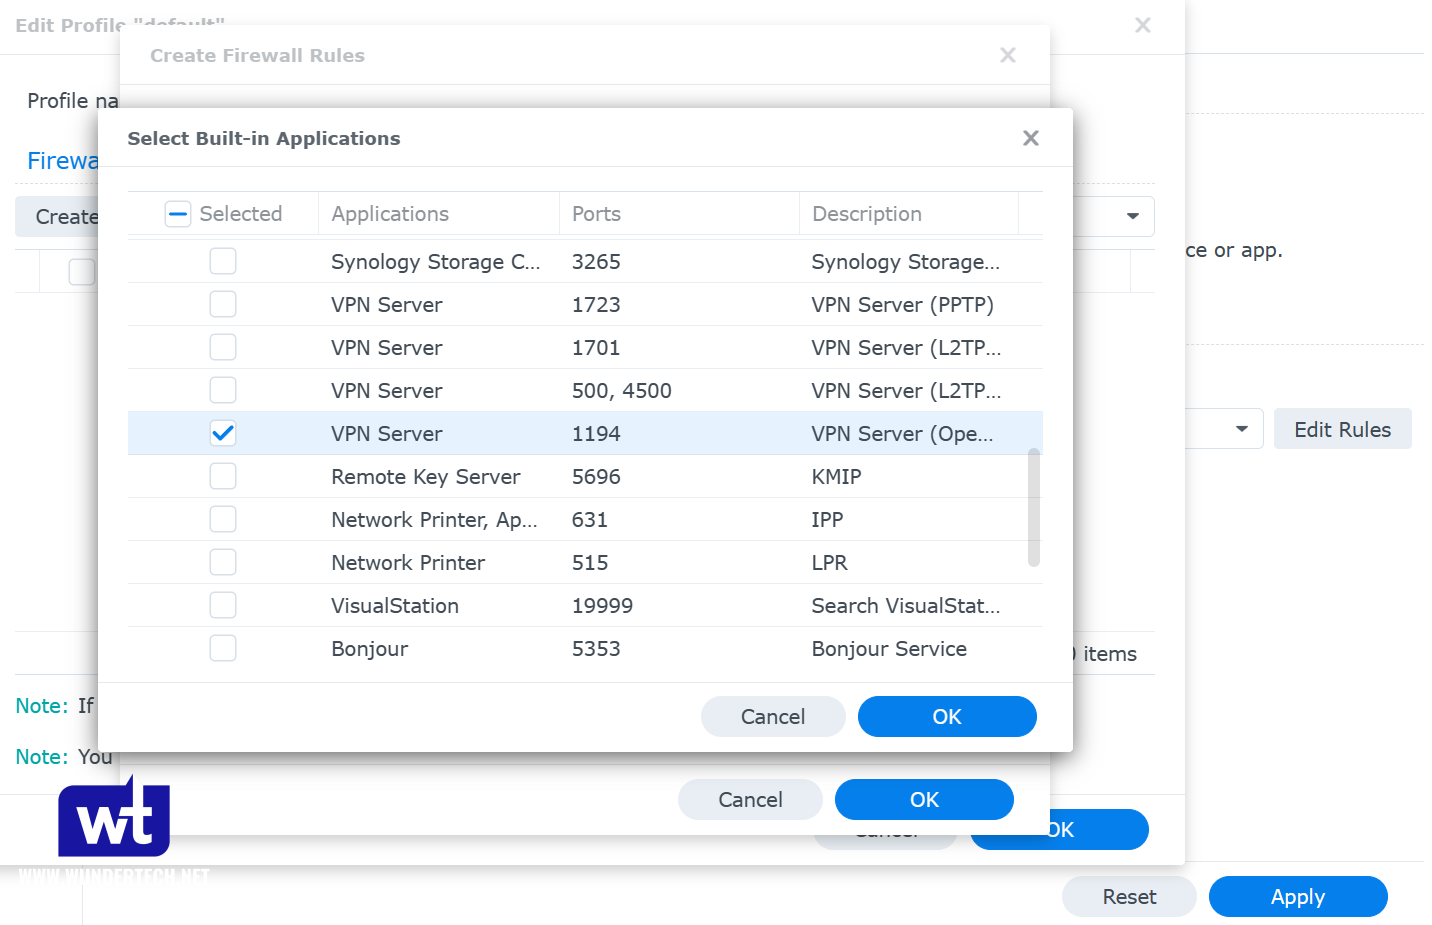
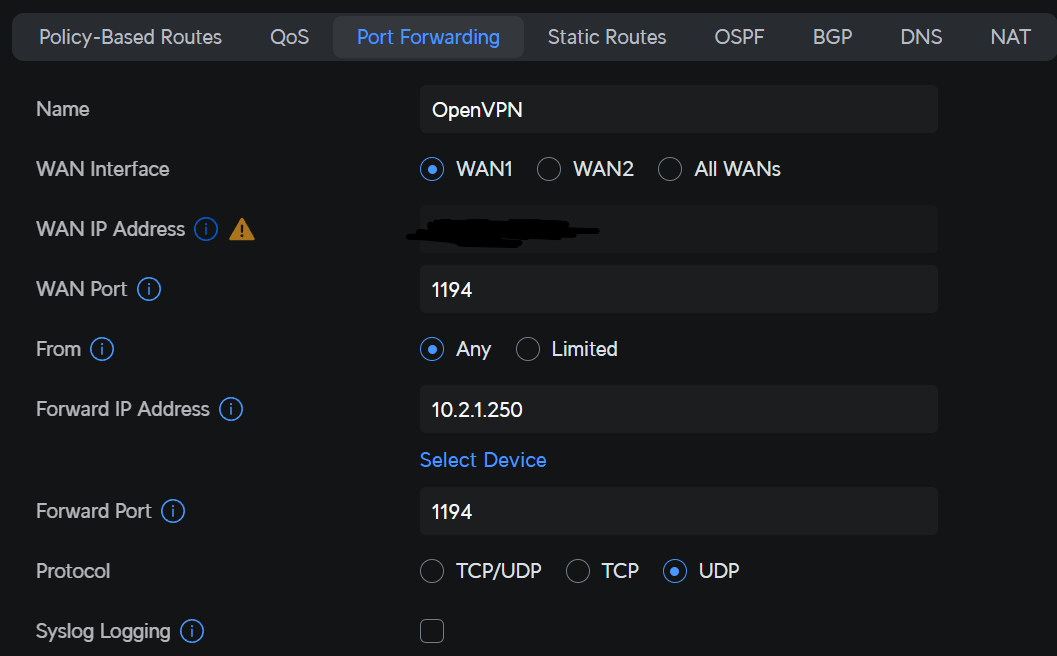
5. If you’re using Synology’s firewall, create an allow rule for UDP port 1194.
Port Forwarding the OpenVPN Server Port
To connect to the VPN server, you must port forward UDP port 1194 (if you’re using the default value) on your router. Port forwarding will be completely different on every brand’s router settings page.
Your Synology NAS must have a static IP address as well. If you don’t currently have a static IP address set up, learn how to set up a static IP address here.
- Create a port forwarding rule for UDP port 1194 to the IP address of your Synology NAS.
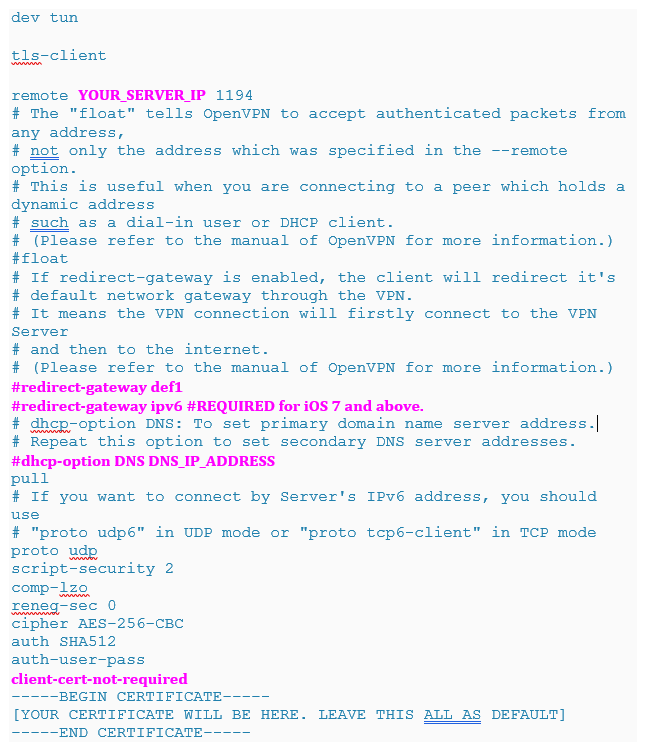
Modifying the OpenVPN Configuration File
If you have a dynamic external IP address, you’ll have to configure Dynamic DNS (DDNS). If you don’t have a dynamic IP address, you can skip over this section and use your external IP address in the configuration file.
However, if you don’t, you must configure DDNS. This can be done on a Synology NAS, or even on your router (here’s a UniFi DDNS example) or another device on your local network.
- Open the VPN Server application and select OpenVPN. Select Export configuration.
- Extract the contents of the zip file, then edit the ovpn file with a text editor.
- There are a few changes that must be made to this configuration file:
- YOUR_SERVER_IP: This should be the DDNS hostname that you configured, or your static external IP address.
- redirect-gateway def1: This is what determines if you are configuring a split-tunnel or full-tunnel VPN.
- NOTE: If you’re using an iPhone, you must add redirect-gateway ipv6 under redirect-gateway def1 as well.
- dhcp-option: If you have a local DNS server that you’d like to use, you can add the IP address of your local DNS server here. If you don’t have a local DNS server, leave this line commented out.
- client-cert-not-required: This option is not added by default, but will remove one of the errors you’ll have to click through.
This is a sample configuration file, but yours will look different.
- Save the configuration file and add it to a device that you’d like to test the VPN connection with. It’s easiest to test with a mobile phone, as you must be on an external network to test properly.
Connecting to OpenVPN with a Client Device
Now OpenVPN Server is configured, we can test our connection. Download the OpenVPN client on your device. Remember, you must be connected to an external network to test this.
- Open the application, select the add button at the bottom, and choose File. You should now be prompted to browse for the ovpn file that we modified earlier. Upload the file and then log in with the DSM user that you configured for OpenVPN.
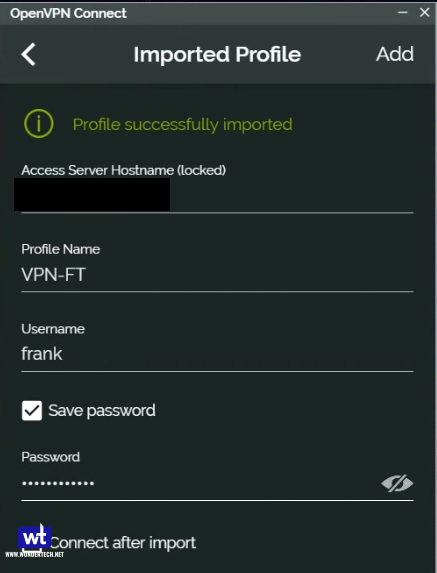
- You should be able to connect to your VPN now.
Conclusion: OpenVPN on a Synology NAS
This tutorial looked at how to set up OpenVPN on a Synology NAS. Configuring Synology’s VPN Server Package allows you to securely access your NAS and local resources. While there are other ways to connect, this is generally the most secure. Thank you for checking out the tutorial on the Synology NAS OpenVPN setup process!