This article is a supplement to the video below, which goes over the ultimate Pi-hole setup, with Unbound, Nebula Sync, and Keepalived. The goal is to provide everything for Pi-hole, including a recursive DNS resolver (Unbound), complete syncing between multiple Pi-hole instances (Nebula Sync), and High Availability (Keepalived).
Video Tutorial on the Ultimate Pi-hole Setup
Watch our step-by-step video tutorial on how to configure the ultimate Pi-hole setup. We’ve embedded our full YouTube walkthrough below, which goes over the entire process, but the commands in the next section were used in the video to highlight how it can be configured.
Ultimate Pi-hole Setup: Unbound, Nebula Sync, & Keepalived
These are the commands needed to configure Pi-hole, Unbound, Nebula Sync, and Keepalived.
Installing and Configuring Pi-hole
The commands below utilize an LXC Container (the same process is used on a Raspberry Pi or any Debian-based OS), but it’s not necessary to configure it this way. You can utilize a Docker Container (for Pi-hole and Unbound) as well and it will all function the same.
apt install curl -y
curl -sSL https://install.pi-hole.net | bash
After installing Pi-hole, set the web password using the command below, then reboot.
pihole setpassword
reboot now
Installing and Configuring Unbound
Run the commands below to install Unbound and access the directory to create the Pi-hole configuration file.
apt install unbound -y
cd /etc/unbound/unbound.conf.d
Copy the configuration file from the Unbound documentation and paste it into the configuration file below. You can modify this if you’d like, and there’s a lot that can be done with Unbound, but we’ll be using a generic setup in this tutorial.
nano pi-hole.conf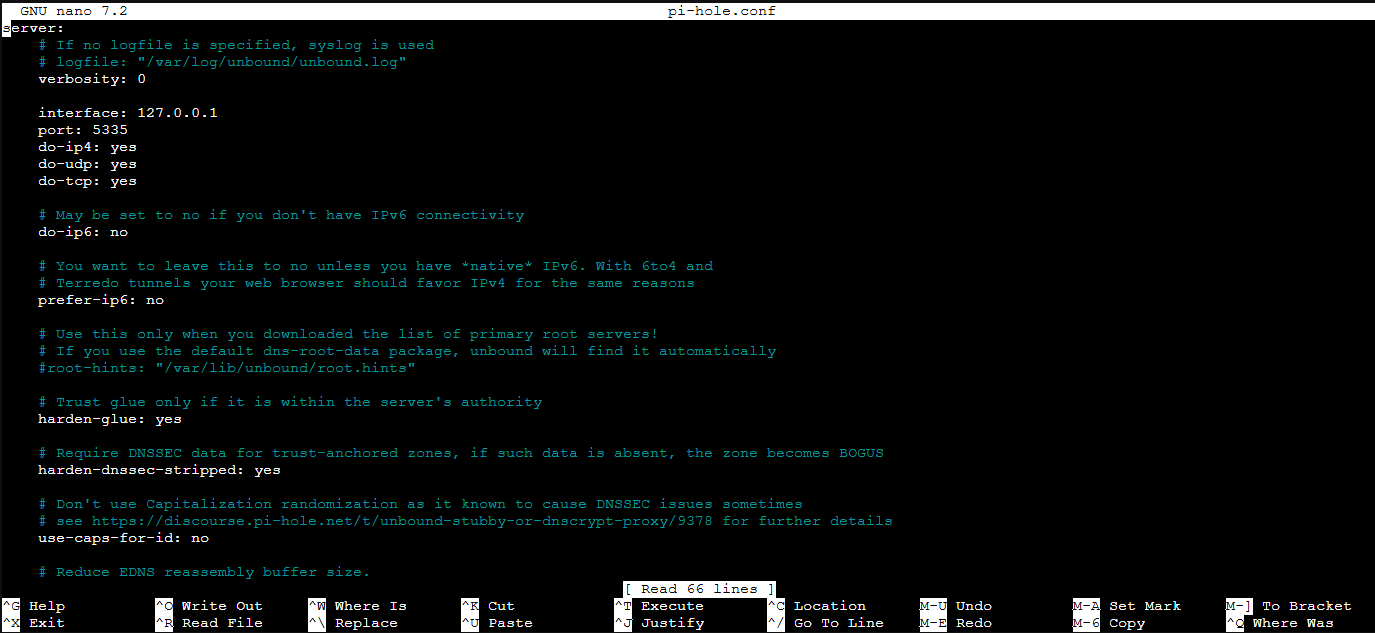
This is the configuration file I used in the tutorial above:
server:
    # If no logfile is specified, syslog is used
    # logfile: "/var/log/unbound/unbound.log"
    verbosity: 0

    interface: 127.0.0.1
    port: 5335
    do-ip4: yes
    do-udp: yes
    do-tcp: yes

    # May be set to no if you don't have IPv6 connectivity
    do-ip6: no

    # You want to leave this to no unless you have *native* IPv6. With 6to4 and
    # Terredo tunnels your web browser should favor IPv4 for the same reasons
    prefer-ip6: no

    # Use this only when you downloaded the list of primary root servers!
    # If you use the default dns-root-data package, unbound will find it automatically
    #root-hints: "/var/lib/unbound/root.hints"

    # Trust glue only if it is within the server's authority
    harden-glue: yes

    # Require DNSSEC data for trust-anchored zones, if such data is absent, the zone becomes BOGUS
    harden-dnssec-stripped: yes

    # Don't use Capitalization randomization as it known to cause DNSSEC issues sometimes
    # see https://discourse.pi-hole.net/t/unbound-stubby-or-dnscrypt-proxy/9378 for further details
    use-caps-for-id: no

    # Reduce EDNS reassembly buffer size.
    # IP fragmentation is unreliable on the Internet today, and can cause
    # transmission failures when large DNS messages are sent via UDP. Even
    # when fragmentation does work, it may not be secure; it is theoretically
    # possible to spoof parts of a fragmented DNS message, without easy
    # detection at the receiving end. Recently, there was an excellent study
    # >>> Defragmenting DNS - Determining the optimal maximum UDP response size for DNS <<<
    # by Axel Koolhaas, and Tjeerd Slokker (https://indico.dns-oarc.net/event/36/contributions/776/)
    # in collaboration with NLnet Labs explored DNS using real world data from the
    # the RIPE Atlas probes and the researchers suggested different values for
    # IPv4 and IPv6 and in different scenarios. They advise that servers should
    # be configured to limit DNS messages sent over UDP to a size that will not
    # trigger fragmentation on typical network links. DNS servers can switch
    # from UDP to TCP when a DNS response is too big to fit in this limited
    # buffer size. This value has also been suggested in DNS Flag Day 2020.
    edns-buffer-size: 1232

    # Perform prefetching of close to expired message cache entries
    # This only applies to domains that have been frequently queried
    prefetch: yes

    # One thread should be sufficient, can be increased on beefy machines. In reality for most users running on small networks or on a single machine, it should be unnecessary to seek performance enhancement by increasing num-threads above 1.
    num-threads: 1

    # Ensure kernel buffer is large enough to not lose messages in traffic spikes
    so-rcvbuf: 1m

    # Ensure privacy of local IP ranges
    private-address: 192.168.0.0/16
    private-address: 169.254.0.0/16
    private-address: 172.16.0.0/12
    private-address: 10.0.0.0/8
    private-address: fd00::/8
    private-address: fe80::/10
After the file is saved, restart the Unbound service.
service unbound restartFinally, you can test that Unbound is running properly by running the three commands below (found in the Unbound documentation). The first command should return an IP address, the second should return SERVFAIL (you’ll have to run it twice), and the third should return NOERROR.
dig pi-hole.net @127.0.0.1 -p 5335
dig fail01.dnssec.works @127.0.0.1 -p 5335
dig dnssec.works @127.0.0.1 -p 5335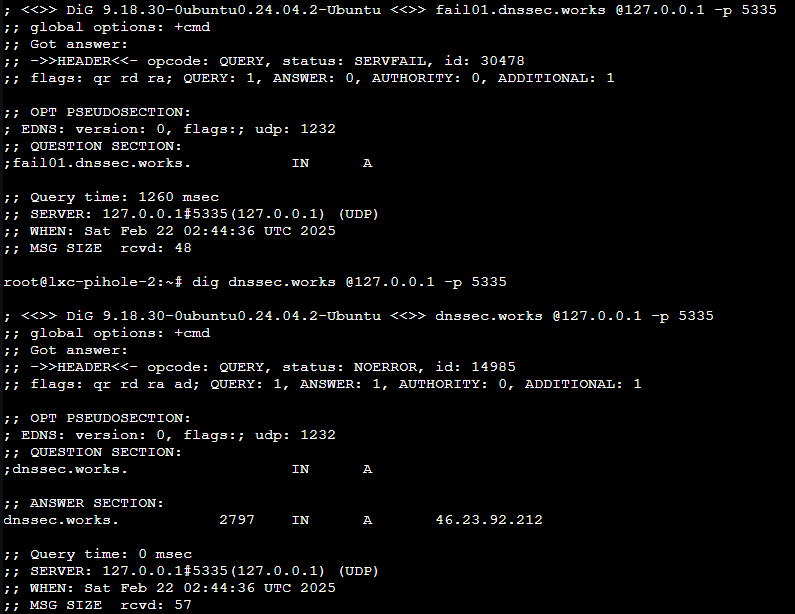
Configuring Nebula Sync for Pi-hole Syncing
Since we’re configuring three total Pi-hole instances, we want to manage them all in an individual location (the primary Pi-hole instance). That can be done using Nebula Sync, but it must be configured using Docker.
Set up the Docker Container below replacing the IP address of your Pi-hole instances and passwords. You can use an env file as well to keep the password out of the Docker config (if you’d like).
While I showed the syncing being done on a minute-by-minute basis in the video, you should not do that as you’ll run into API authentication issues. Every hour as shown below is perfect.
version: "3"
services:
nebula-sync:
image: ghcr.io/lovelaze/nebula-sync:latest
container_name: nebula-sync
environment:
- PRIMARY=http://10.2.1.150|password
- REPLICAS=http://10.2.1.151|password,http://10.3.15.20|password
- FULL_SYNC=true
- CRON=0 * * * *
networks: {}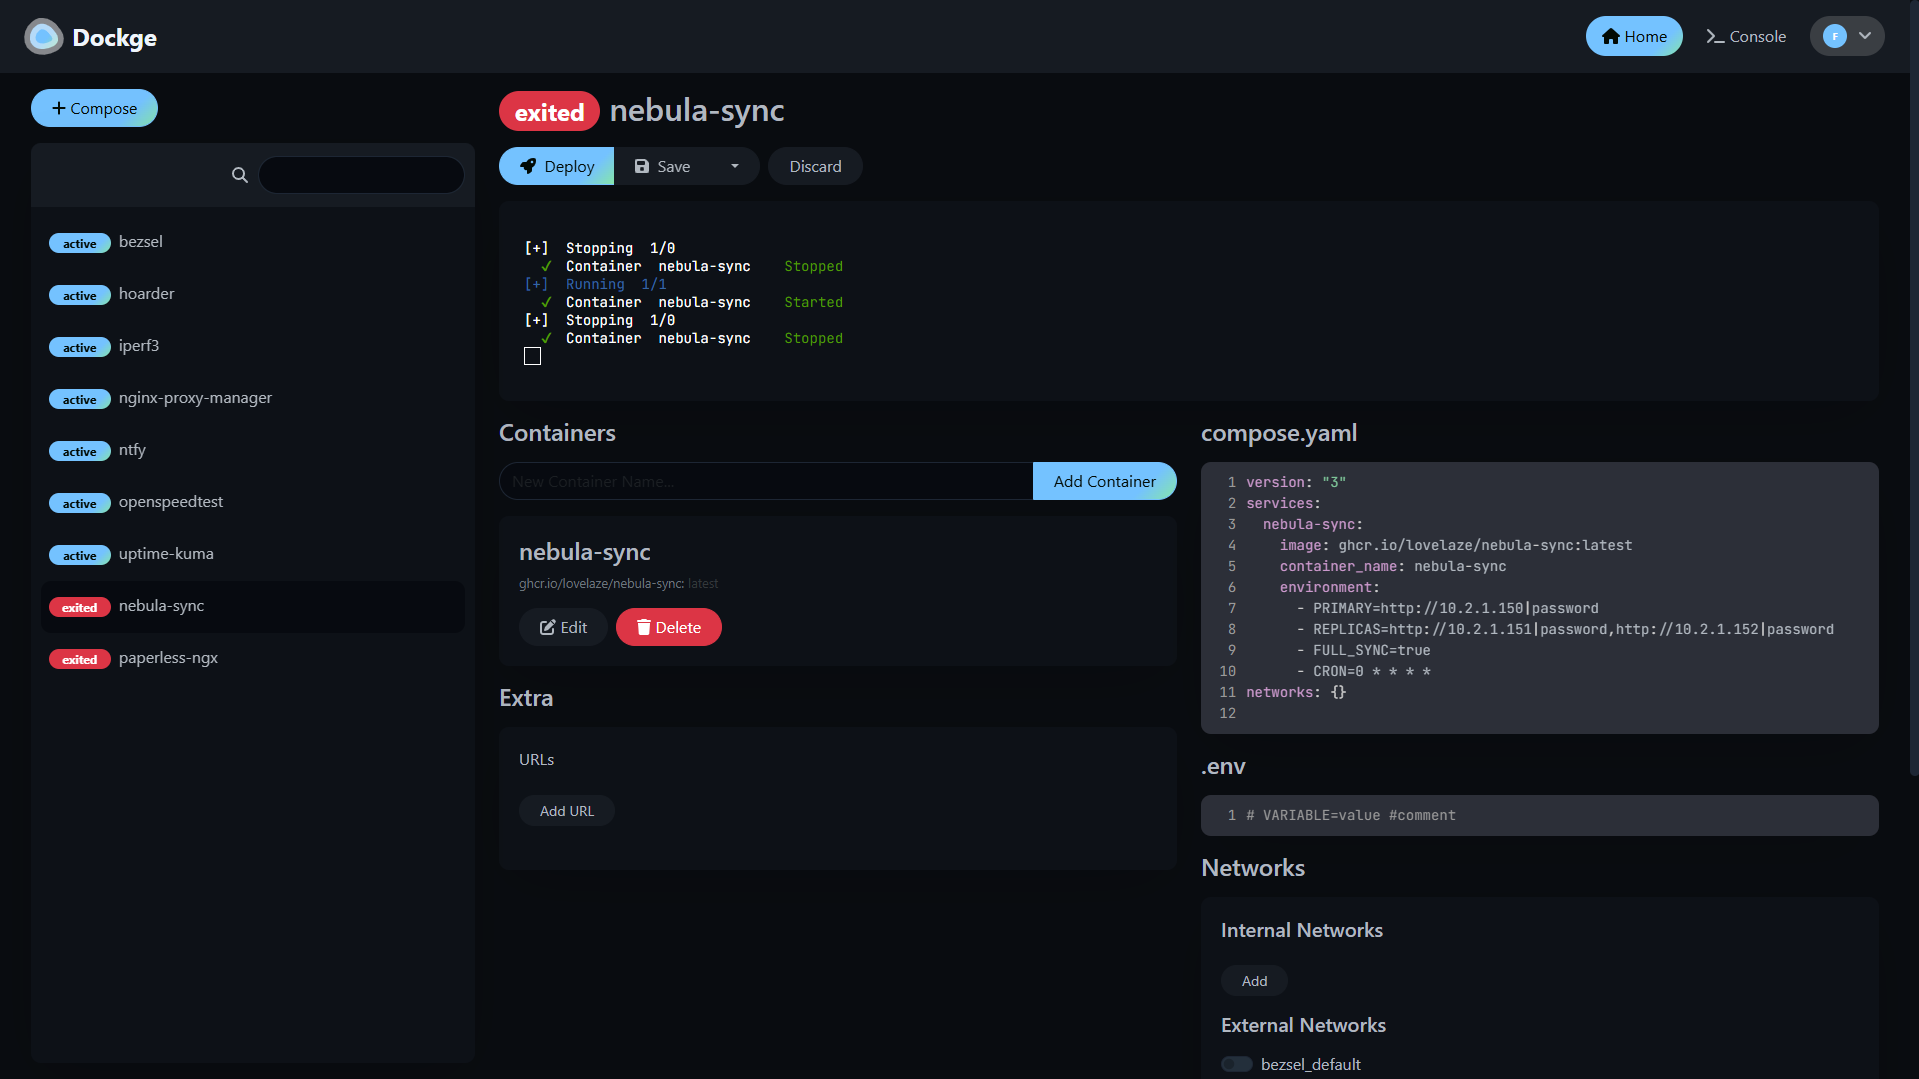
Configuring Keepalived for High Availability
Keepalived is designed to run on two separate hosts but share a virtual IP address. This ensures that if one goes down (the master), the backup will take over using the same virtual IP. In this example, the virtual IP is used as our backup DNS server.
Install Keepalived on both instances of Pi-hole where you’d like High Availability.
apt install keepalivedGet the interface name (shown in the video above, I used eth0), then modify the config file.
ip a
nano /etc/keepalived/keepalived.conf
Paste this information into the configuration file of the master and modify it as needed.
vrrp_instance VI_1 {
  state MASTER
  interface eth0
  virtual_router_id 198
  advert_int 1
  unicast_src_ip 10.2.1.151
  unicast_peer {
    10.2.1.152
  }
  priority 20
  authentication {
    auth_type PASS
    auth_pass AdfG4IJK
  }
  virtual_ipaddress {
    10.2.1.198/24
  }
}
Run the same commands on the backup Pi-hole instance, then paste this information into the Keepalived configuration file:
vrrp_instance VI_1 {
  state BACKUP
  interface eth0
  virtual_router_id 198
  advert_int 1
  unicast_src_ip 10.2.1.152
  unicast_peer {
    10.2.1.151
  }
  priority 10
  authentication {
    auth_type PASS
    auth_pass AdfG4IJK
  }
  virtual_ipaddress {
    10.2.1.198/24
  }
}
Enable the Keepalived service on both instances, reboot, and then check the status to ensure it’s running.
systemctl enable keepalived.service
reboot now
systemctl status keepalived.service
At this point, if you reboot the master and keep the status window open, the backup should kick in. You can test by using a continuous ping and rebooting the master host, or stopping the Keepalived service.
Final Thoughts on the Ultimate Pi-hole Setup
This isn’t going to be necessary for everyone, but I think if you spend the time to configure all of this, you’ll be very happy that you did…assuming you have the devices for it. This is simply a better way of running Pi-hole, provides redundancy for your DNS, and just works. Thanks for checking out the tutorial! If you have any questions, please leave them in the comments!